Microsoft Excel imports/exports can be achieved through using the Pigment Import/Export API and Excel’s VBScript. It will need the following information:
1. Generate Pigment Import/Export API key
https://community.pigment.com/security-permissions-82/manage-api-keys-226
2. For Imports into Pigment (to understand the process)
https://community.pigment.com/importing-and-exporting-data-95/how-to-trigger-an-import-with-apis-230
3. For Exports from Pigment (to understand the process)
4. The Excel work
-
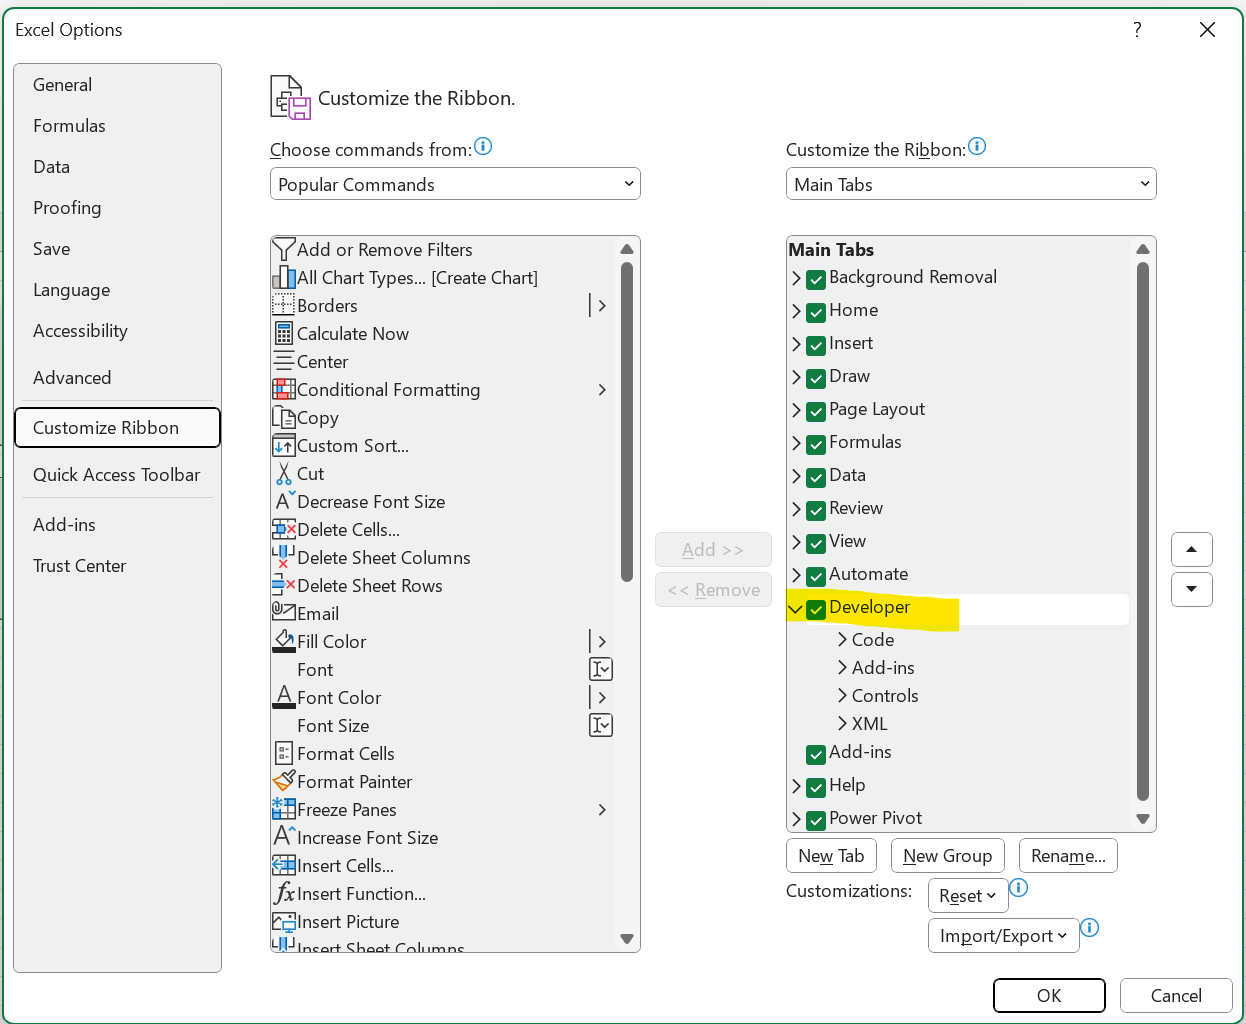
First enable Developer Tab in Excel
-
Open Excel.
-
Go to
File>Options. -
In the
Excel Optionsdialog box, clickCustomize Ribbon. -
Check the
Developercheckbox and clickOK.
-

-
Create a VBA Macros
-
Go to the
Developertab and clickVisual Basic. -
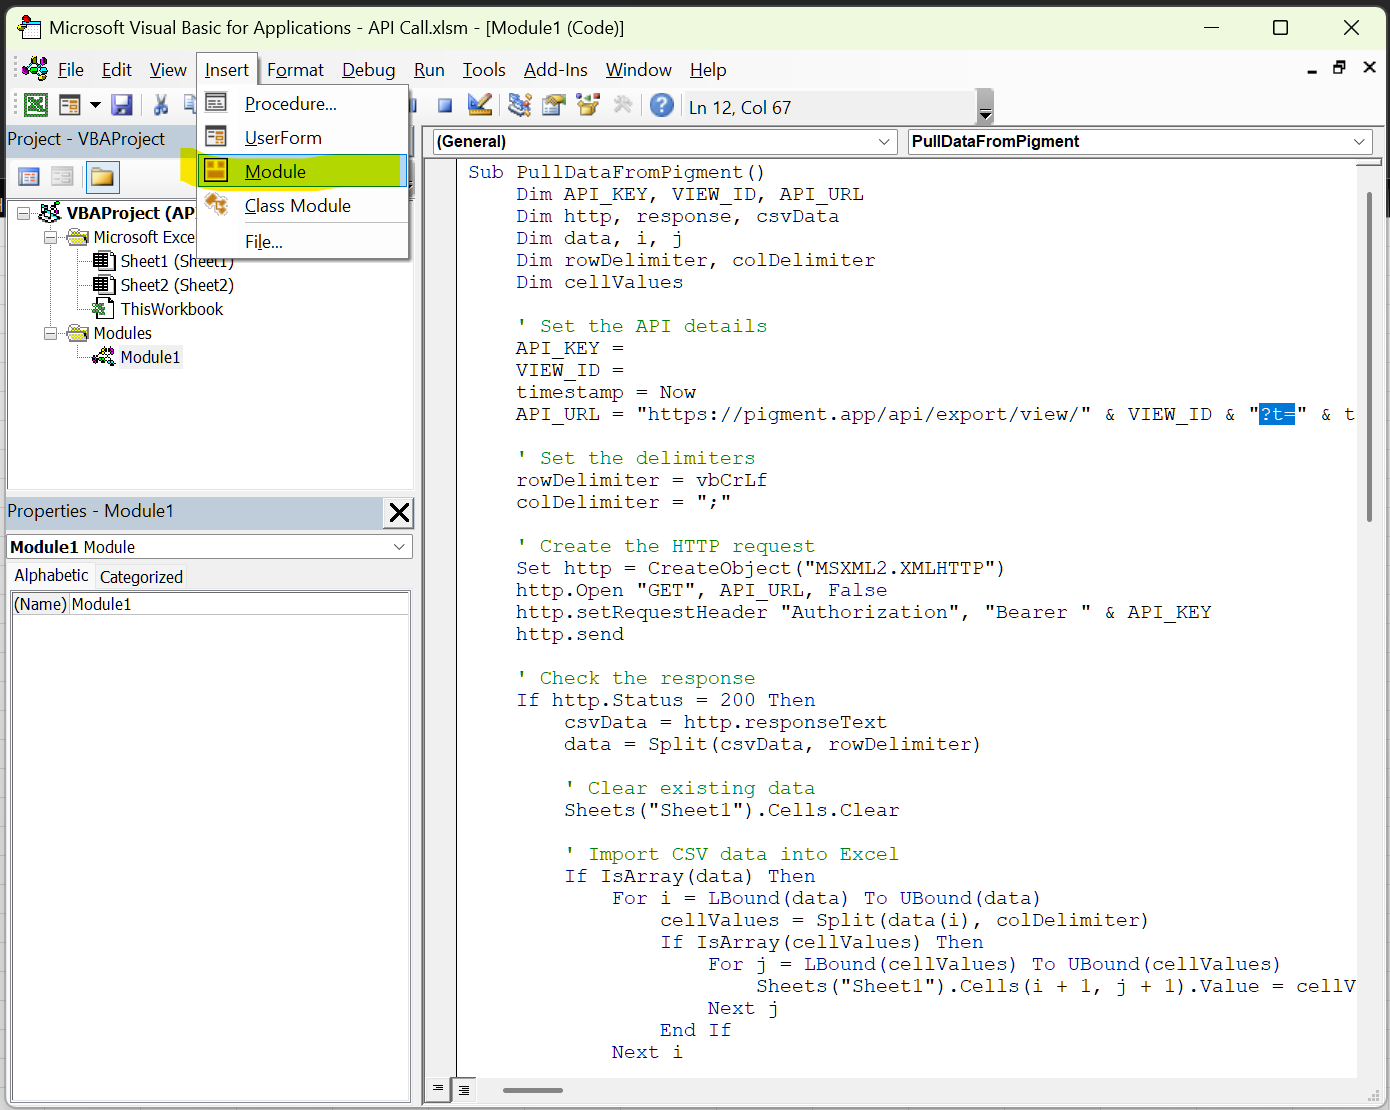
In the VBA editor, insert a new module:
-
Right-click on any existing module or the workbook name in the Project Explorer.
-
Select
Insert>Module. Copy and paste two VBScript code samples into this module making the necessary changes.
-

pullDataFromPigment
Sub pullDataFromPigment()
    Dim API_KEY, VIEW_ID, API_URL
    Dim http, response, csvData
    Dim data, i, j
    Dim rowDelimiter, colDelimiter
    Dim cellValues

    ' Set the API details
    API_KEY = "YOUR_PIGMENT_EXPORT_API_KEY"
    VIEW_ID = "YOUR_VIEW_ID"

    ' The ?t= addresses the Excel API caching
    timestamp = Now
    API_URL = "https://pigment.app/api/export/view/" & VIEW_ID & "?t=" & timestamp

    ' Set the delimiters
    rowDelimiter = vbCrLf
    colDelimiter = ";"

    ' Create the HTTP request
    Set http = CreateObject("MSXML2.XMLHTTP")
    http.Open "GET", API_URL, False
    http.setRequestHeader "Authorization", "Bearer " & API_KEY
    http.send

    ' Check the response
    If http.Status = 200 Then
        csvData = http.responseText
        data = Split(csvData, rowDelimiter)

        ' Clear existing data
        Sheets("Sheet1").Cells.Clear

        ' Import CSV data into Excel
        If IsArray(data) Then
            For i = LBound(data) To UBound(data)
                cellValues = Split(data(i), colDelimiter)
                If IsArray(cellValues) Then
                    For j = LBound(cellValues) To UBound(cellValues)
                        Sheets("Sheet1").Cells(i + 1, j + 1).Value = cellValues(j)
                    Next j
                End If
            Next i
            MsgBox "Data successfully imported from Pigment."
        Else
            MsgBox "Error: Data is not an array."
        End If
    Else
        MsgBox "Error fetching data from Pigment: " & http.Status & " - " & http.responseText
    End If

    ' Clean up
    Set http = Nothing
End Sub
Explanation (pullDataFromPigment)
-
Set the API Details:
-
API_KEY: Your Pigment Export API key. -
VIEW_ID: Your Pigment view configuration ID. -
API_URL: The URL for the Pigment API, constructed using the view configuration ID and a timestamp to prevent caching.
-
-
Set the Delimiters:
-
rowDelimiteris set tovbCrLf(carriage return and line feed) to split rows. -
colDelimiteris set to";"(semicolon) to split columns.
-
-
Create the HTTP Request:
-
Use
MSXML2.XMLHTTPto create an HTTP GET request. -
Set the necessary headers, including
Authorization. -
Send the request to the Pigment API.
-
-
Check the Response:
-
If the response status code is 200 (OK), process the response text.
-
Split the CSV data using the specified row and column delimiters and import it into Excel.
-
-
Import CSV Data into Excel:
-
Clear existing data in the sheet.
-
Check if
datais an array before processing it. -
Loop through the CSV data and populate the Excel sheet.
-
Ensure
cellValuesis treated as an array before processing it.
-
pushDataToPigment
Sub pushDataToPigment()
    Dim http As Object
    Dim url As String
    Dim apiKey As String
    Dim configId As String
    Dim csvData As String
    Dim lastRow As Long
    Dim lastCol As Long
    Dim i As Long, j As Long
    Dim cellValue As String

    ' Set the API details
    API_KEY = "YOUR_PIGMENT_IMPORT_API_KEY"
    CONFIG_ID = "YOUR_CONFIG_ID"
    API_URL = "https://pigment.app/api/import/push/csv?configurationId=" & CONFIG_ID

    ' Get the last row and column with data
    lastRow = Cells(Rows.Count, 1).End(xlUp).Row
    lastCol = Cells(1, Columns.Count).End(xlToLeft).Column

    ' Build the CSV data
    For i = 1 To lastRow
        For j = 1 To lastCol
            cellValue = Cells(i, j).Value
            csvData = csvData & cellValue & ","
        Next j
        csvData = Left(csvData, Len(csvData) - 1) ' Remove the trailing comma
        csvData = csvData & vbCrLf
    Next i

    ' Create the HTTP request
    Set http = CreateObject("MSXML2.XMLHTTP")
    http.Open "POST", API_URL, False
    http.setRequestHeader "Content-Type", "application/csv"
    http.setRequestHeader "Authorization", "Bearer " & API_KEY
    http.send csvData

    ' Check the response
    If http.Status = 200 Then
        MsgBox "Data successfully sent to Pigment."
    Else
        MsgBox "Error sending data to Pigment: " & http.Status & " - " & http.responseText
    End If

    ' Clean up
    Set http = Nothing
End Sub
Explanation (pushDataToPigment)
-
Set the API Details:
-
apiKey: Your Pigment Import API key. -
configId: Your Pigment import configuration ID. -
url: The URL for the Pigment API, constructed using the import configuration ID.
-
-
Get Data from Excel:
-
lastRow: Gets the last row with data in the first column. -
lastCol: Gets the last column with data in the first row.
-
-
Build the CSV Data:
-
Loops through each cell in the range and builds a CSV string.
-
-
Create the HTTP Request:
-
Uses
MSXML2.XMLHTTPto create an HTTP POST request. -
Sets the necessary headers, including
Content-TypeandAuthorization. -
Sends the CSV data to the Pigment API.
-
-
Check the Response:
-
If the response status code is 200 (OK), process the response text.
-
Displays a message box indicating whether the data was successfully sent or if there was an error.
-
5. To run the Macros
-
Close the VBA editor.
-
Go back to Excel.
-
Press
Alt + F8to open theMacrodialog box. -
Select
PullDataFromPigment(to pull the data) andPullDataFromPigment(to push the data) clickRun.
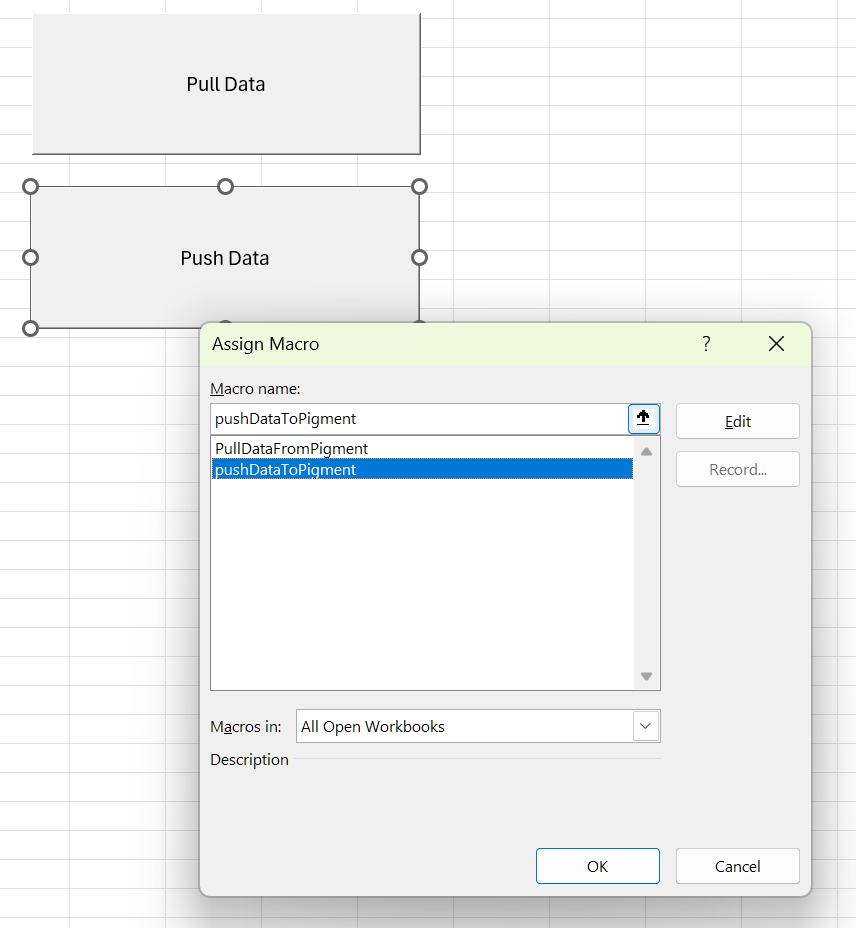
These macros can be run via the method described above or could be presented on a sheet via buttons

Once complete, remember to save your Excel Workbook as a XLSM to ensure the macro is saved for next time.
