This article discusses how to create and delete a Scenario, and how to edit data with Scenarios.
Permissions and Access for Working with Scenarios
Before working with Scenarios, it’s important to understand the roles and permissions required for specific tasks and how data access is managed.
- Create Scenarios.
To activate Scenarios in an Application, a Member with a Workspace Admin account type (or higher) and the Create Scenarios Application permission must create the first Scenario. This is typically done by a Workspace Admin with the Admin Role.
- Interact with Scenarios.
Now that the initial Scenario is activated, the following Members can interact with Scenarios on the Application:- all Members can see Scenarios, and access them on the Settings page
- all Members in the Application with the Create Scenarios Application permission can create and manage local Scenarios
- all Members with the Create Shared Scenarios account type permission (Workspace Admin and higher) can create and manage shared Scenarios
- Define access rights for new Scenarios.
Members need to have both the Security Admin account type (or higher) and the Display Application Role permission for the relevant Application.Defining access rights for a Scenario determines the following for Members:- Read/write access for Metric data associated with the Scenario.
- Visibility of the Scenario name in Page Selectors on Boards and Views.
For all Members that have Builder or Standard Member account types, any new Scenarios they interact with will inherit access rights from the source Scenario.
Create a new Scenario
Each Application starts with a default Scenario, which inherits all the current data and formulas. You can create new scenarios in multiple places:
- All Scenarios can be managed on the Scenario Management screen. When in an Application, select the three dots in the Sidebar and choose Scenarios. In the top right, you can select + New to add more.
- You can also add a Scenario from any of the Scenario Selector screens, located on Metrics, Tables, Boards or anywhere scenarios are present. Look for the icon below.

Options when creating a new Scenario
You are presented with the following options after creating a Scenario:
Name and color
The name field is mandatory and allows users to identify the Scenario. Each name must be unique. Selecting the circle next to the name lets you adjust the color. This color is used in selectors and data grids and, like the name, can be adjusted at any time. While the name must be unique, you can use the same color across multiple Scenarios to identify clusters of Scenarios.
Description
The description is optional and appears by the name in the Scenario Management screen to further distinguish the Scenario.
Initial source of data
The Initial source of data is the Scenario used to define the new Scenario’s data and formulas. Any Scenario can be the Initial source of data. For example, you start with a default Scenario as your Initial source of data for Scenario A, and then create a Scenario B that can use Scenario A or the default Scenario as a Source.
From the Scenario Management screen, you can select the three dots by a Scenario to create a new Scenario that uses the current Scenario as its source.
Shared and Local Scenarios
When creating a new Scenario it’s very important to select the right type of Scenario. Once you have started to work on a particular Scenario you can’t change its type.
There are two types of Scenarios:
- Shared Scenarios: can be used across different Applications. By default, if you are a Workspace Administrator, new Scenarios are Shared Scenarios. If you want to create a Local one you have to disable the Shared Scenario option in the Scenario creation form. Remember that if your Application is using Shared Blocks from other Applications and you plan to change assumptions on these Blocks, you need a Shared Scenario. You can identify a Shared Scenario by the two rings icon next to them.
- Local Scenarios: can only be created in your Application and won’t be visible elsewhere. Data in Local Scenarios is never shared with other Applications via Shared Blocks. Shared Blocks used in the Local Scenario are the ones coming from the closest Shared Scenario.
Scenarios can’t be converted from Local to Shared and vice versa. You must be a Workspace Administrator in order to create a Shared Scenario.
Making Changes in Scenarios
Changes made to one Scenario are reflected across all Scenarios in most cases. Exceptions include Metrics and Variables—these can vary by Scenario. In the case of Variables, they are the same across Scenarios unless, in the case of Dynamic and Member-based Variables, their configuration Metric is set to different values under different Scenarios. Find out more information in this guidance.
Below are examples of actions that impact all Scenarios regardless of the Scenario being selected on the Active Scenario Selector:
- Editing a List (Dimension or Transaction)
- Creating a new Block or changing a Metric’s Dimensions
- Creating or modifying a View or a Board
The Scenario Selector appears when viewing List dimensions, however it has no effect, as all lists remain the same across Scenarios.
Editing a Scenario
When working with Scenarios, they always appear in the top left of your screen in the Scenario Selector. By default, when only one Scenario is selected, its name does not appear in the grid in a Metric or Table. If you want to see the name of a Scenario in the grid, open the right-hand Configure panel, locate the Scenarios and select Always show header. There is more information around how to view and compare scenarios in this article.
Putting a Scenario into Read Only
You can limit all users’ ability to adjust data in a Scenario by making it Read Only. This prevents users from manually entering and importing data in that specific Scenario. Changing formulas is still permitted. Only users with Create Scenario permission can make a Scenario Read Only, by selecting the Prevent inputs icon in the Scenario Selector dropdown.
Importing into a Scenario
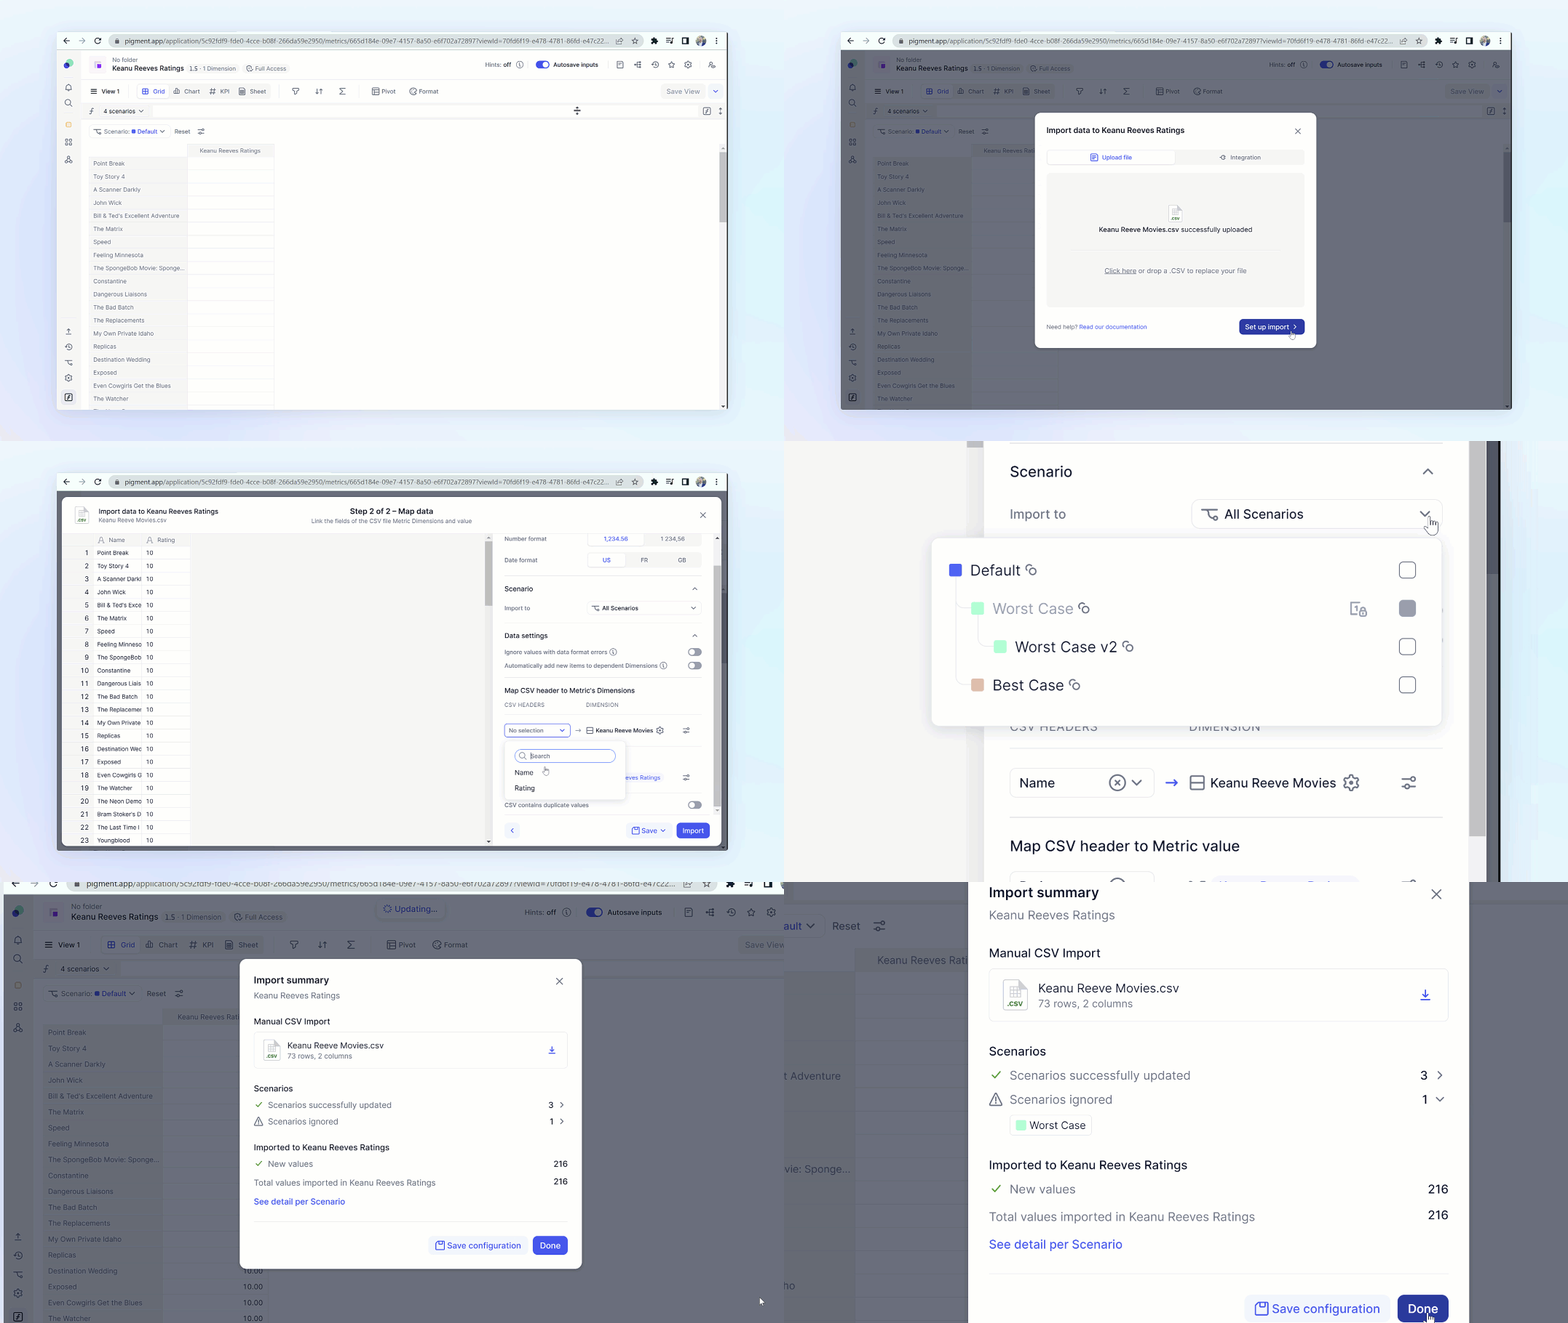
When importing into a Scenario, you have to choose which Scenario you want to import your data into. In Step 2 of the import, there is a Scenario Section with a dropdown offering a menu of possible Scenarios to include for the import. All Scenarios is set by default. If an import is saved as All Scenarios, it populates all future created Scenarios. If a Scenario is grayed out, it has been put into Read-Only mode and can not be imported into.

Deleting a Scenario
Members should avoid keeping unneeded Scenarios live, as this could impact performance.
Those with the Delete scenarios permission can delete a Scenario in two places. They can delete it directly from the Scenario page selector by clicking on the delete icon next to the Scenario they wish to remove. Scenarios can also be deleted from the Scenario Management screen. Once deleted, a Scenario’s data is deleted and any formula groups or changes will be lost. Members can delete any Scenario, even the ones that have been used as a source of data of other Scenarios.
Access rights on Scenarios
Security Admins can define access rights on newly created Scenarios by Role for Members in the Application. These access rights determine whether Members can read or write into the data for Metrics using that Scenario, and whether the Scenario name is visible in the Page Selectors on Boards / Views. For non-Security Admins, the access rights for newly created Scenarios are created the same as the source Scenario access rights. Learn more about access rights on Scenarios in the articles below:
