
This article explains how to connect a Azure Blob Storage with your Pigment Organization, specifically how to load a CSV file stored in a Container into a Pigment’s block.
Overview
This process starts in Azure, with the configuration of an App Registration and a Container, which you’ll use when setting up the connection in Pigment.
Setting up access
Azure Step 1 - Create or use an existing App registration
From your Azure Portal homepage, first head to App registrations:
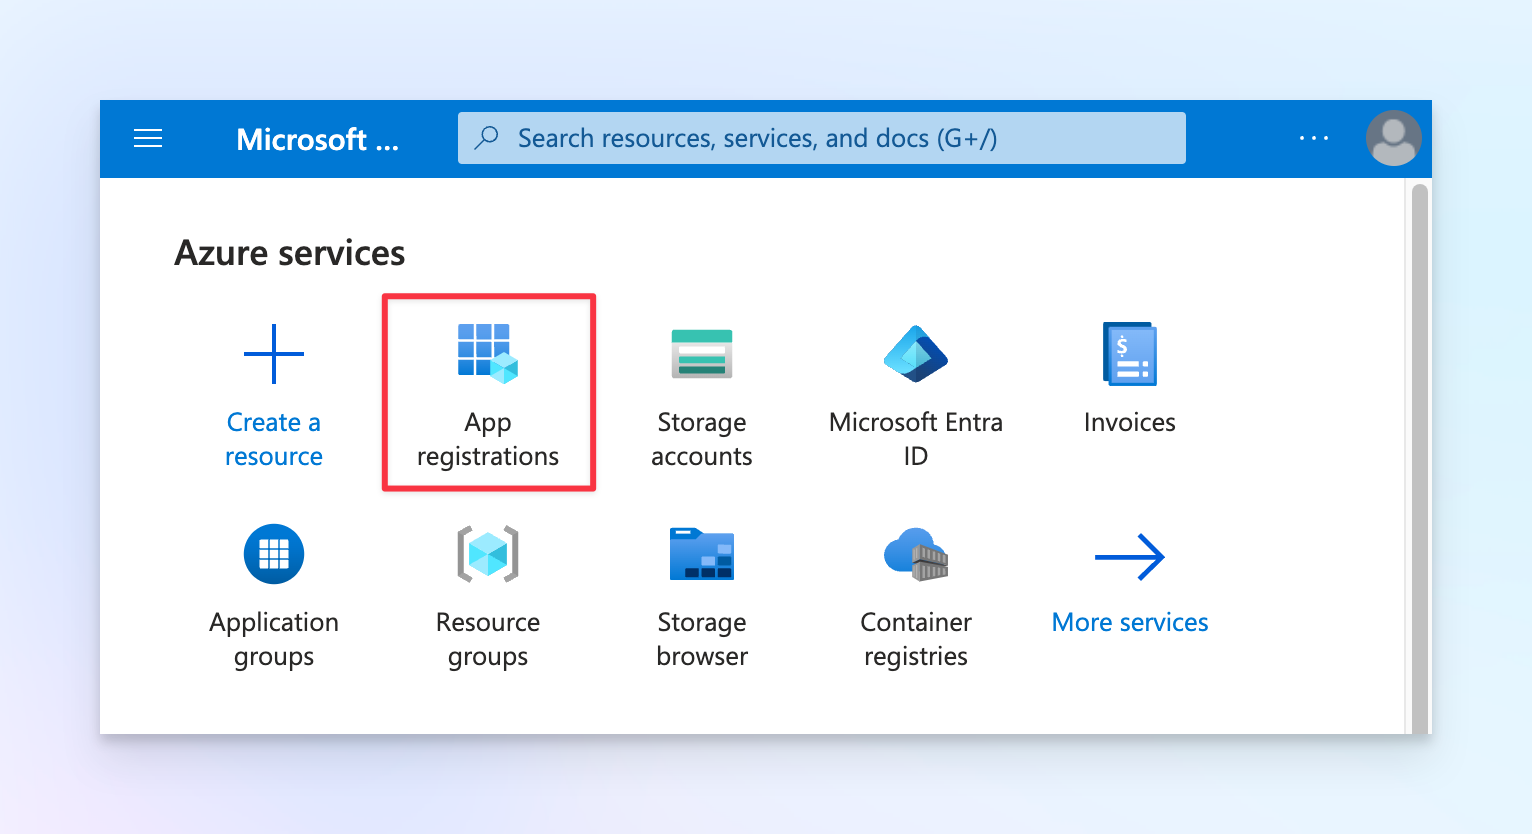
Here, you can either select an existing registration in the list of applications, or create a new one by clicking + New registration.
Azure Step 2 - Retrieve authentication credentials
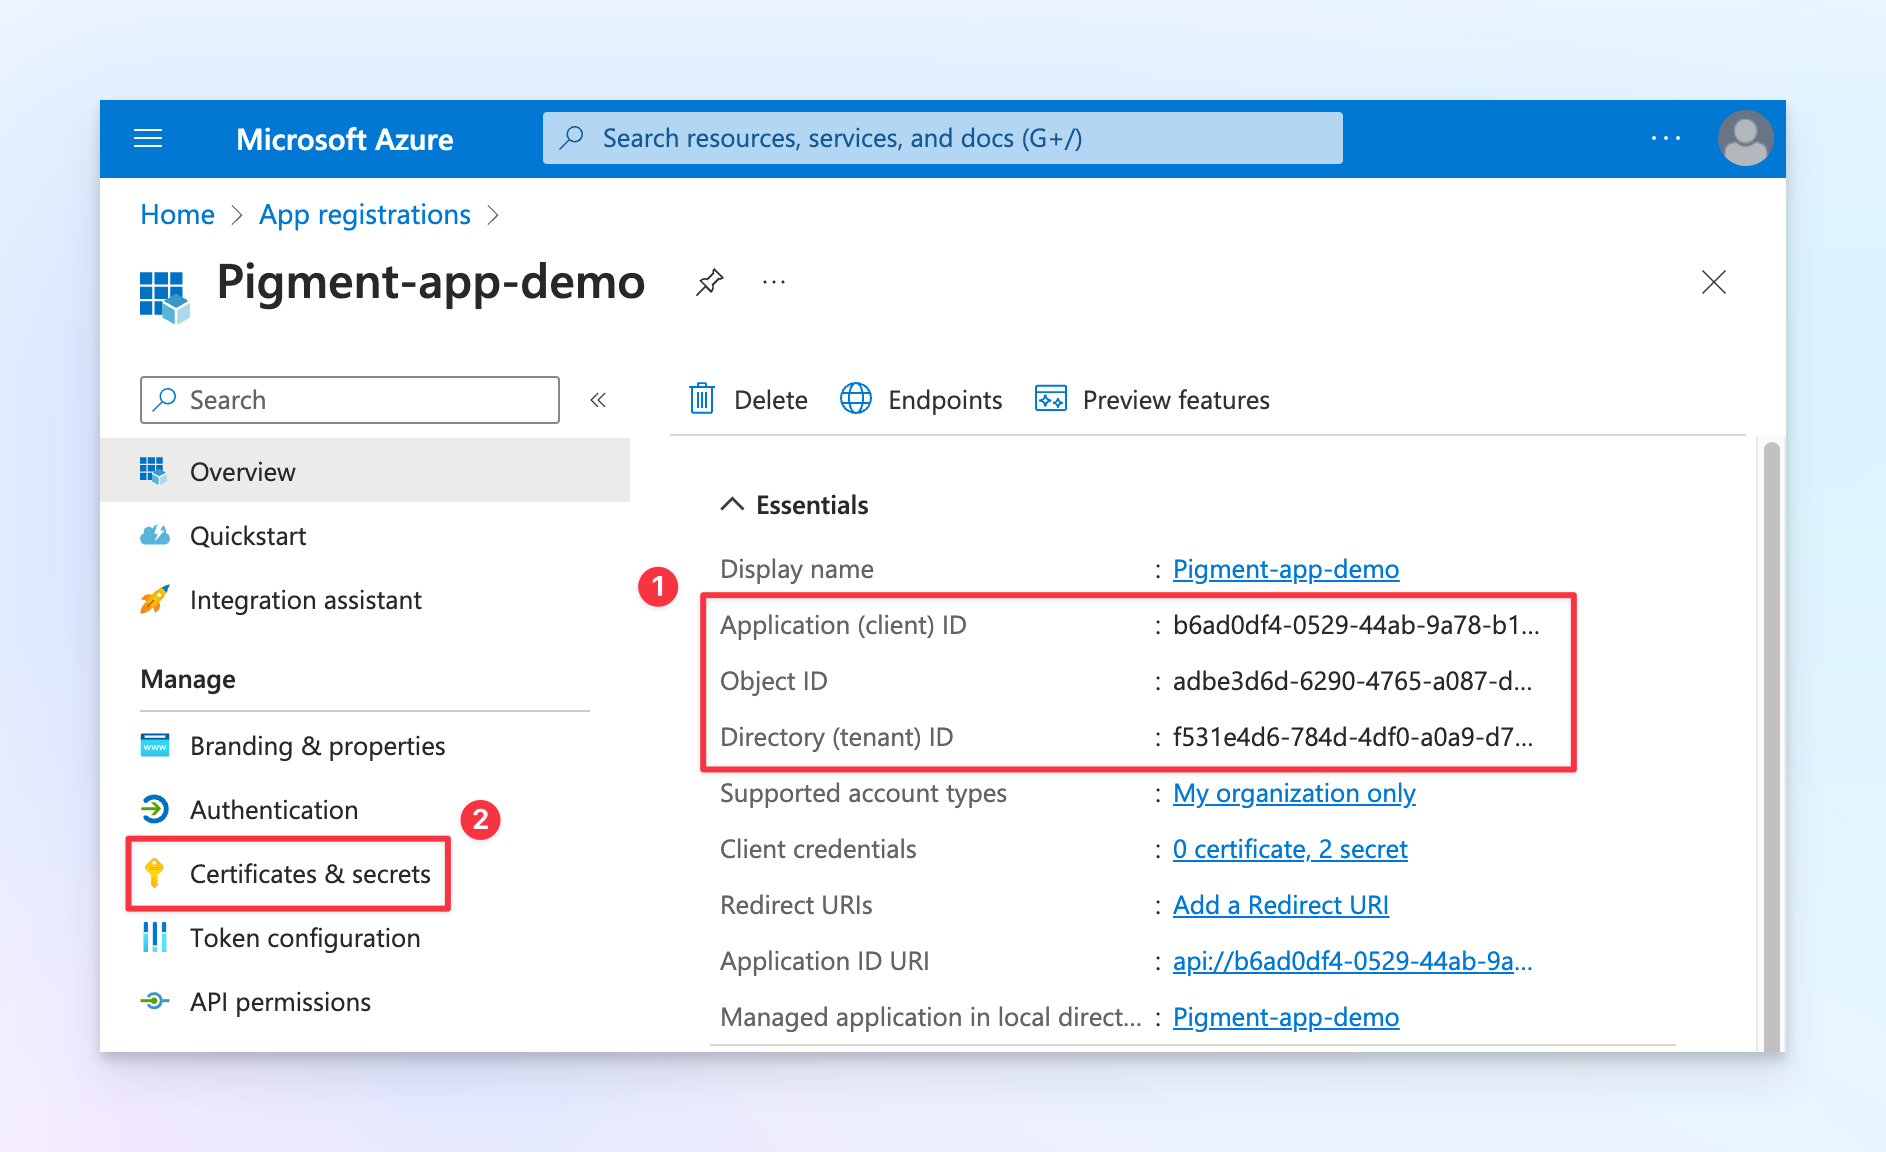
In App registration, you’ll retrieve the following IDs that you will need later to configure Pigment.
- Application (client) ID
- Directory (tenant) ID
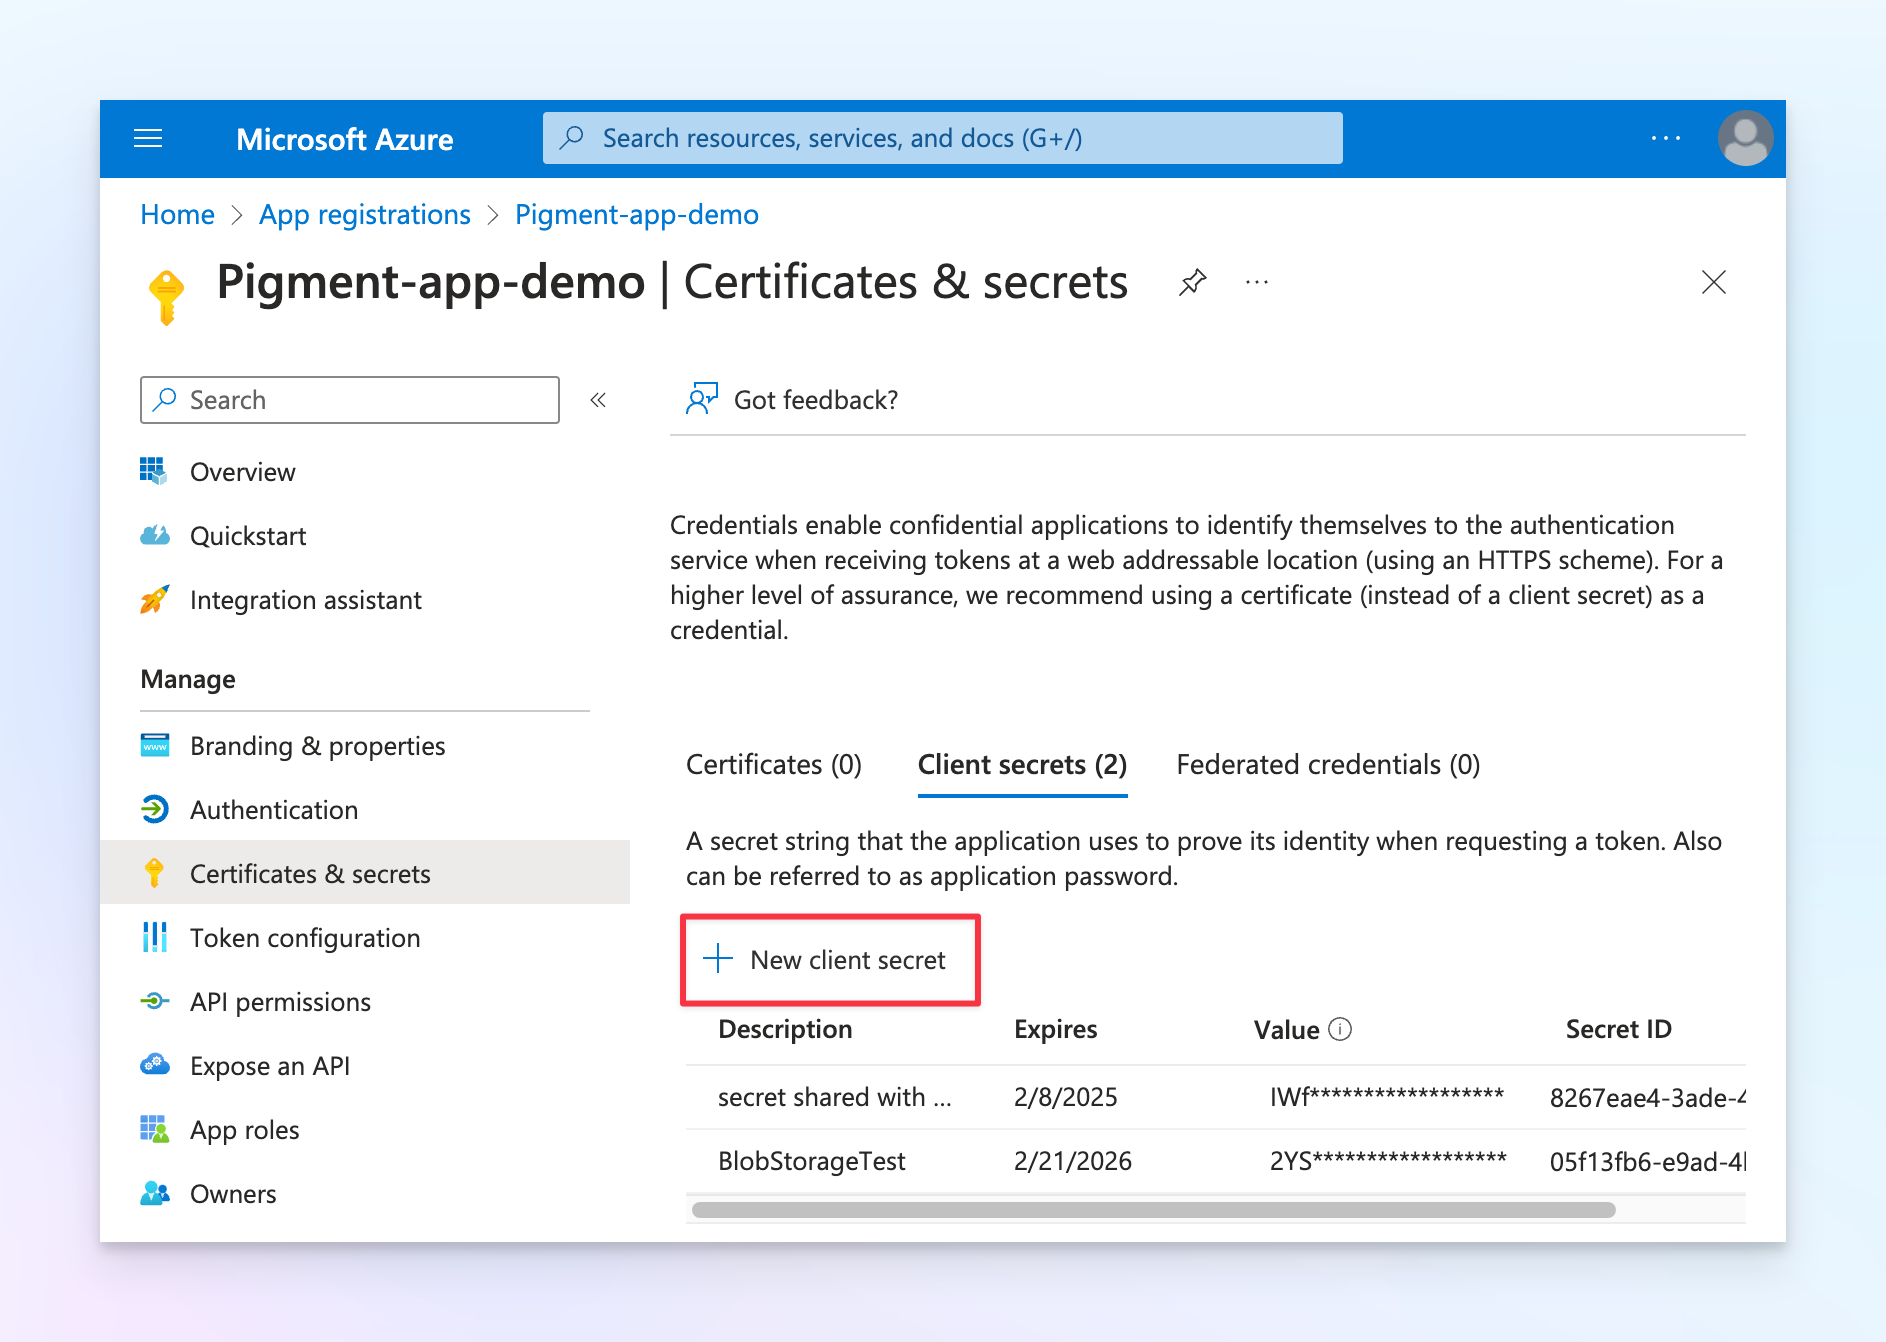
Make a note of these so you can reference them later on in the setup process. Next, go to Certificates & secrets.
Create a new client secret and also make a note of its value. You’ll need this later with the previous IDs:
Azure Step 3 - Create or use an existing Storage account and Container
From the Azure Portal homepage, go to Storage accounts.
Select an existing Storage account or create a new one, and save its name.
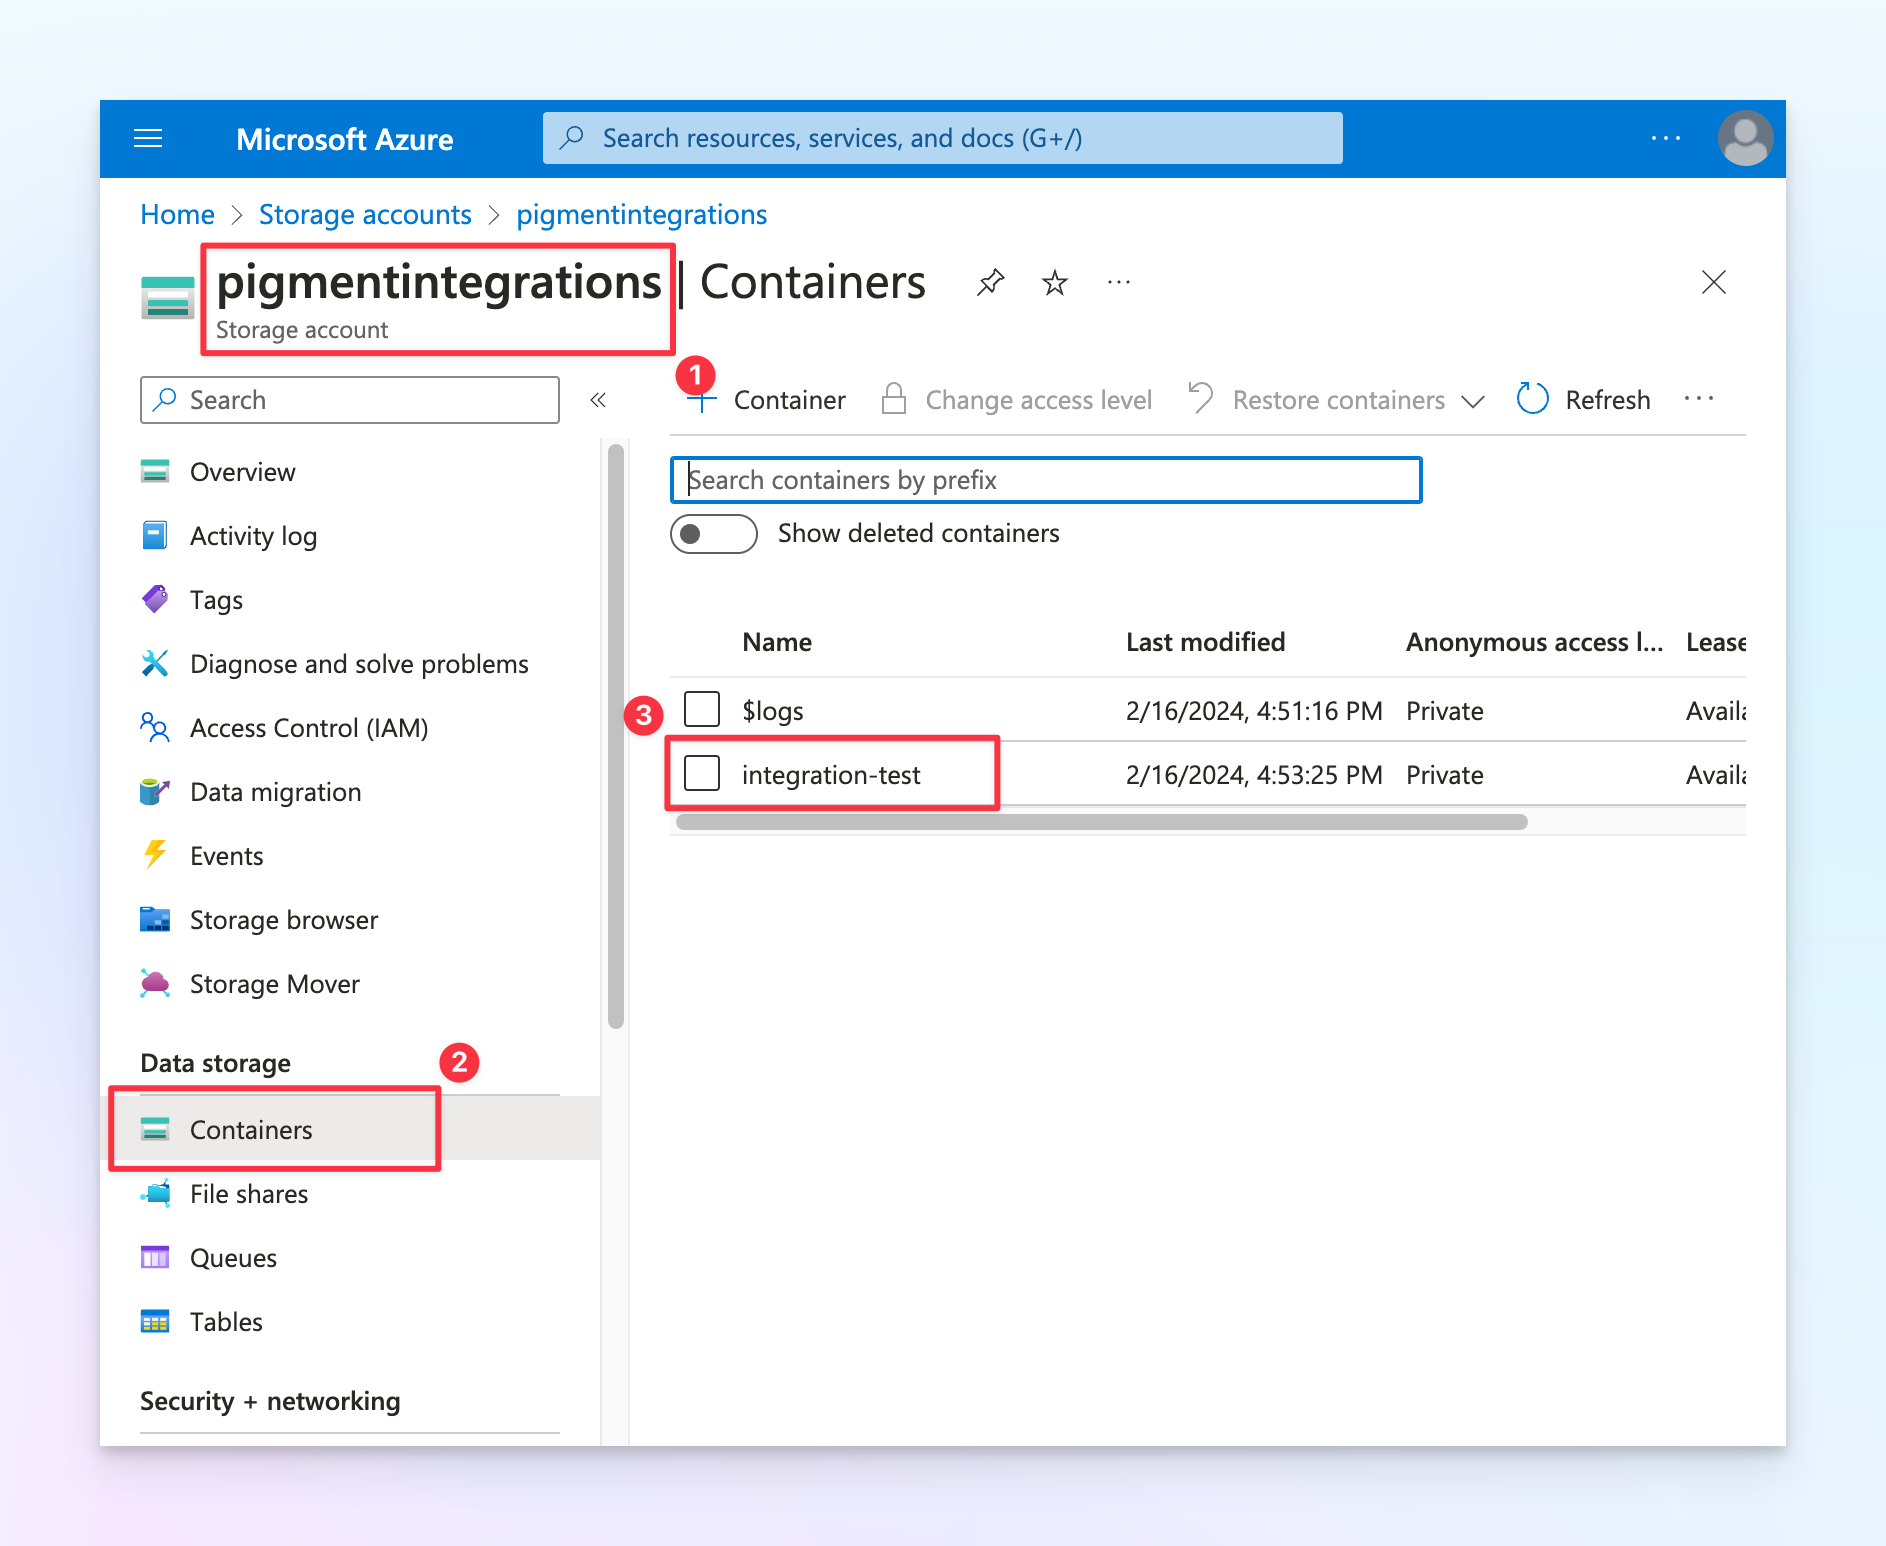
From the Storage account, select an existing Container or create a new one, and save its name.
Make a note of the Storage account name and Container name. These are the two last pieces of information you need to setup in Pigment.
Azure Step 4 - Set IAM permissions on the Container
On the same page, click on the Container name and then on Access Control (IAM).
Click on + Add and then + Add role assignment and make sure you assign the Reader role to the user or group you want to use.
Creating a connection in Pigment
- In Workspace Settings, open the Integration page.
- Go to Azure Blob Storage and click +Add.
- Complete the following fields with your saved information:
- Name: Connection name.
- Application ID: Azure application ID. This is described in Step 2.
- Directory ID: Azure directory ID This is described in Step 2.
- Secret value: Client secret value that you generated in Step 2.
- Account name: Name of your Azure storage account. This is described in Step 3.
- Container name: Name of your Azure storage container. This is described in Step 3.
To connect to multiple containers, you need to create multiple connections in Pigment.
Use the connection in Pigment
When the connection is configured, do the following:
- Open Pigment and go to an Application where this connection is available.
- Click Import data located in the top right of the Block header.
You can also click Start from an import, this option is available when you create a new Block. - Click the Integration tab in the Import data pane.
- In the Choose a connection menu, select your Blob Storage connection.
- Select which Import mode you want, both options are described in more detail below.
Fixed file
This import mode chooses one individual file name.
Input the file path, that is, the folder name, file name with extension. For example:
folder1/folder2/file.csv
Click Set up import.
The file preview loads in Pigment, the load time depends on the file size.
If you save this import configuration and reuse it or schedule it, it will always download and import this exact file.
Most recent file
This import mode allows you to define a file path. From here Pigment downloads the most recent file, which must adhere to a defined naming convention that contains a ISO-8601 compatible date format within it. We discuss this naming convention in greater detail below.
Naming convention in Azure Blob Storage
When naming your CSV files with dates, the name must follow a consistent convention with the date included. Here are some examples of file names for an example CSV file called rev.csv with the ISO-8601 compatible date formats located at the start.
| ISO-8601 Compatible Date Formats | File Name Examples: {{date}}-rev.csv |
|---|---|
yyyy-MM-dd | 2022-09-30-rev.csv |
yyyy-MM-ddThh | 2022-09-30T00:00:00-rev.csv |
yyyy-MM-ddThh | 2022-09-30T00:00:00Z-rev.csv |
 ss
ss
When writing the file path in Pigment
Similar to the Fixed file, you must first define the path with the location. For example:
folder1/folder2/
Next you must define a file naming convention with a date included in the file name. When entering the case sensitive path in Pigment, use {{date}} where the date is located.
It should look something like this:
folder1/folder2/file-{{date}}.csv
Here are some examples of file names and the results depending on the path you entered.
If the container contains the following files:
- /folderA/2022-09-15-salaries.csv
- /folderA/2022-10-15-salaries.csv
- /folderA/2022-10-16-revenue.csv
- /folderB/2022-11-15-salaries.csv
Here are the expected results depending on the file path:
- A path named "folderA/{{date}}-salaries.csv" will import:
/folderA/2022-10-15-salaries.csv
This is because it’s the most recent file in folderA.
- A path named "folderB/{{date}}-salaries.csv" will import
/folderB/2022-11-15-salaries.csv
This is because this is the most recent file in folderB.
- A path named "/{{date}}-salaries.csv" will import nothing.
This is because the folder location is missing.