
This article explains how to load Pigment data in Microsoft PowerBI, specifically how to easily use Pigment’s API with the Get data from Web feature of PowerBI.
Use the Pigment API to retrieve Pigment data, this can be queried directly from PowerBI. Follow the steps below to quickly set up the API.
Step 1 - Prepare API credentials
To prepare the API credentials:
- Go to Workspace Settings.
- Select API Keys.
- Select + Create API key in the top-right corner of the page to create a new key.
- Enter an API key name, expiration date and toggle Key type to Export.
Save the generated key as you will need it to authenticate the data request from PowerBI.
The key tells Pigment which Workspace is targeted, and if the request is made by an authorized user with the appropriate security permissions.
 Important
Only Admins can access the API Keys page.
Step 2 - Find the View ID you want to load
To configure the API endpoints, we need to identify the View ID.
You will typically find this element in the URL of the page. For example, when you open a View in Pigment, you will see this type of URL in your browser:
https://pigment.app/w/company-name/application/023a8e40-a9a0-4daf-bced-eabc08af93ce/tables/933e36d0-d032-45dd-affc-b7412abd1beb?viewId=f1f3edd7-e639-4701-9fce-fe7f16fb4379&displayMode=Grid
The section of the URL after viewId= is the ID of the currently displayed View (it stops before the &).
In the example above, the View ID is:
- View ID:
f1f3edd7-e639-4701-9fce-fe7f16fb4379
Take note of the View ID.
Step 3 - Prepare the API endpoints
Important
Block exports require POST requests and aren’t supported in PowerBI. You must use View exports instead.
Views
Replace {viewId} with the View ID you copied in the previous step.
https://pigment.app/api/export/view/{viewId}
Using our example, it looks like this:
https://pigment.app/api/export/view/f1f3edd7-e639-4701-9fce-fe7f16fb4379
 Note
Note
For more details, refer to the complete documentation on View exports.
Step 4 - Load Pigment data from PowerBI
Now that you have prepared everything, it’s very easy to configure the import in PowerBI (desktop version).
- From the desktop PowerBI application, select Get data.

- Select Other, then choose Web.
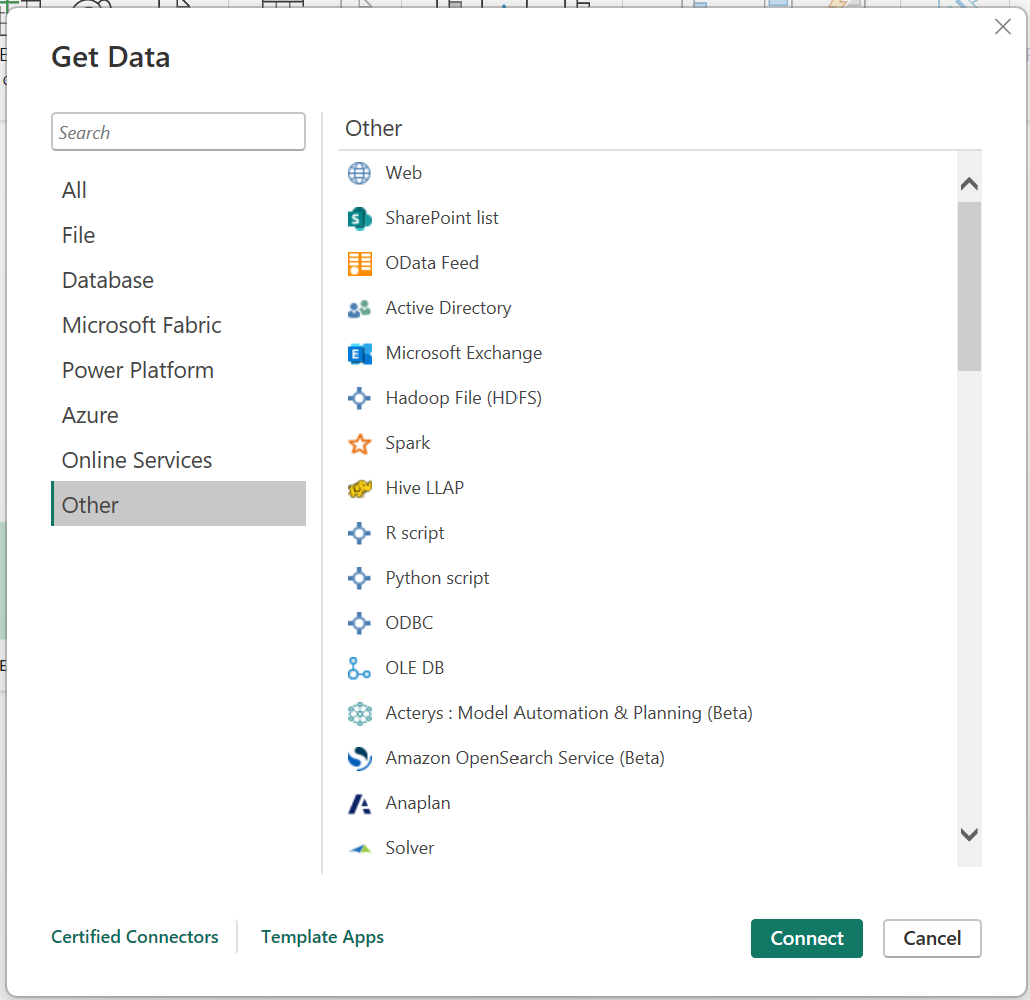
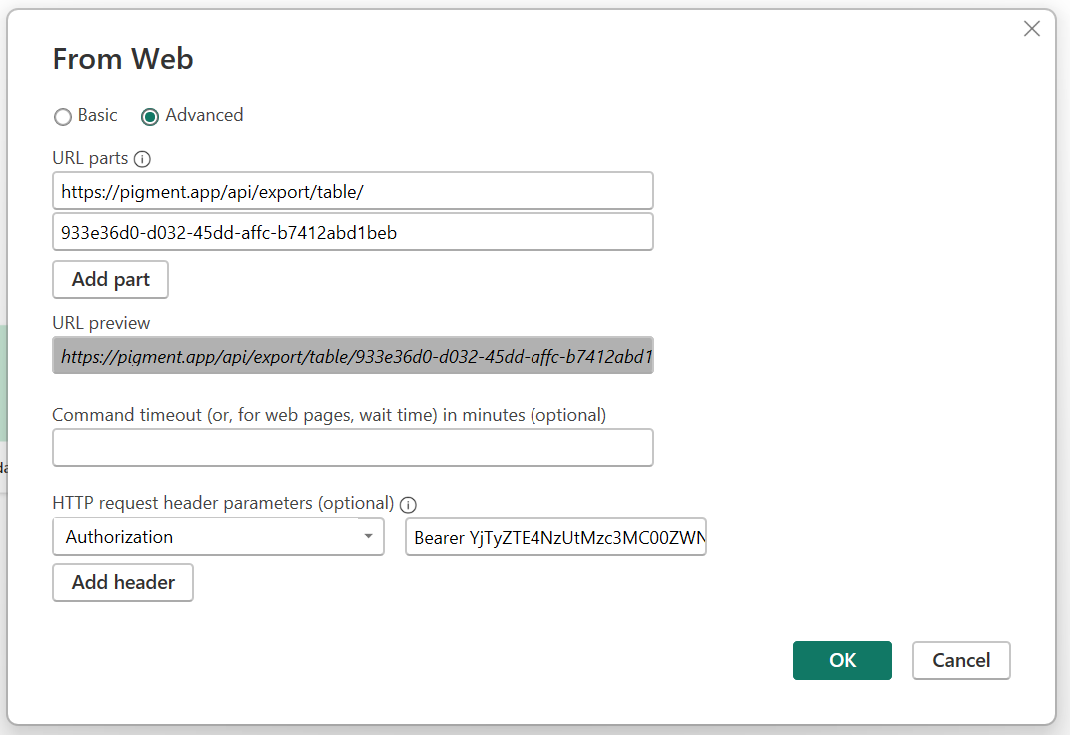
- Select the Advanced mode and add the details below.
- In URL parts, add either the full API endpoint or split it like in the example below to make it easier to update the ID later.
- In HTTP request header parameters, add the following information:
- Header name:
Authorization - Header value:
Bearer {apiKey}. Replace{apiKey}with the key you generated in step 1 and ensure there's exactly one space after Bearer and the key value like below.
- Header name:
- Select OK, then follow the usual import steps from PowerBI.