
This article explains how to connect Sage Intacct with Pigment to import data into a Pigment Block.
Table of Contents
Prerequisites from Sage Intacct
To perform the sync setup, you will need a Full Admin access to Sage Intacct.
Step 1: Subscribe to Web Services
Follow these steps to activate the Web Services option:
- Log into Sage Intacct.
- Go to Company, then select Subscriptions.
- In the Applications tab, find Web Services and toggle Subscribe to On.
You can ignore the warning message about additional charges.

Step 2: Allow Pigment’s Sender Id and IP Address
IP Address
If your organization enforces the IP address check to connect to Sage Intacct, you must add Pigment’s IP Address to Sage Intacct’s allowed list. For more information, see Intacct’s documentation.
- Go to Company, then Company Info.
- Click EDIT.
- Click the Security tab.
- Go to the field labeled Enforce IP address filters and click the Edit icon.
- Add the following IP addresses:
35.242.251.11134.145.54.11334.163.209.11935.202.142.12
Sender ID
Add Pigment’s Sender ID to the list of authorized Web Services. For more information, see Intacct’s documentation.
- Go to Company, then Company Info.
- Select EDIT
- Select the Security tab
- Go to the Web Services authorizations section and add the following Sender ID :
PigmentMPP

Step 3: Create a Web Service User with Role-Based Security
Pigment requires a Web Service user to connect to your Sage Intacct account. This user needs the required Permission and access. This section describes how to:
- Create and configure a new Role.
- Create and configure a new Web Service User. This user’s credential will be shared later with Pigment.
Create a Role
- Go to Company, then Roles.
- Select Add.
- Input the following values in the Name and Description fields:
Pigment-Role used for Pigment Web Service user. - Select Save.
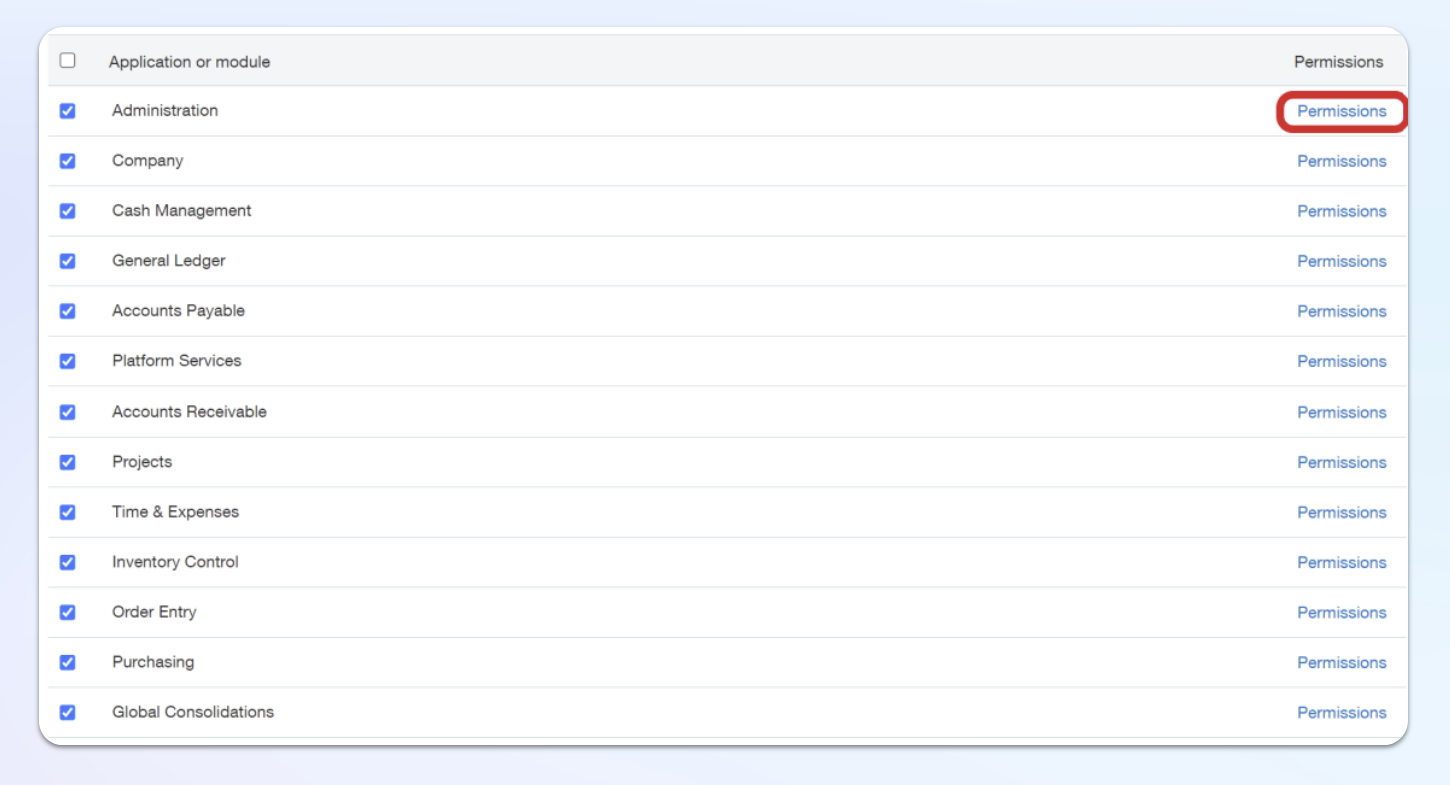
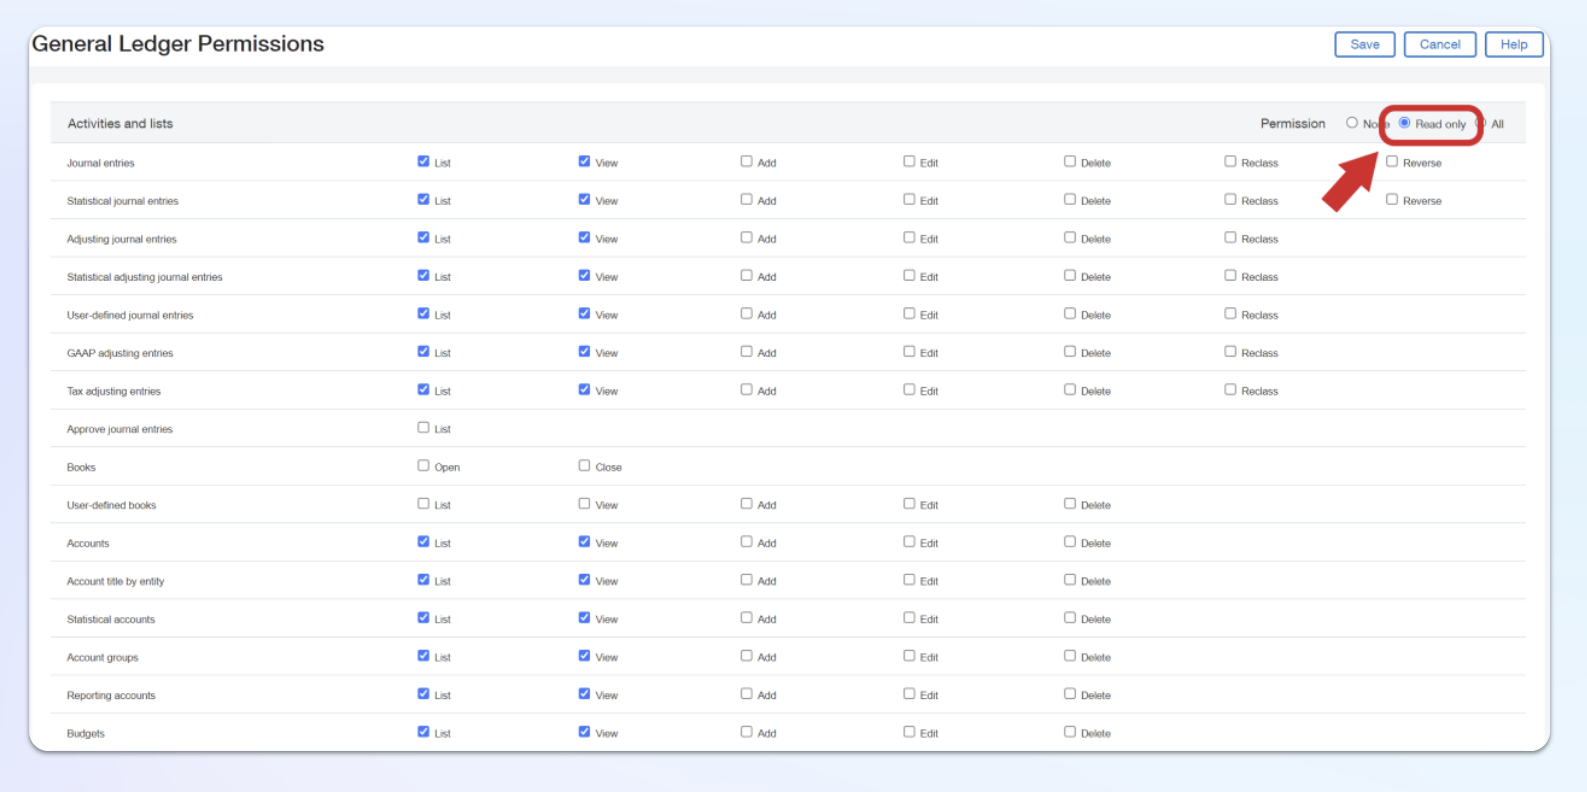
- Select each Application/Module, select Read Only from the top right, and save changes.
- Select Save.
Create Web Service User
- Go to Company, then Web Service User.
- Select New.
-
Input the following values for these fields:
a. User ID:Pigment
b. Last name:Pigment
c. First name:Connector
d. Email address: the email of the user which will receive this account credentials.
e. Make sure the User Type = Business User - Select the Roles information tab and select the Role created in the prior step.
- Select Save
You can ignore the warning message about additional charges for creating a user.
Setting up the Sage Intacct Connector within Pigment
In your Pigment Workspace, go to Settings, then Integrations and select + Add on the Sage Intacct integration.

| Select Setup a Connection and then complete the following fields:
Select Setup to finish the setup. | 
|
Load data into Pigment using the connector
When the Sage Intacct Connection is configured, open an Application that the connection is available on and open the Import Data interface for the object you want to import data into.
For example, if you were importing data into a Transactions List, you would open up that list and then select Import and Download and then Import.
Instead of Upload file, select the Integration option. From here, select the Sage Intacct Connection you just configured.
If you don’t see the connection, go to Integrations, and verify that the Application is on the Application Access list.

The Sage Intacct connector allows you to load data into Pigment with two different modes:
- Data Source
- Custom Report
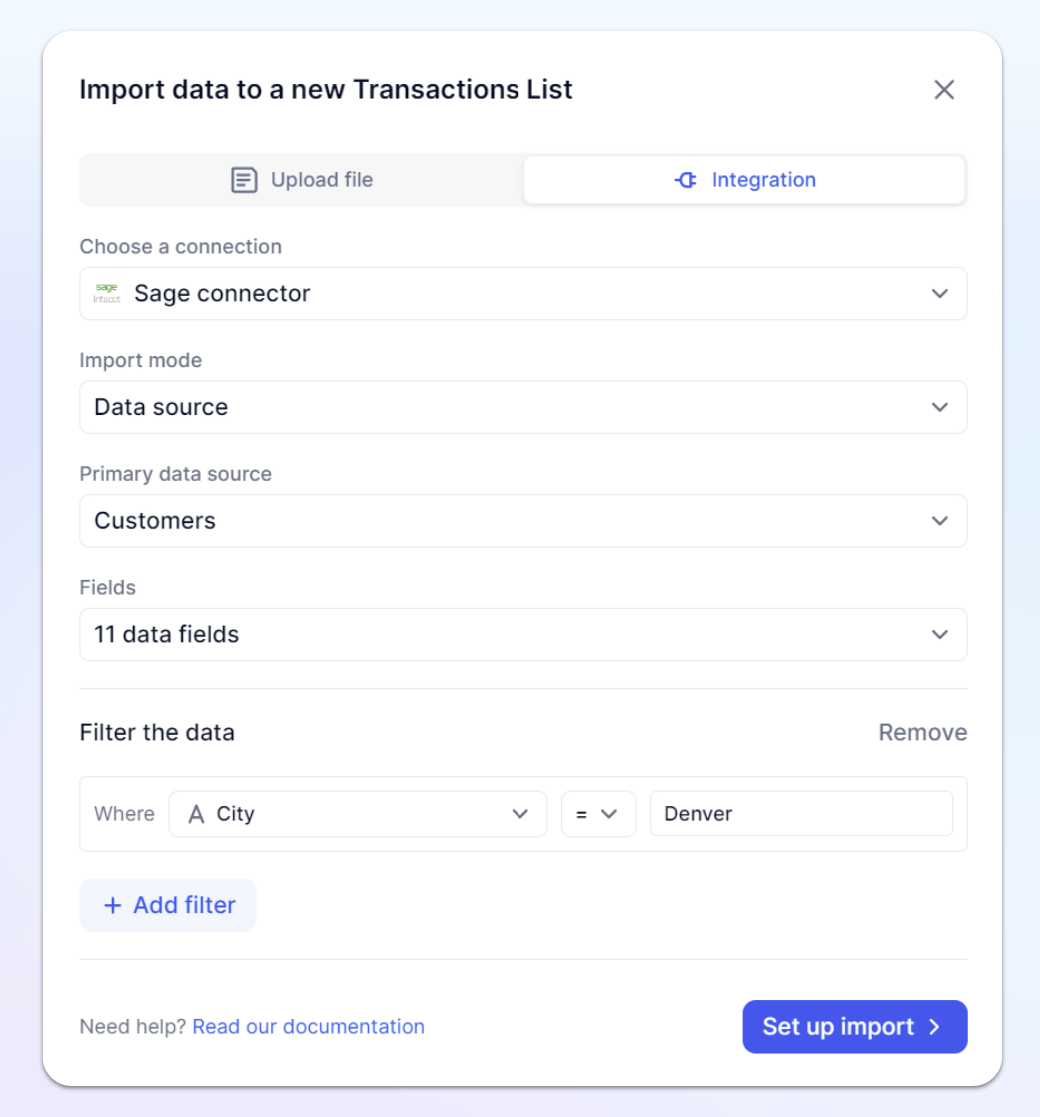
Data source mode
The Data Source mode allows the end-user to select one of the following Primary data sources:
- General Ledger / Accounts
- General Ledger / Account balances
For this Primary data source, you need to include PERIOD as a parameter in the Define query to filter data field, using the Advanced Filter option.
For example:PERIOD = 'Month Ended June 2024' - General Ledger / Details
- General Ledger / Journal entries
- General Ledger / Journal entry lines
- Revenue / Recognition schedules
- Revenue / Recognition schedule entries
- Contract / Billing schedules
- Contract / Billing schedule entries
- Contract / Expense schedule
- Contract / Expense schedule entries
- Contract / Revenue schedules
- Contract / Revenue schedule entries
- Bills
- Contracts
- Customers
- Departments
- Employees
- Entities
- Invoices
- Locations
- Vendors
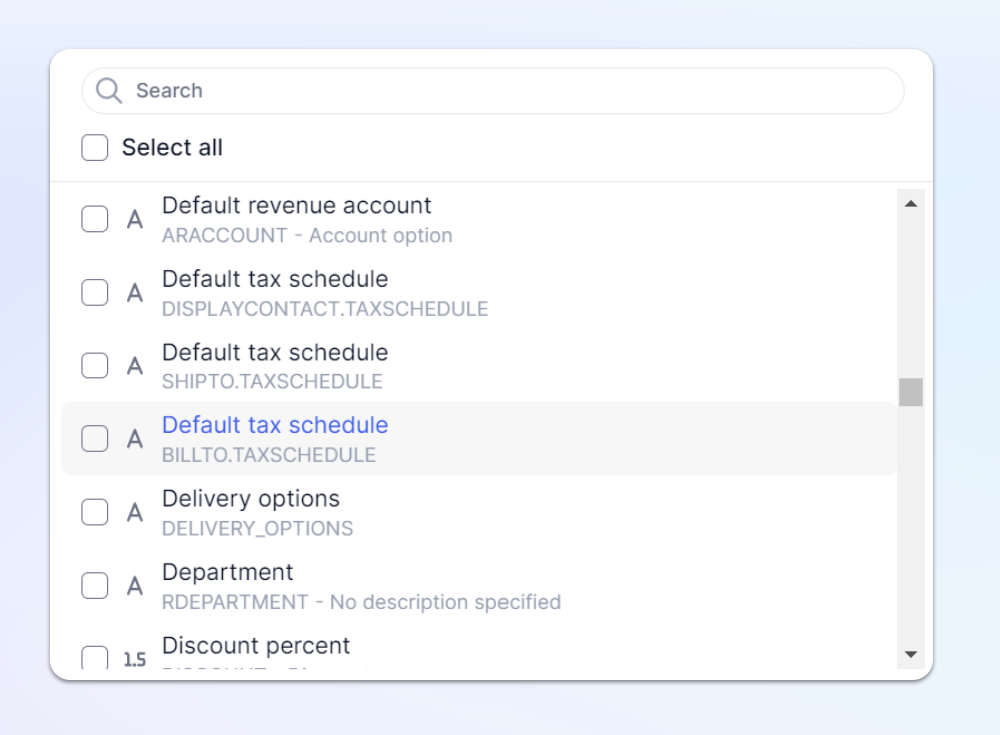
When you have selected a Primary data source, you need to specify the fields you want to load from the source.
Some fields can have similar names because they are referring to a different parent object. Use the field description to ensure the parent object is correct one.
Filtering data before Importing:
You can configure a connector to only load a part of the Data source.
Select Add Filter and select the Basic Filter option. Then fill in the conditions you want to filter on.
For more complex filtering conditions ( ex: filters using OR condition) you can also use the Advanced filter option. Write a SQL-like filtering condition based on the Fields ID. The following operators are supported: <, >, >=, <=, =, like, not like, in, not in, IS NOT NULL, IS NULL, AND
Custom Report mode
If you want to simply load a Report result into Pigment you might find it easier to use the Custom Report. With this mode, you configure all the report options in Sage Intact and type the report name in Pigment.
The performance of the Custom report mode is way more limited than the Data source mode. Only use this mode for small data loads, that is less than 10 000 lines of data.
Before you import
Before importing, be aware of a limitation in Sage Intacct’s query process. If any changes are made to the source data in Sage Intacct while an import is running, the imported data might include duplicate rows or even miss some rows. This issue tends to happen more often when you're importing over 2,000 records. This is due to how the Offset parameter works during queries.
To avoid issues, follow these recommendations:
- Avoid making changes to the source data in Sage Intacct while an import is in progress.
- After the import, check the data for any duplicates or missing rows.
Scheduling of import
Similar to other Native connectors, you can automate data load through the Schedule Import interface. However, we strongly recommend avoiding certain hours due to the timing of Sage Intacct maintenance.
Don’t run jobs between 12:00am and 2:00am Pacific. This is the preferred timing for Sage Intacct maintenance, Scheduled imports might fail if triggered to run while Sage Intacct is not available for maintenance.