
This article details the process of transferring data from Workday directly into Pigment and configuring an automatic data update based on a desired schedule.
Building a Set Up
Transferring data from Workday into Pigment is a 3-step process:
- Build a
Custom Reportin Workday with that includes the data you want to send to Pigment - Build an Enterprise Interface Builder (EIB) in Workday which will connect the Workday report to a Pigment Block
- (Optional) Create an
Integration System User (ISU)
Build a Custom Report in Workday
Custom reports are built with the Workday Report Writer tool.
There are two ways of creating one:
- From scratch by using the
Create Custom Reporttask - From a copy of an existing Standard report by using the
Copy Standard Report to Custom Reporttask
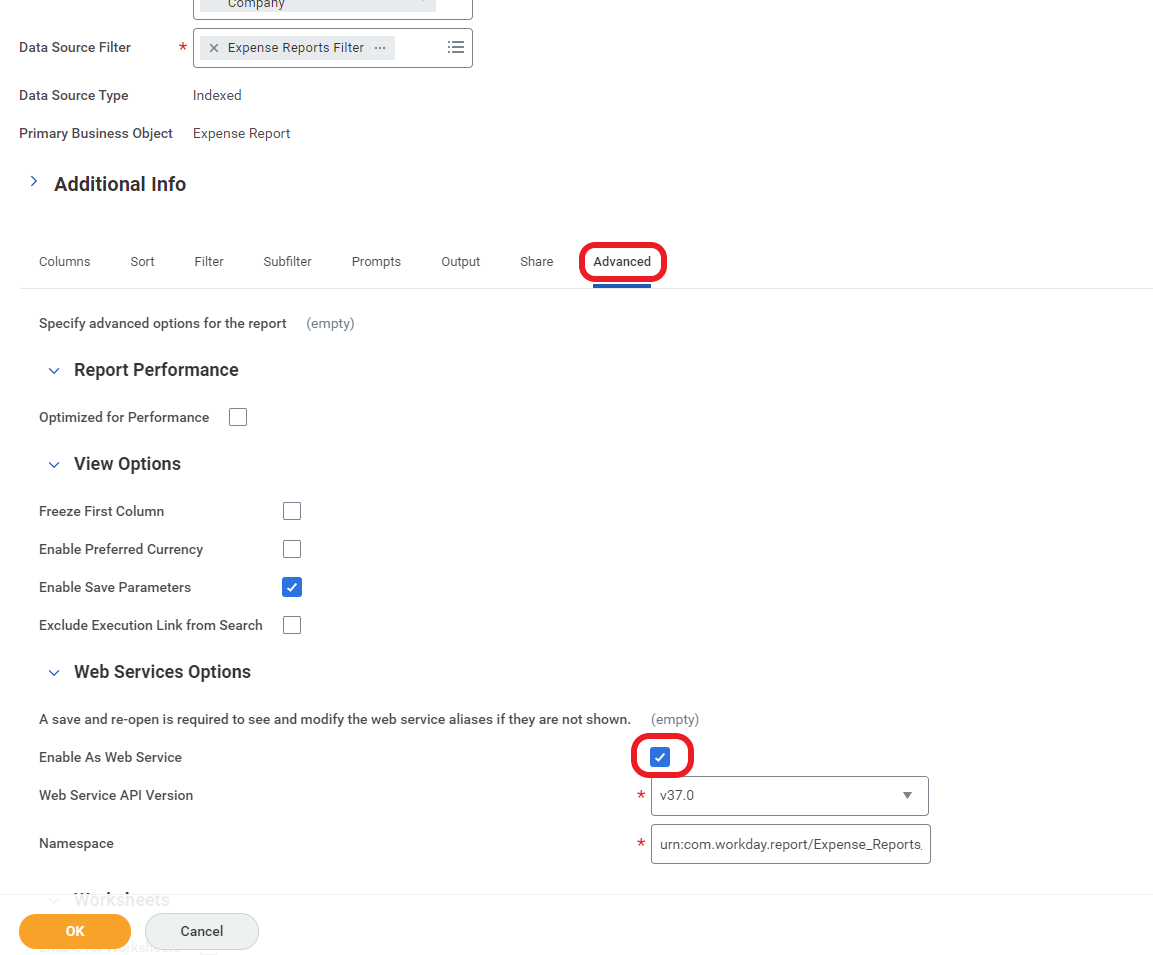
Make sure to activate the option "Enable as web service" to use the report in an EIB later. Go to the report’s Advanced settings to do it.
Build an Enterprise Interface Builder (EIB) in Workday
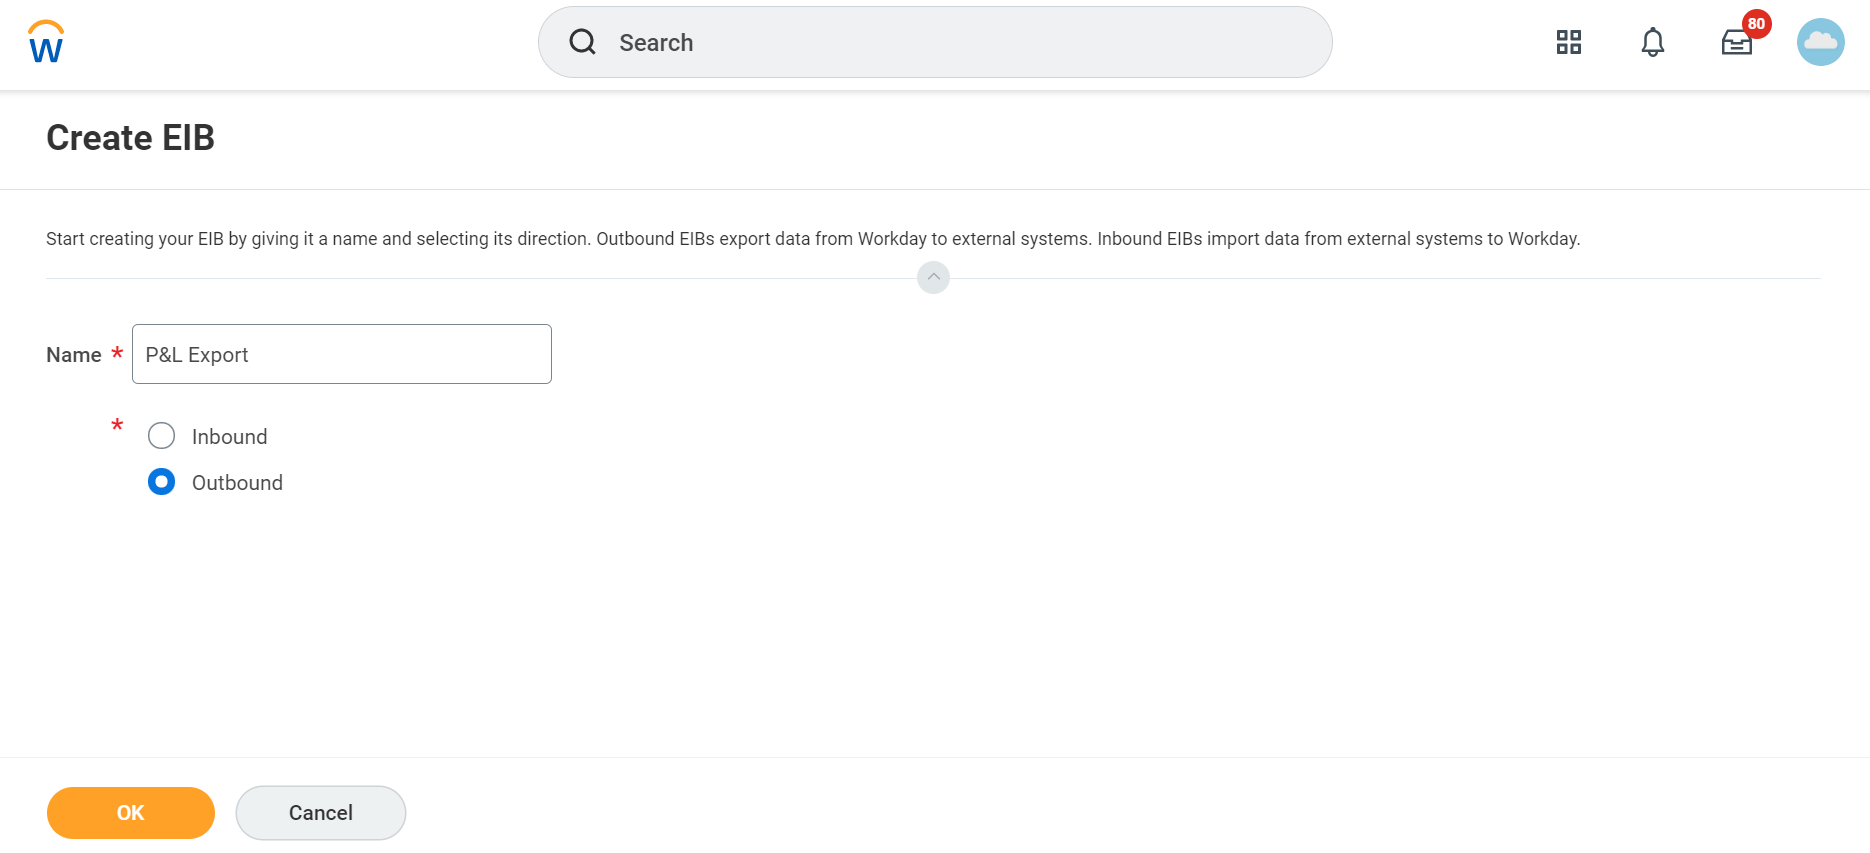
To create an EIB, use the Task Create EIB and select "Outbound”
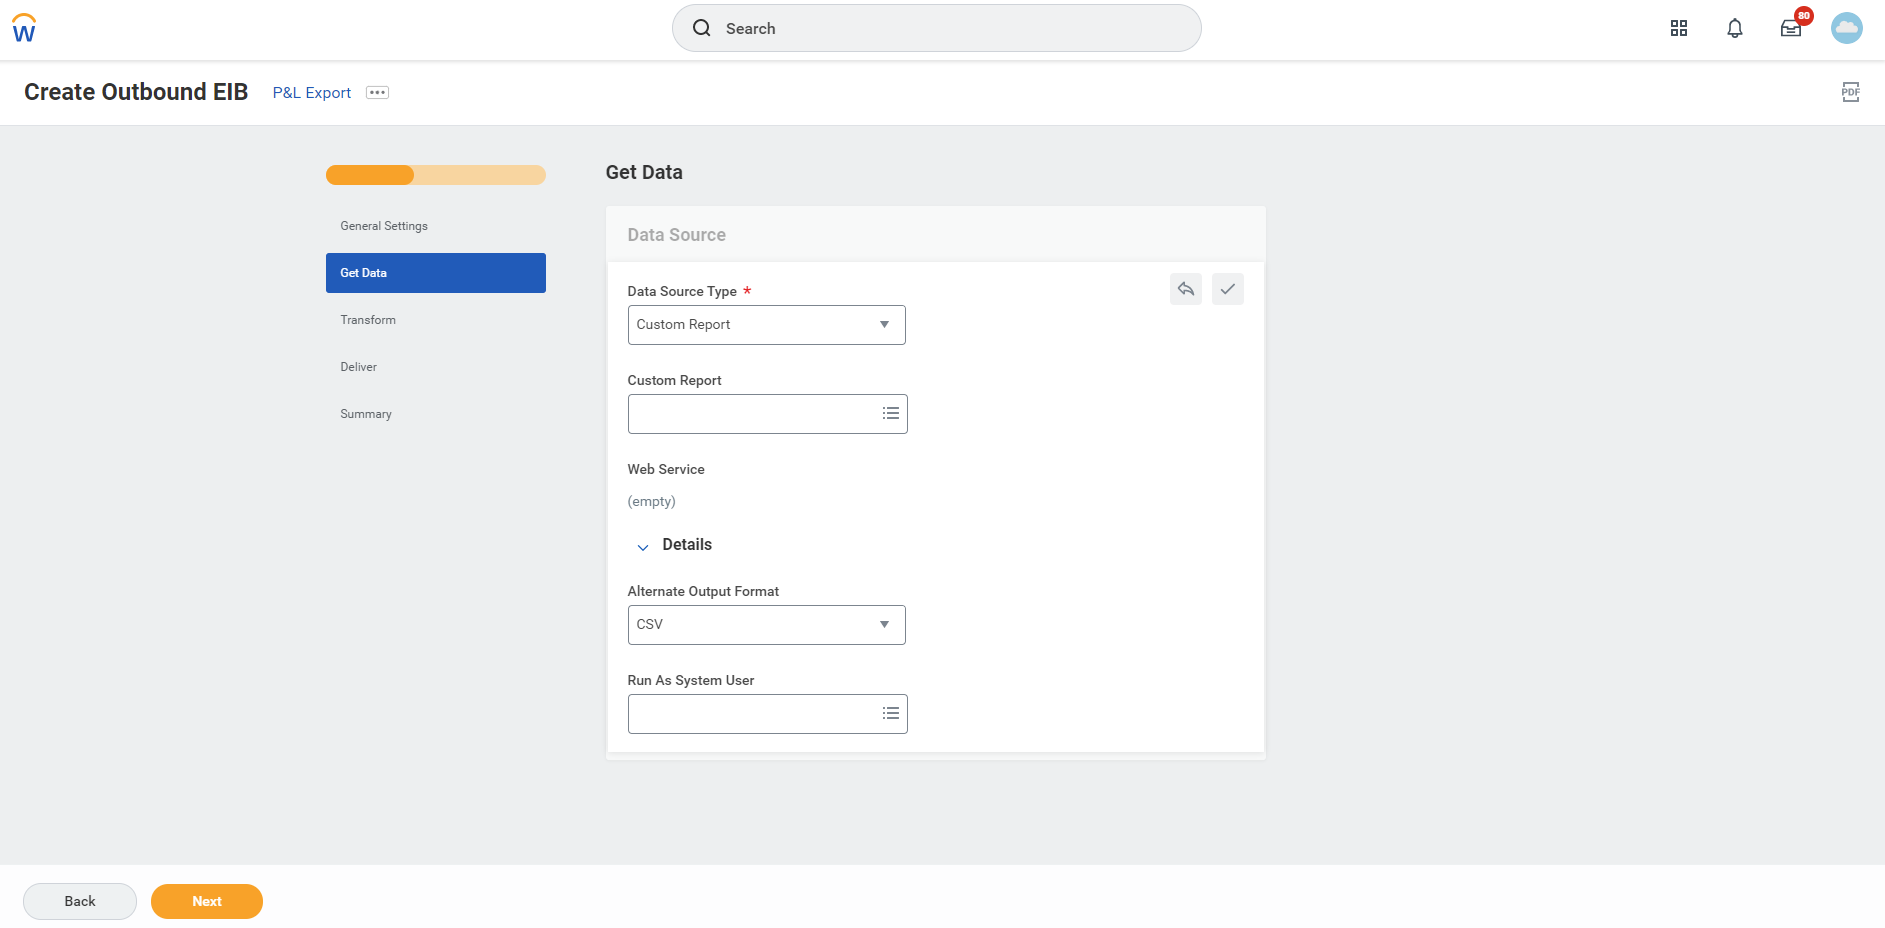
In the "Get Data" step, select "Custom Report" then select the report you want to integrate (note that if you forgot to enable the "Web service option" on your report you won't be able to find it). In Details > "Alternate Output format", please select "CSV".
In the "Transform" step, do nothing and click next.
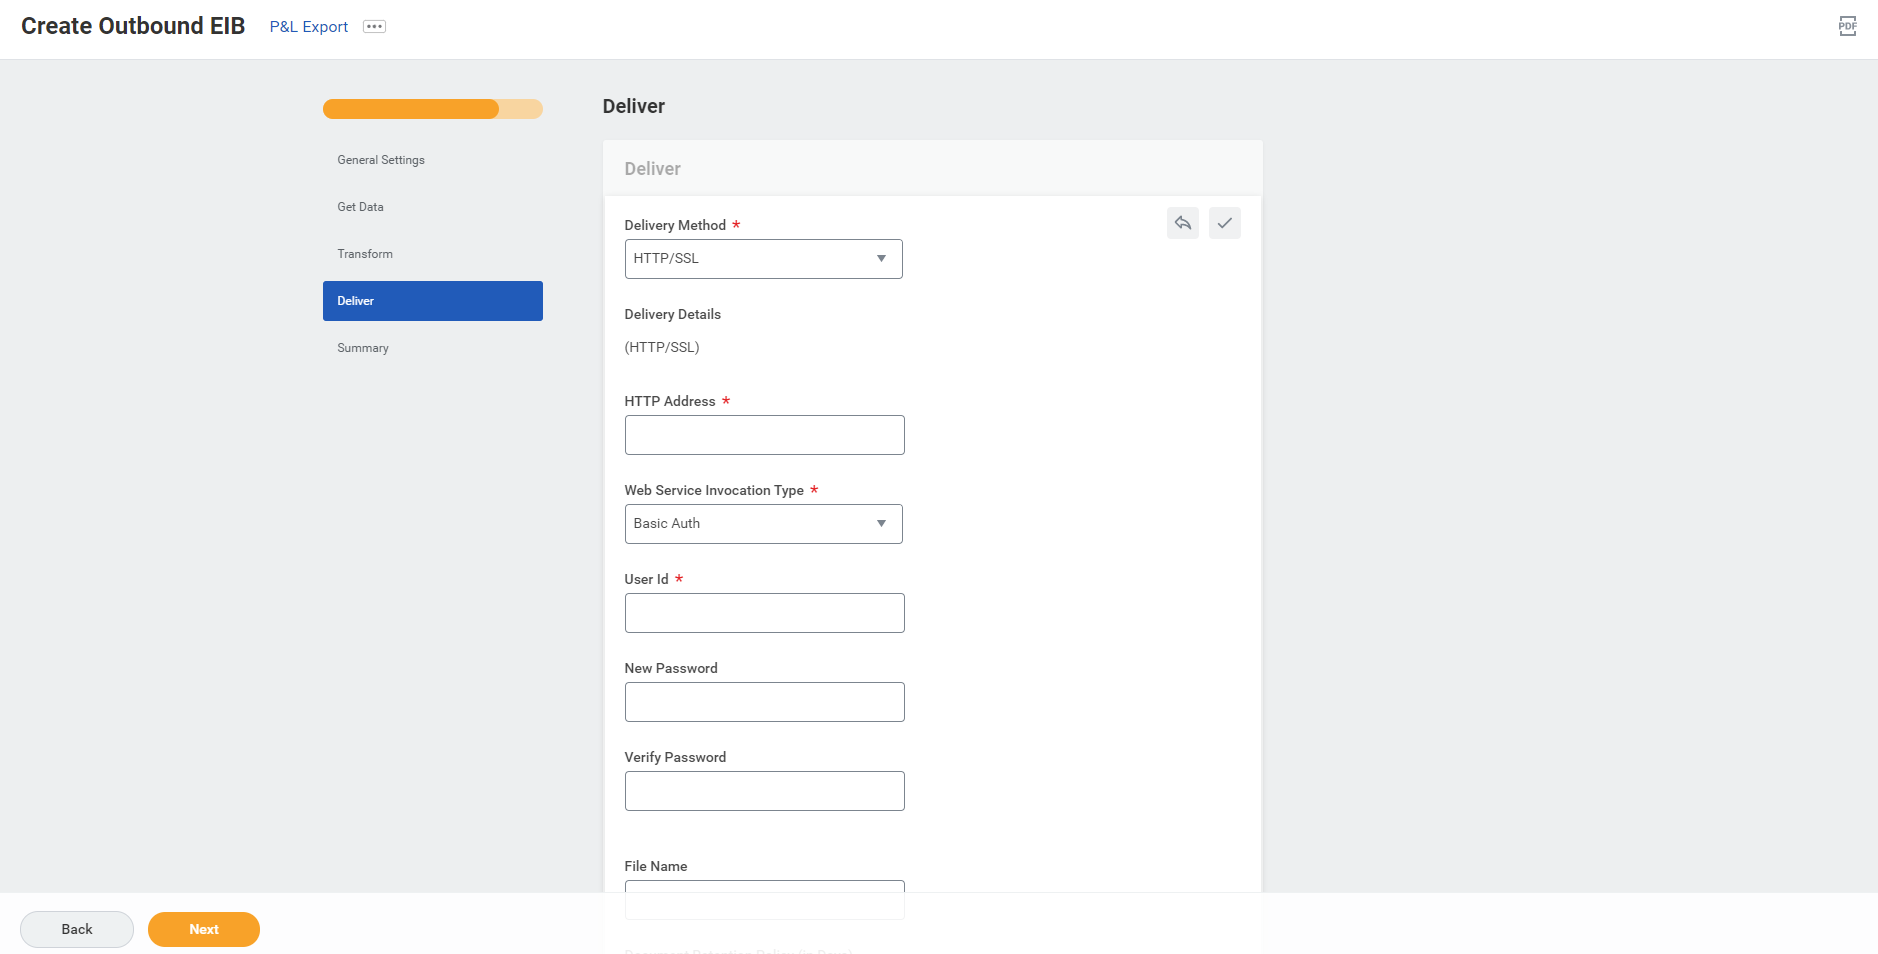
In the "Deliver step", this is the configuration required:
- Delivery method: HTTP/SSL
- HTTP Address: put Pigment API URL with the API token as query parameter.
- API URL template:
https://pigment.app/api/import/push/csv?configurationId={CONFIGURATION_ID} - Replace {CONFIGURATION_ID} by a Pigment Configuration ID, follow this tutorial to learn more
- Your final URL should look like this:
https://pigment.app/api/import/push/csv?configurationId=33d0d7d0-6125-47c4-b36a-882f4ed53b33
- API URL template:
- Web service Invocation Type: Basic Auth
- User Id: input a Pigment Import API Key, follow this tutorial to learn more.
- Password: enter anything in there.
- File Name: leave blank
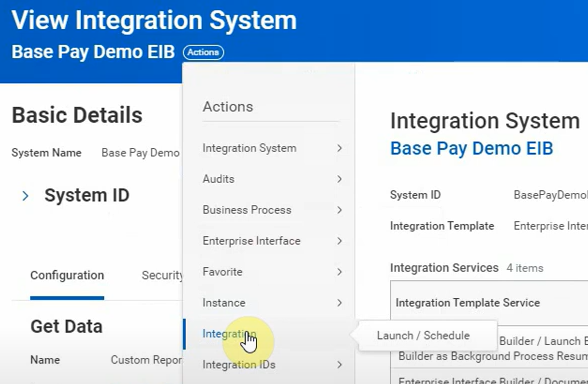
Once your EIB integration is created you can launch it to see if it works. Open the EIB you just created and click on "Action">"Integration" > "Launch / Schedule"
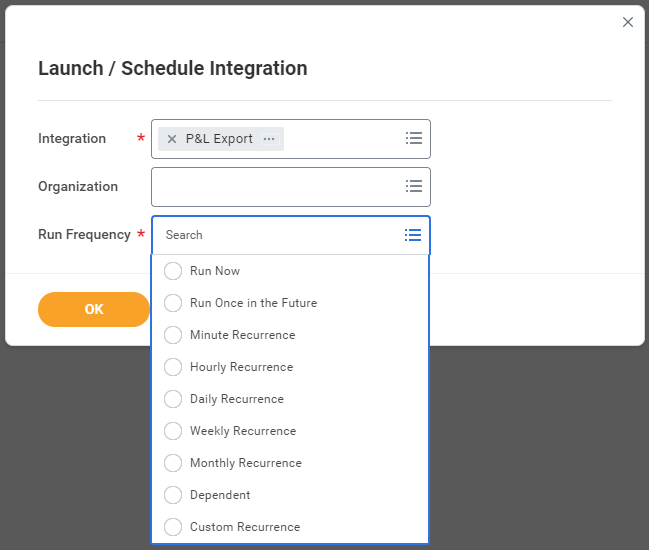
Select "Run Now" and launch the EIB.
Your data should now appear in Pigment!
Note
If your data doesn't appear in Pigment, check the History Update panel:
- If you see a failed import, it means that the data has been correctly sent to Pigment. You may need to adjust your import Pipeline configuration.
- If you don't see any import: it means that Pigment didn't receive the data. Double-check on the Workday side if the "API URL" is correct and if the EIB has ran correctly.
Schedule an automated export
Open the EIB you just created and click on "Action">"Integration" > "Launch / Schedule".
Then in "Run Frequency" select the desired frequency. For this example, we will take "Monthly Recurrence".
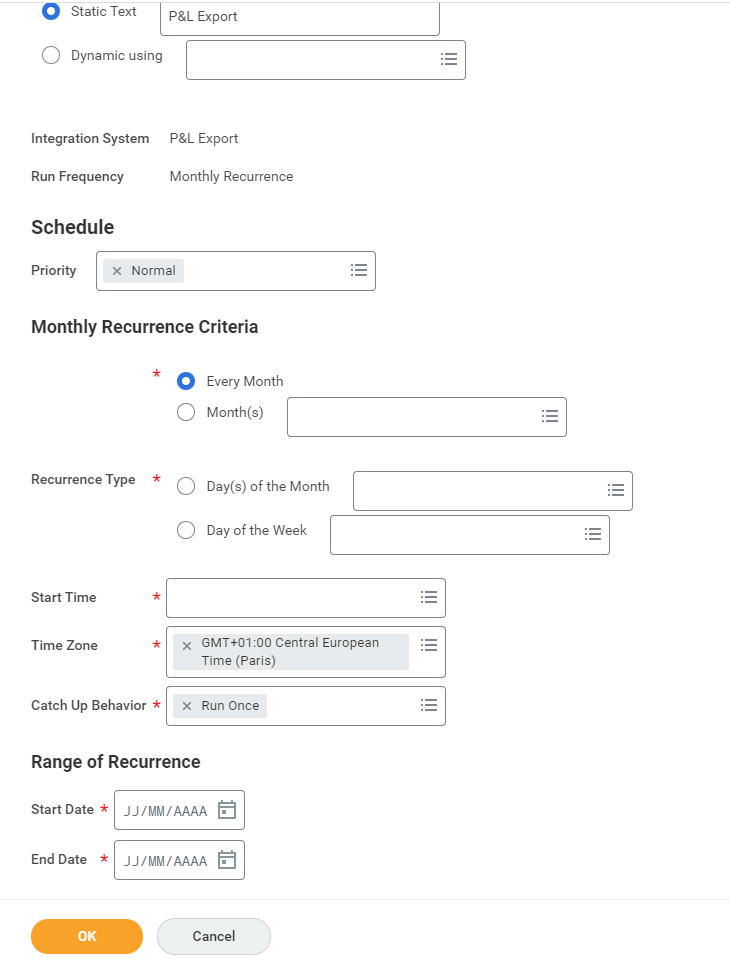
Fill in the different information requested and Save.
Thanks to this configuration, now Workday will automatically send this report to Pigment at the frequency chosen.
(Optional) Create an Integration System User (ISU)
We also recommend using an Integration System User (ISU) to run your Custom report. This way you can run it with different security profiles.
Here are the steps to follow:
- Create an Integration System User using the
Create Integration System Usertask. Add this ISU to an existingIntegration System Security Group(ISSG) or create a new one. - Using the
Maintain Password Rules task, add this ISU account to the System Users exempt from the password expiration list - Update the relevant domain security policies so that the security group gets access to integration permissions
- Activate pending security policy changes
- Share the report with authorized users including the ISSG/ISU