The Pigment Connector for Excel allows you to Connect Pigment Applications with your spreadsheet to easily push and pull data across platform. This article will outline how to use the connector, there are other articles on how to troubleshoot.
Table of Contents
Overview
The Add-in allows you to easily:
- Pull data from a View. Data is pulled into Excel from any View in your Application. Once data is pulled into a sheet, you can easily click a button to refresh your data.
- Push data to Pigment. A range of cells from your Excel spreadsheet is pushed to Pigment based on the import configuration.
You need to connect to your Pigment account to use the Add-in. Once connected, the Add-in will provide you with the option to create Pull or Push connections for your Pigment data. These connection configurations are saved in your Excel files and can be reused by other Members who have installed the Add-in.
Technical considerations
The Pigment Connector for Excel is an Excel Office Add-in available for free on Microsoft AppSource Marketplace.
Unlike older add-in technology, Office Add-ins are web-based add-ins and don't require direct installation on individual desktops. This allows cross-platform support and centralized deployment and distribution for company administrators.
Supported Excel versions
Pigment Connector for Excel is compatible with the following Microsoft Excel versions:
- Excel 2019 or later on Mac
- Excel on Mac (Microsoft 365)
- Excel on Windows (Microsoft 365)
- Excel on the web
How to install
To install the Excel Add-In from the Excel Insert tab:
- Go to Add-Ins in the Home ribbon (Home > Add-ins).
- Type Pigment Connector for Excel into the search bar.
- Locate the Pigment Connector for Excel Add-in and select Add.
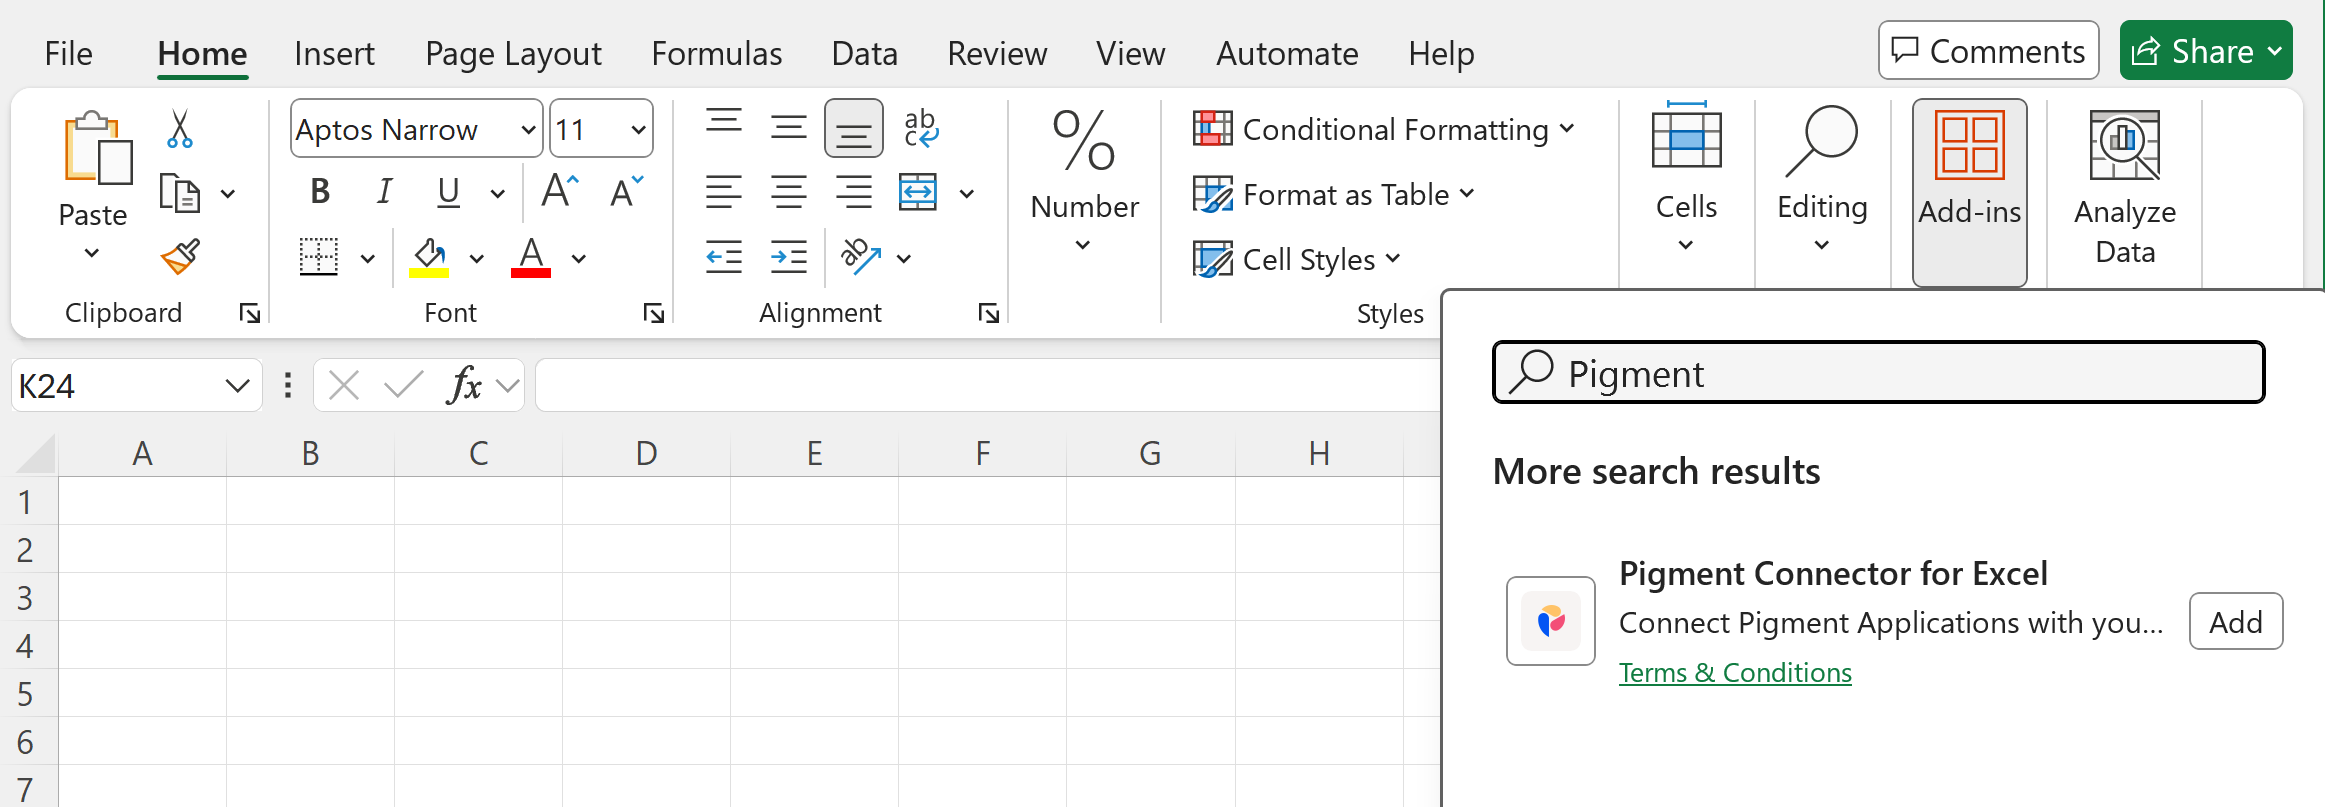
Pigment Add-in not found in the Microsoft Marketplace
If you can't find the Pigment Add-in, it's possible that the Microsoft Marketplace might be blocked by your IT team. Contact them and ask for the Pigment Connector for Excel Add-in to be deployed to your Office 365 Account following the Microsoft guide.
Launch and login
Once installed, follow the steps below to start using the Pigment Connector for Excel:
- Launch the Add-in from the Insert Ribbon.

-
Select on the Pigment Connector to reveal the side bar.
-
Select Login and input your credentials.
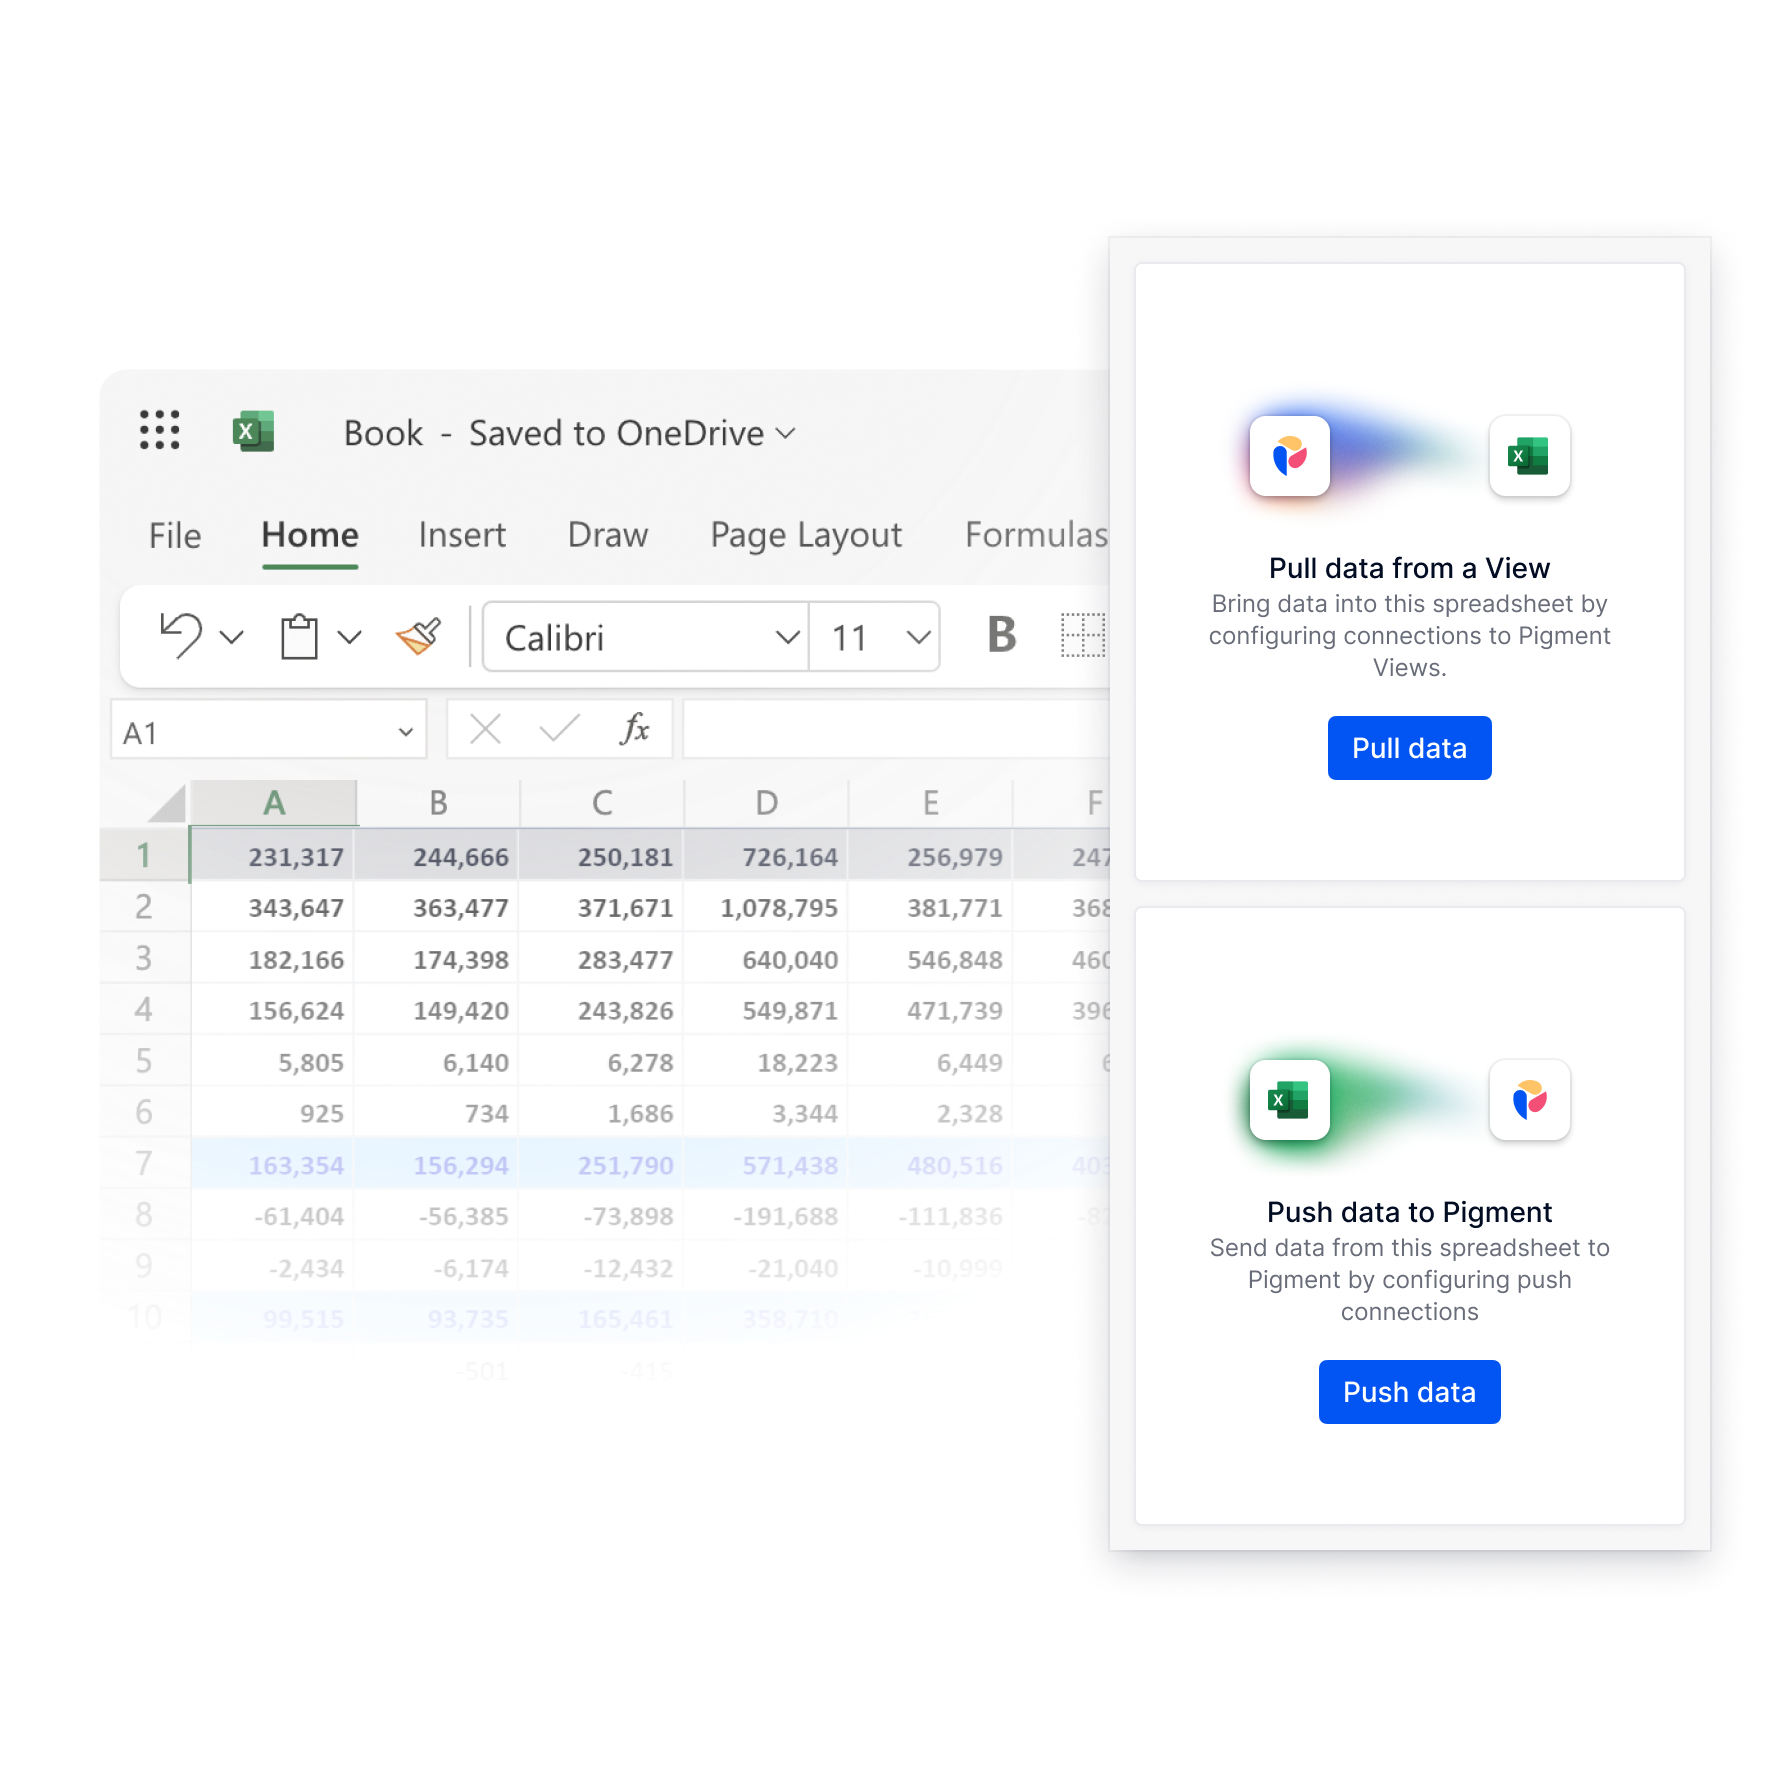
You are ready to start using the Pigment Connector for Excel.
How to pull data from a View
Click on Pull data to load data from Pigment into Excel.
Data is pulled into Excel through pull connections. Pull connections allow you to specify which Views in Pigment you want to import into Excel.
Each connection is created between Pigment and a single sheet. You can only have one connection per sheet. Follow the instructions below to set up a connection. For each new connection, open a new sheet and repeat.
Permissions
Users that have the Display Application Permission will be able to pull data from Pigment into Excel. Access Rights are applied so they will only be able to extract the data they have Read access to.
Create a pull connection
Click on Create a new connection and fill in the following fields.
| Source This section is used to define data in Pigment. Application Choose the Application that you wish to pull data from. You will see all the Applications that you have access to in your Workspace. Block Select the Block you wish to import data from. You will not be able to view shared Blocks from other Applications via Libraries in the dropdown, unless they are being used in a Block within the Application you have access to. View Select the View you wish to import. For Views on Metrics and Tables, toggle Include View Format to On to ensure the Pigment Connector applies the Pigment View formatting to the Sheet. If the View changes, when you refresh your data all changes will also be reflected. Because of this we recommend saving a specific View and not importing from the default. | 
|
| Target This area defines the location in Excel where the data will be imported into. Sheet Select the sheet that you want data to be imported into. You can only have one connection per sheet. Cell This is the cell in Excel where the data will start. It will be the top left of all imported data. By default it is set to A1. |
Connections are set up one per sheet. To create another connection, navigate to a new sheet and follow the steps above.
Include View Format
If Include View format is toggled On, Pigment will erase the existing formatting of your Sheet each time the data is pulled.
The following Pigment formatting is supported:
- Number formatting. Supports percentage style, thousand separators, prefixes/suffixes, and decimal precision.
- Zero display. Controls how zero values appear, including positive/negative formatting and the option to reverse the sign for consistency.
- Text styles. Applies formatting such as bold and italic.
- Cell styling. Supports fill color, text color, and borders.
- Indentation. Preserves structure in tree views.
- Merged cells. Maintains header structure.
Use a pull connection
Once configured, select the Pull icon to use the connection. Data should import into Excel in a few seconds. If multiple connections are configured on the spreadsheet, you can refresh all sheets by selecting Pull All.
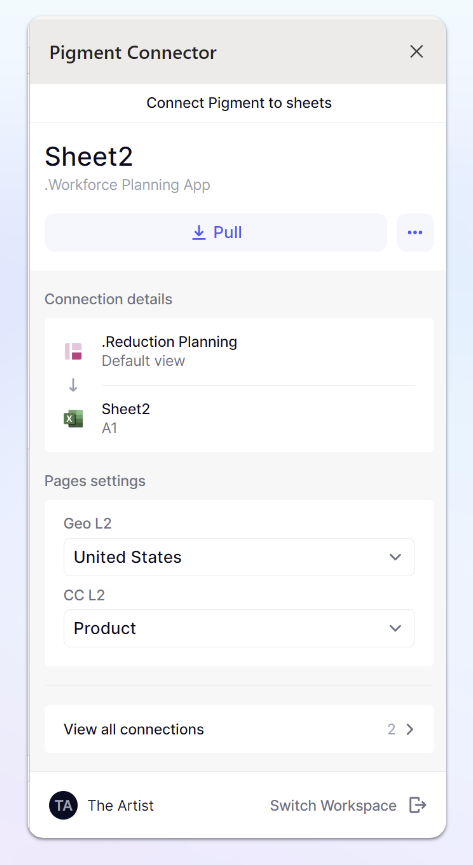
Adjusting Page Selectors
Within a connection, you can adjust the Page Selectors to define which data you would like to view. Under Pages Settings, you’ll see any Dimensions that were in Pages from your View. You can adjust these to the desired date you wish to see. After adjusting the Page Selector, select the Pull button at the top of the panel to refresh the data to match the new selection.
Access Rights are still applied within the Excel Add-in. When working with Pages, users will be able to see all options. However, they will not be able to import data that they do not have access to in Pigment.
For example, if a user does not have access to US data, the US Page Selector option will remain visible but the data will not import.
Manage pull connections
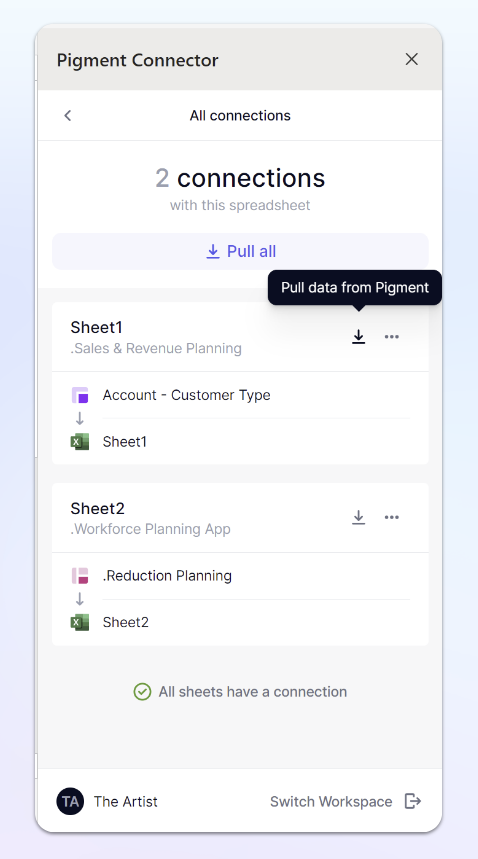
At the bottom of the connector sidebar, you can select View all connections to see all of the connections available in a specific spreadsheet.
| At the bottom of the connector sidebar, you can select View all connections to see all of the connections available in a specific spreadsheet.
From the All connections screen, you can identify all of the connections for a specific spreadsheet.
The connection name will match the name of the sheet that it is on. If you change the name of the sheet, the connection name will update the next time the connection is refreshed.
Under the connection name, you’ll see the name of the Pigment Application.
The Block symbol and name will be located below that.
From the All connections screen, you can select Pull All to refresh the data from all connections. You can also select the Pull icon next to separate connections to run them individually.
You can click on the connection name to open that connection or select the three dots to the right of connection name to view more options.
| 
|
More options
Select the three dots next to a connection to edit, duplicate, reload View configuration or delete a connection.
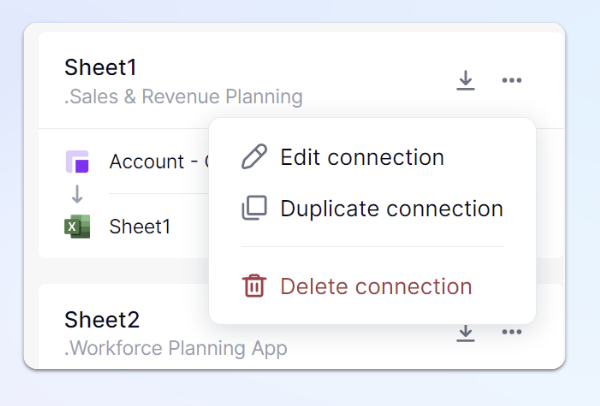
Edit connection. This allows you to adjust the Application, Block, View, and Target specifics.
Duplicate connection. This is used to replicate the configuration settings. When you duplicate a connection you need to specify a new sheet because you can only have one active connection per sheet.
Delete connection. This will remove the connection.
Push data to Pigment
Click on Push Data to send data from your Excel spreadsheet to Pigment. Data is pushed into Pigment through push connections. Push connections allow you to specify the Excel data range you want to import into Pigment. Follow the instructions below to set up a push connection.
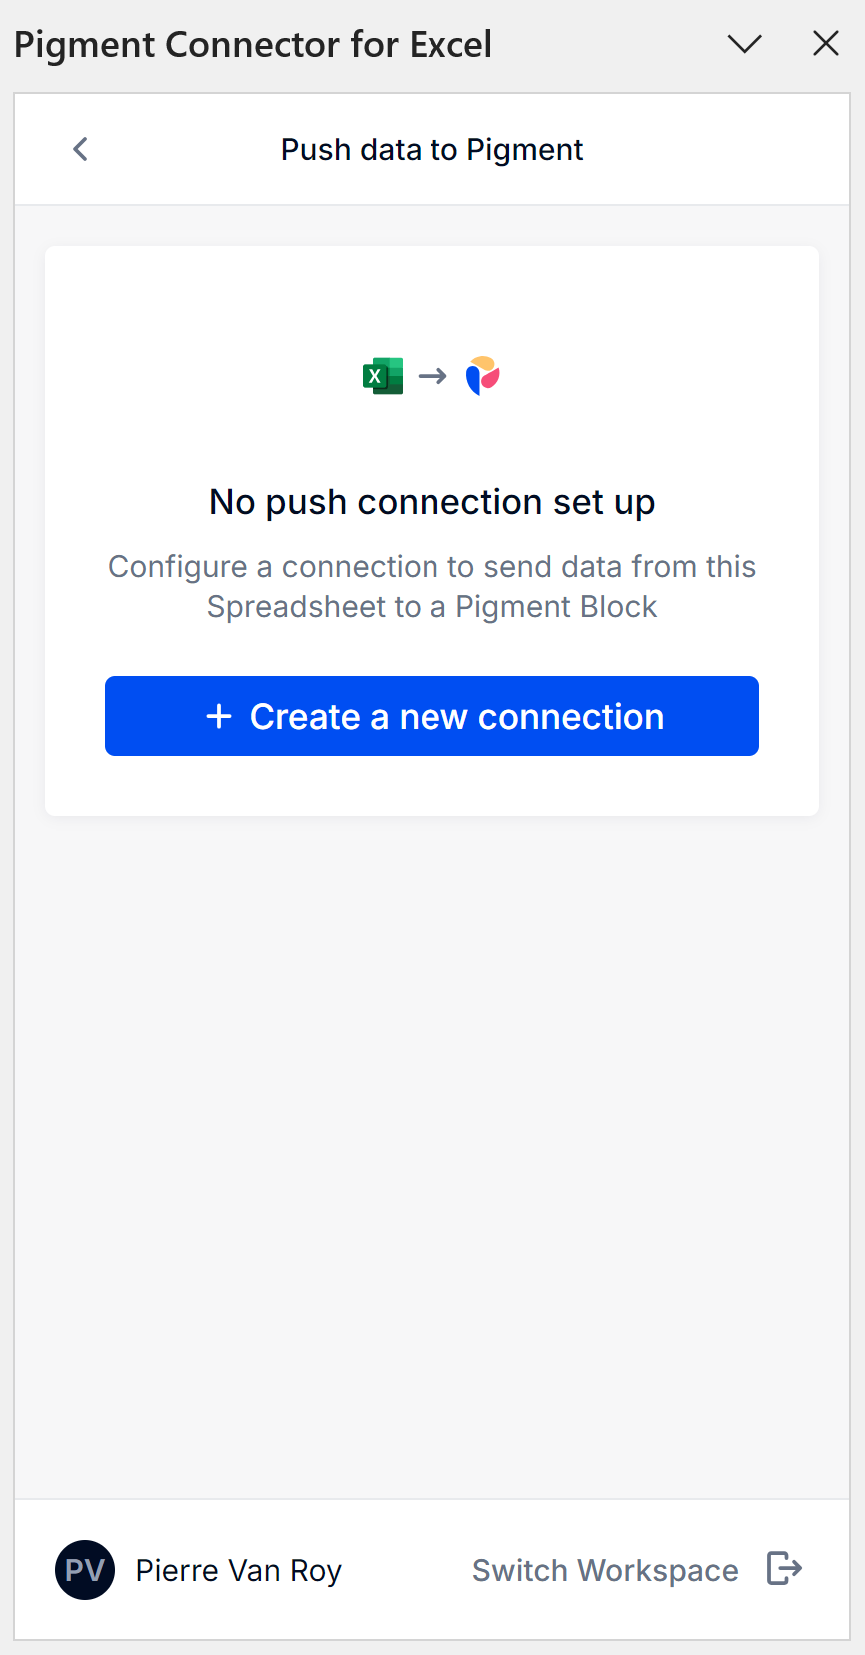
Create a push connection
Click on Create a new connection and fill in the following fields.
| Get data from This section is dedicated to identifying the data in Excel. Sheet Select the Sheet you want to select data from. Cell range Input the top-left and bottom-right cells of the range to send to Pigment Ex: Range start : Named cells With Name (documentation), configure the range of cells in a dynamic way | 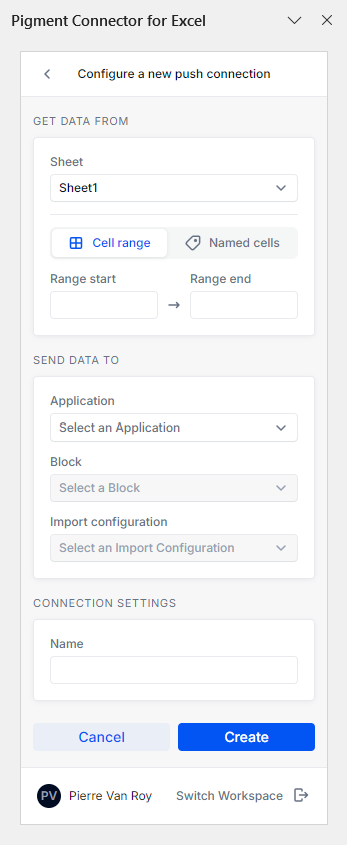
|
| Send data to This area defines the location in Pigment where the data will be imported into. Application Choose the Application that you wish to push the data to. You will see all Applications within the Workspace that you have access to. Block Select the Block you wish to import data into. Import configuration Select the import configurations used.
| |
| Connection Settings Name Name your Push connection. |
Click on Create to finish the process.
Use a push connection
Once created you can push the data by clicking on Push data.
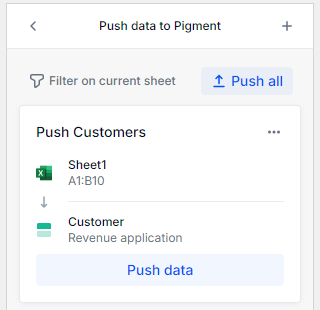
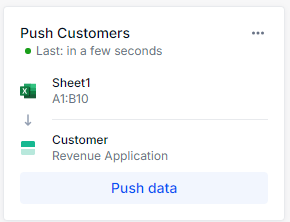
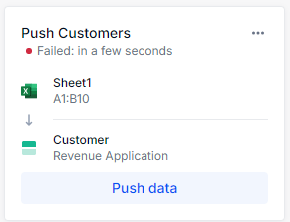
This will trigger an import in Pigment using the import configuration which was selected. An indicator will show you the import status (In progress/Failed/Success).
| 
|
If you want more details on the import process, you can access the import report by clicking on Open last import summary.
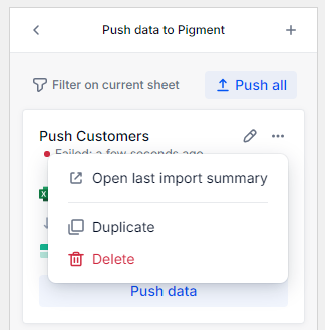
If multiple push connections are configured, you can push all of them by clicking on Push all. In this case, all data will be pushed sequentially.
More options
- Edit connection. This allows you to review and edit the push connection configuration, including cell range, target block, and more.
- Duplicate. This is used to replicate the configuration settings.
- Delete. This will remove the connection.

