
This article provides step-by-step instructions for scheduling data imports to keep your Applications up to date. You can automate Data Flows and import configurations with custom scheduling options, ensuring data is refreshed automatically from integrated sources or other Pigment Blocks.
The article also covers setup requirements, scheduling options, and best practices to help you configure reliable, recurring updates.
 Note
Note
Before you configure a scheduled import, you need to decide if you need to configure a Metric-to-Metric Import or a Pigment Connector from the Integration page, and save an import configuration using this connector.
Before you begin
 Important
Only users with the Can Import Data permission in the Application can access the Import Scheduling page and configure imports.
To access Import Scheduling, you must also have the Import Data Application-level permission.
You can schedule any existing import configuration that doesn't require an external file at the time of import, such as Metric-to-Metric imports or imports using Pigment Connectors.
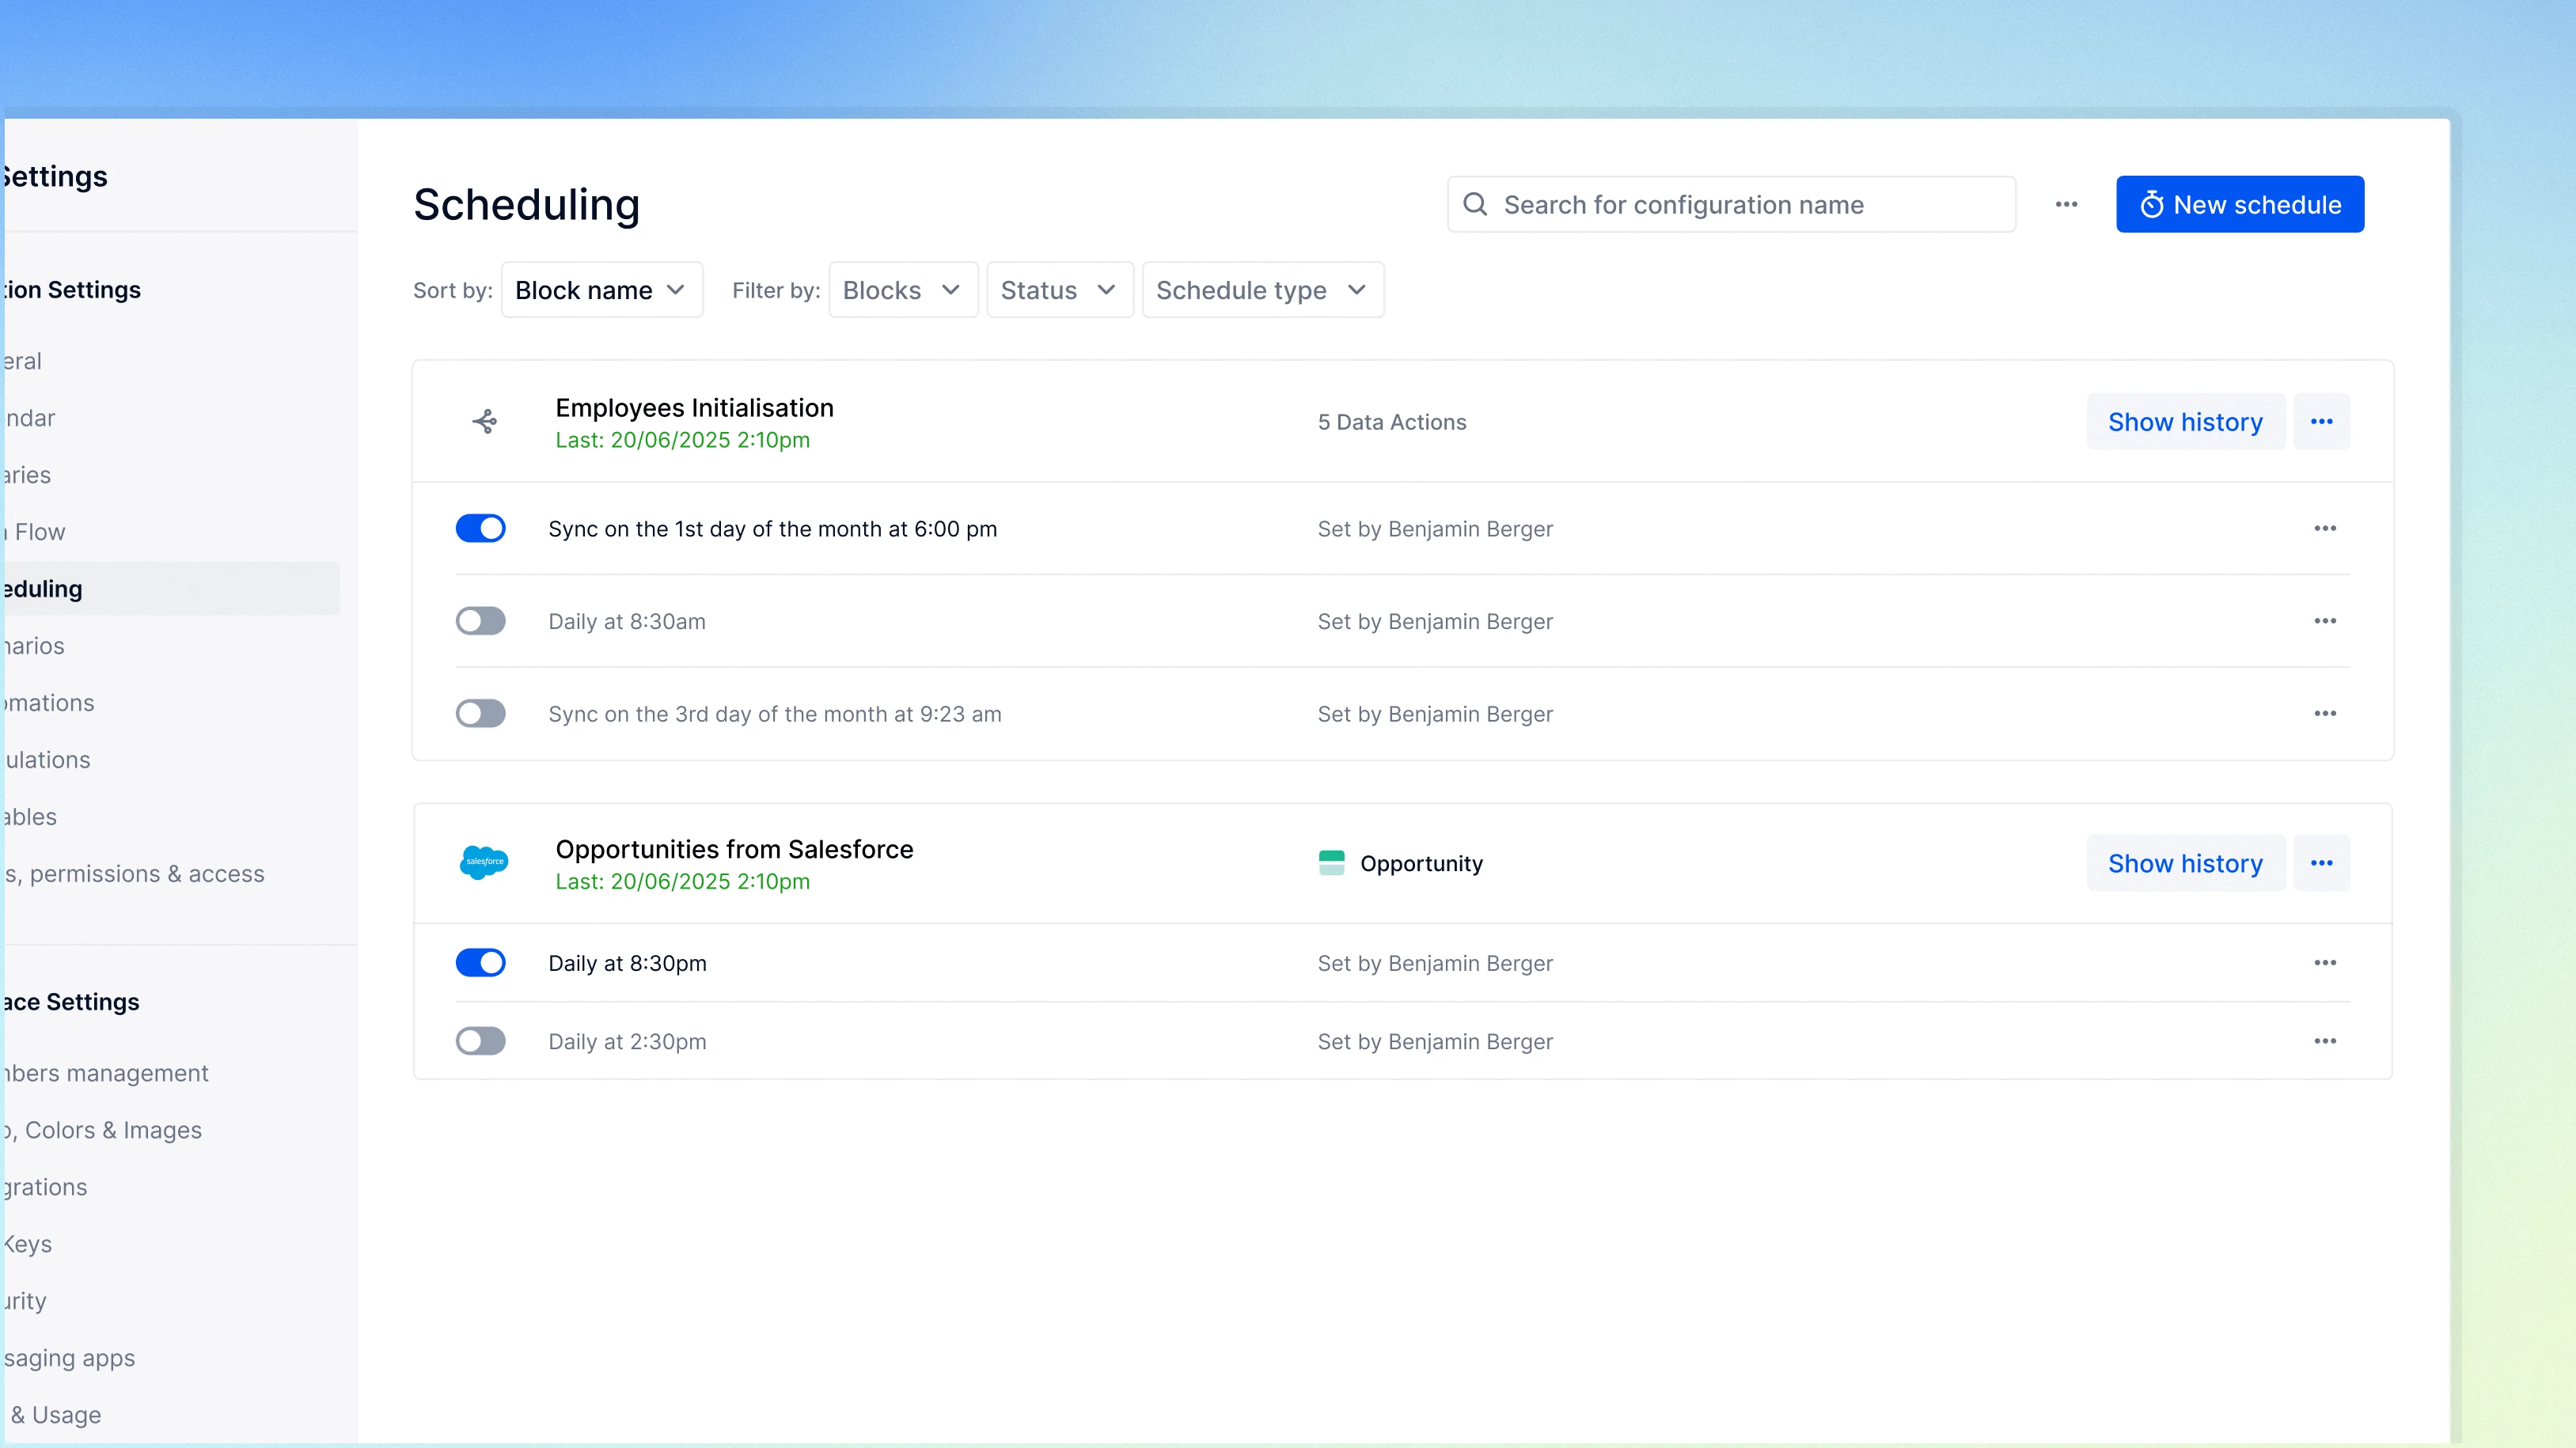
Schedule an import configuration
All import configurations are managed from the Scheduling page. Each schedule is related to a specific Application.
- Open the Application where you want to schedule an import.
- Select More options in the sidebar, then Scheduling.
- Select New Schedule.
- Select Schedule an import to schedule a data import.
- Select Schedule a Data Flow to schedule a Data Flow.
To adjust the settings of existing scheduled import, select the three dots to the right of the name and select Edit schedule. Once you adjust your configuration, select Update Schedule. There are different scheduling options available for data imports and Data Flows.
Schedule an import
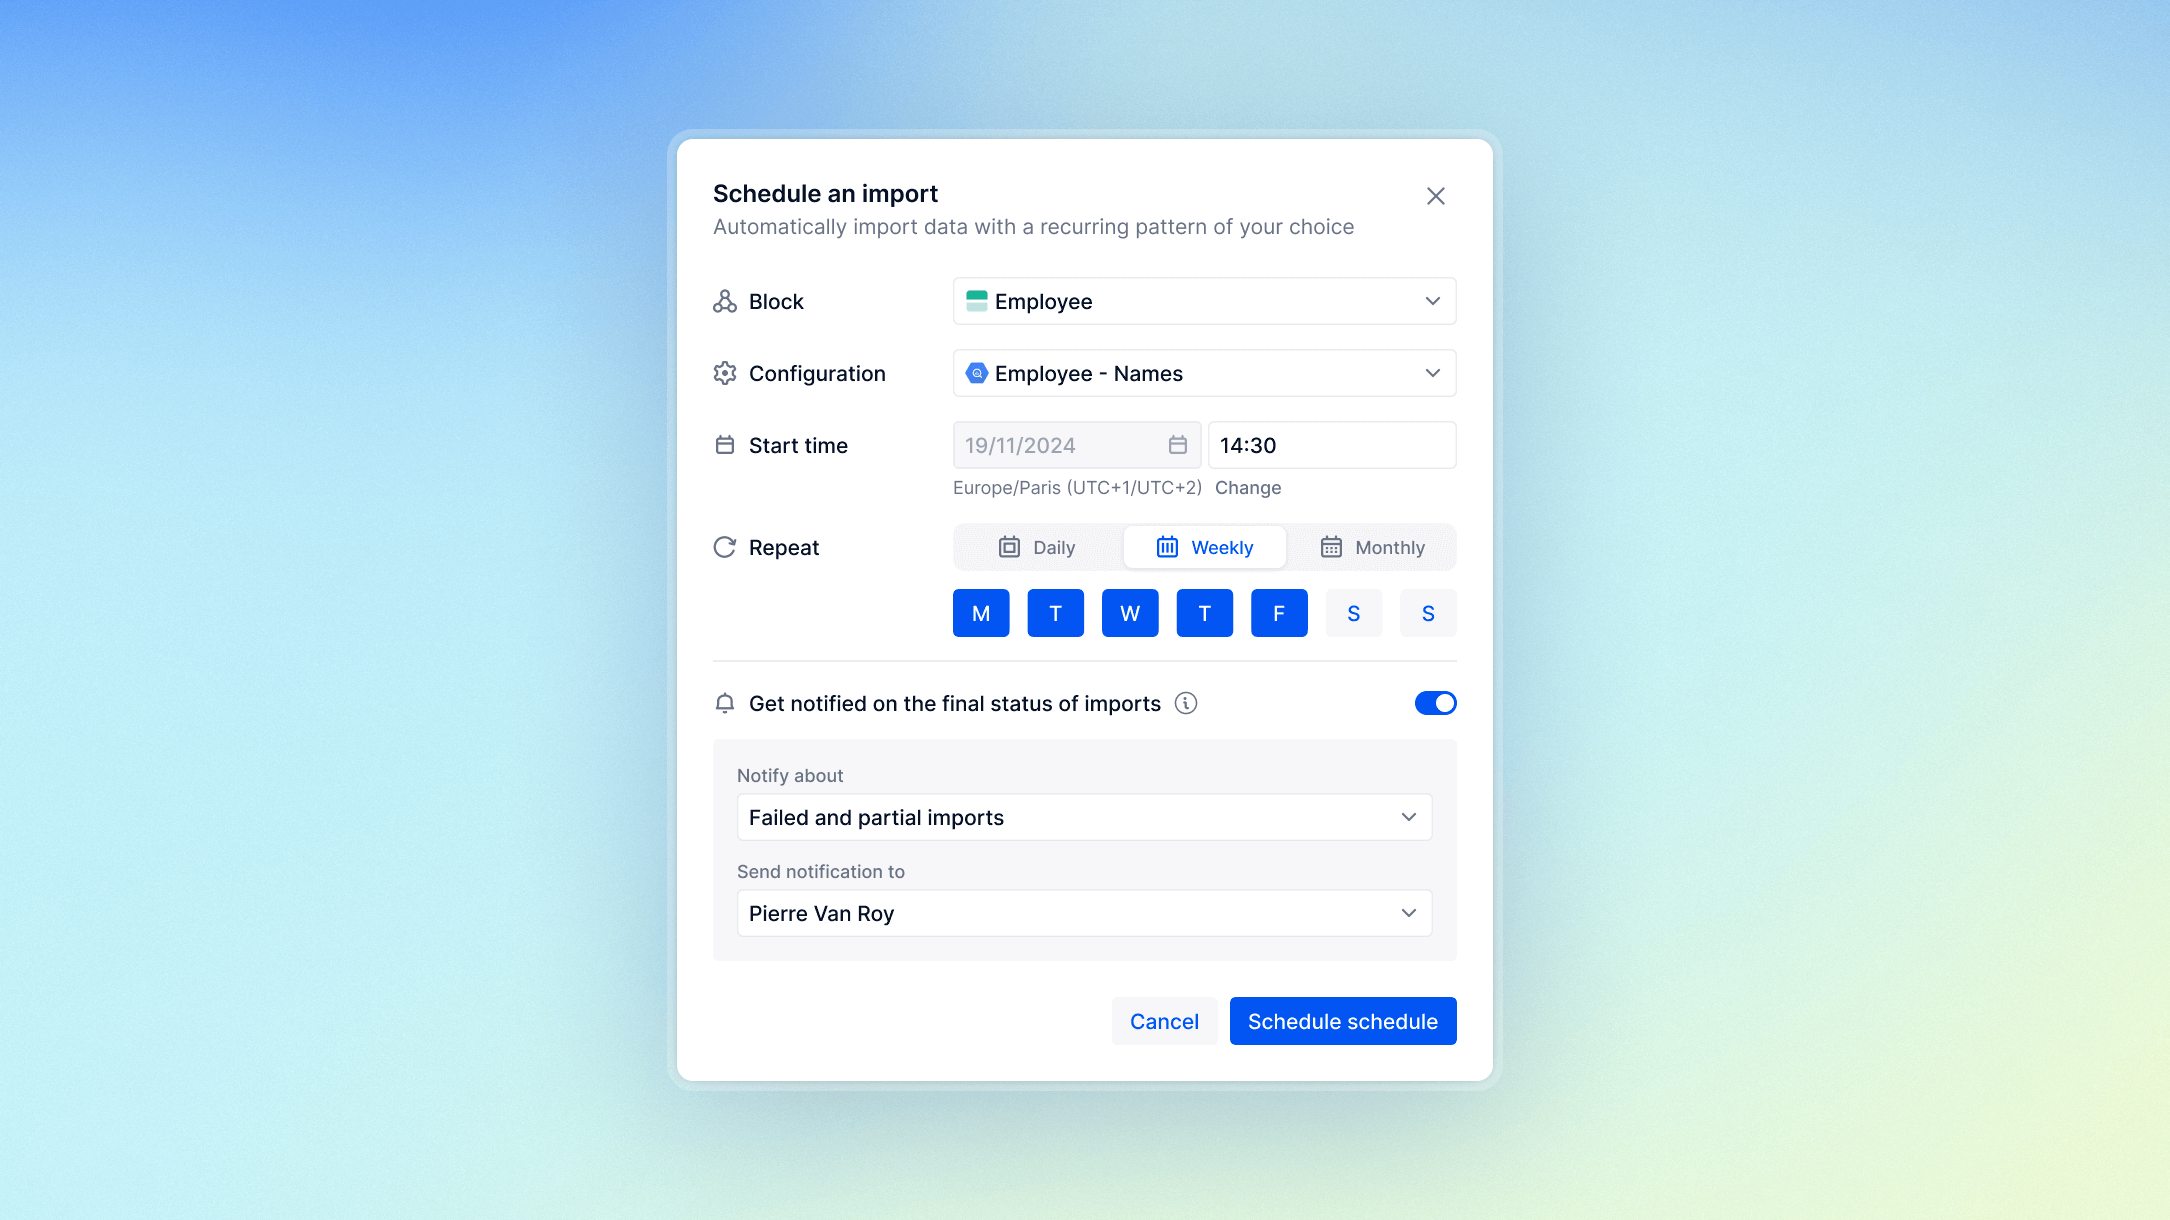
To schedule a data import, configure the following options:
- Block. Select the Block you want to populate during the import. Note
Only Blocks with an import configuration using the a Pigment connector will be available.
- Configuration. Select the Import configuration you want to trigger.
- Start Time. Set the time at which the import should be scheduled. You can select the time zone that you want the import to be scheduled on.
- Repeat. Select the frequency of this import. Note
You can configure up to 4 different schedules on a given import configuration.
- (Optional) Import Notifications. Toggle Get notified on the final status of the import to on.
Enable this option to automatically receive a notification (email or in-app notification) based on import status.
a. Notify about. Select which import status will trigger a notification Failed, Failed and partial, or All imports.
b. Send notification to. Select the Members you wish to send a notification to. - Select Schedule Import to create the import scheduling configuration.
Note
If you need to create several scheduled imports for one connector, we recommend setting a different Start Time for each import. For example, Import #1 1:00 am; Import #2: 1:05 am, and so on.
You no longer need to manually refresh your data once a scheduled import is created. Notifications are delivered in-app, by email, or through the Pigment App in Slack.
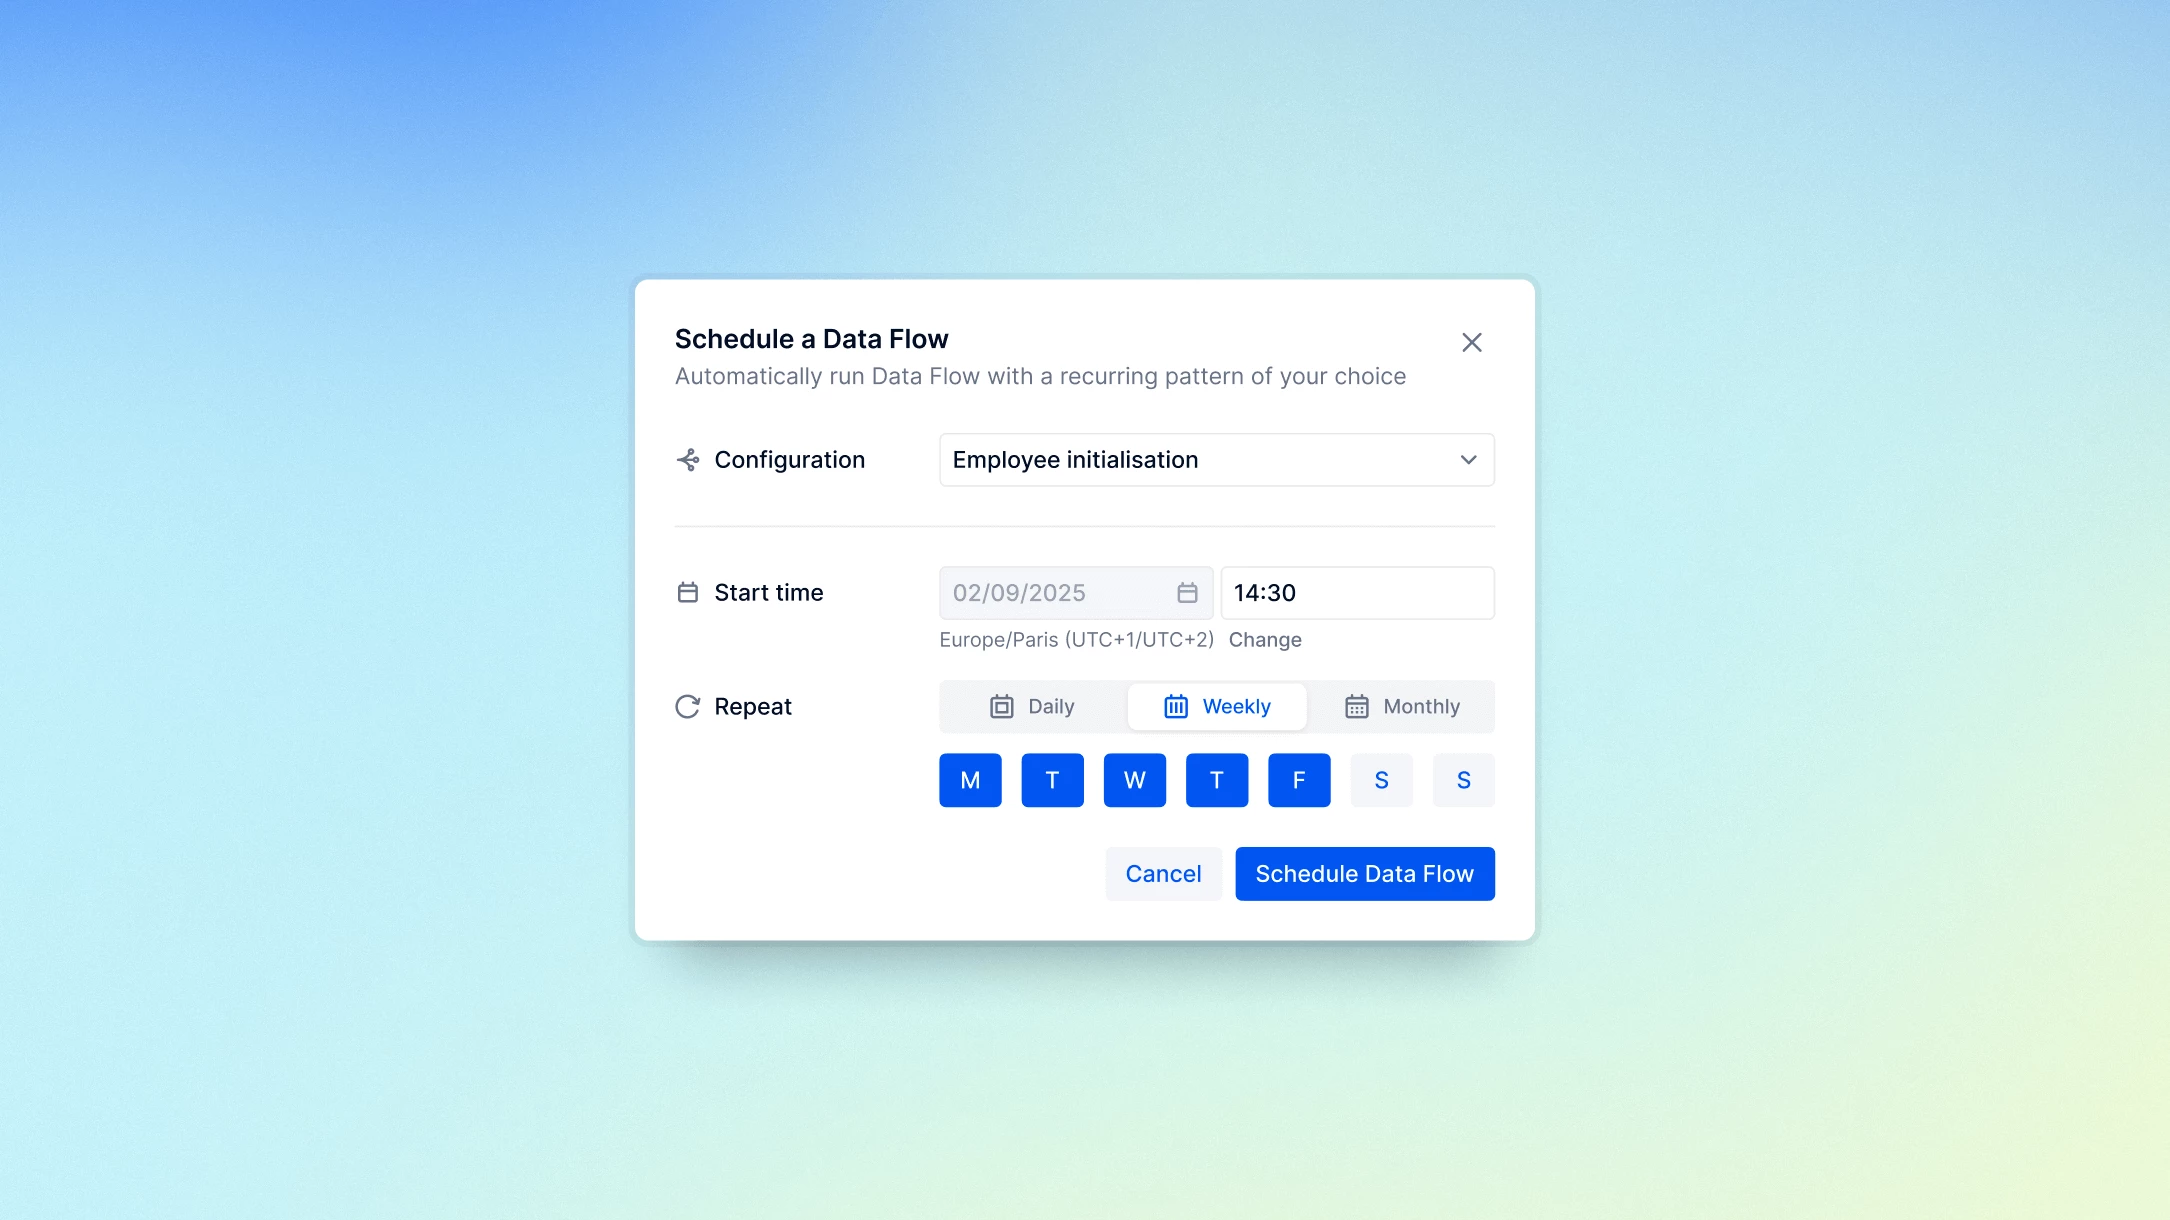
Schedule a Data Flow
To schedule a Data Flow, configure the following options:
-
Configuration. Select the Data Flow configuration you want to trigger.
-
Start time. Set the time at which the Data Flow should be scheduled. You can select the time zone that you want the Data Flow to be scheduled on.
-
Repeat. Select the frequency of this Data Flow.
You can configure up to 4 different schedules on a given import configuration.
-
Select Schedule Data Flow to create the scheduled Data Flow configuration.
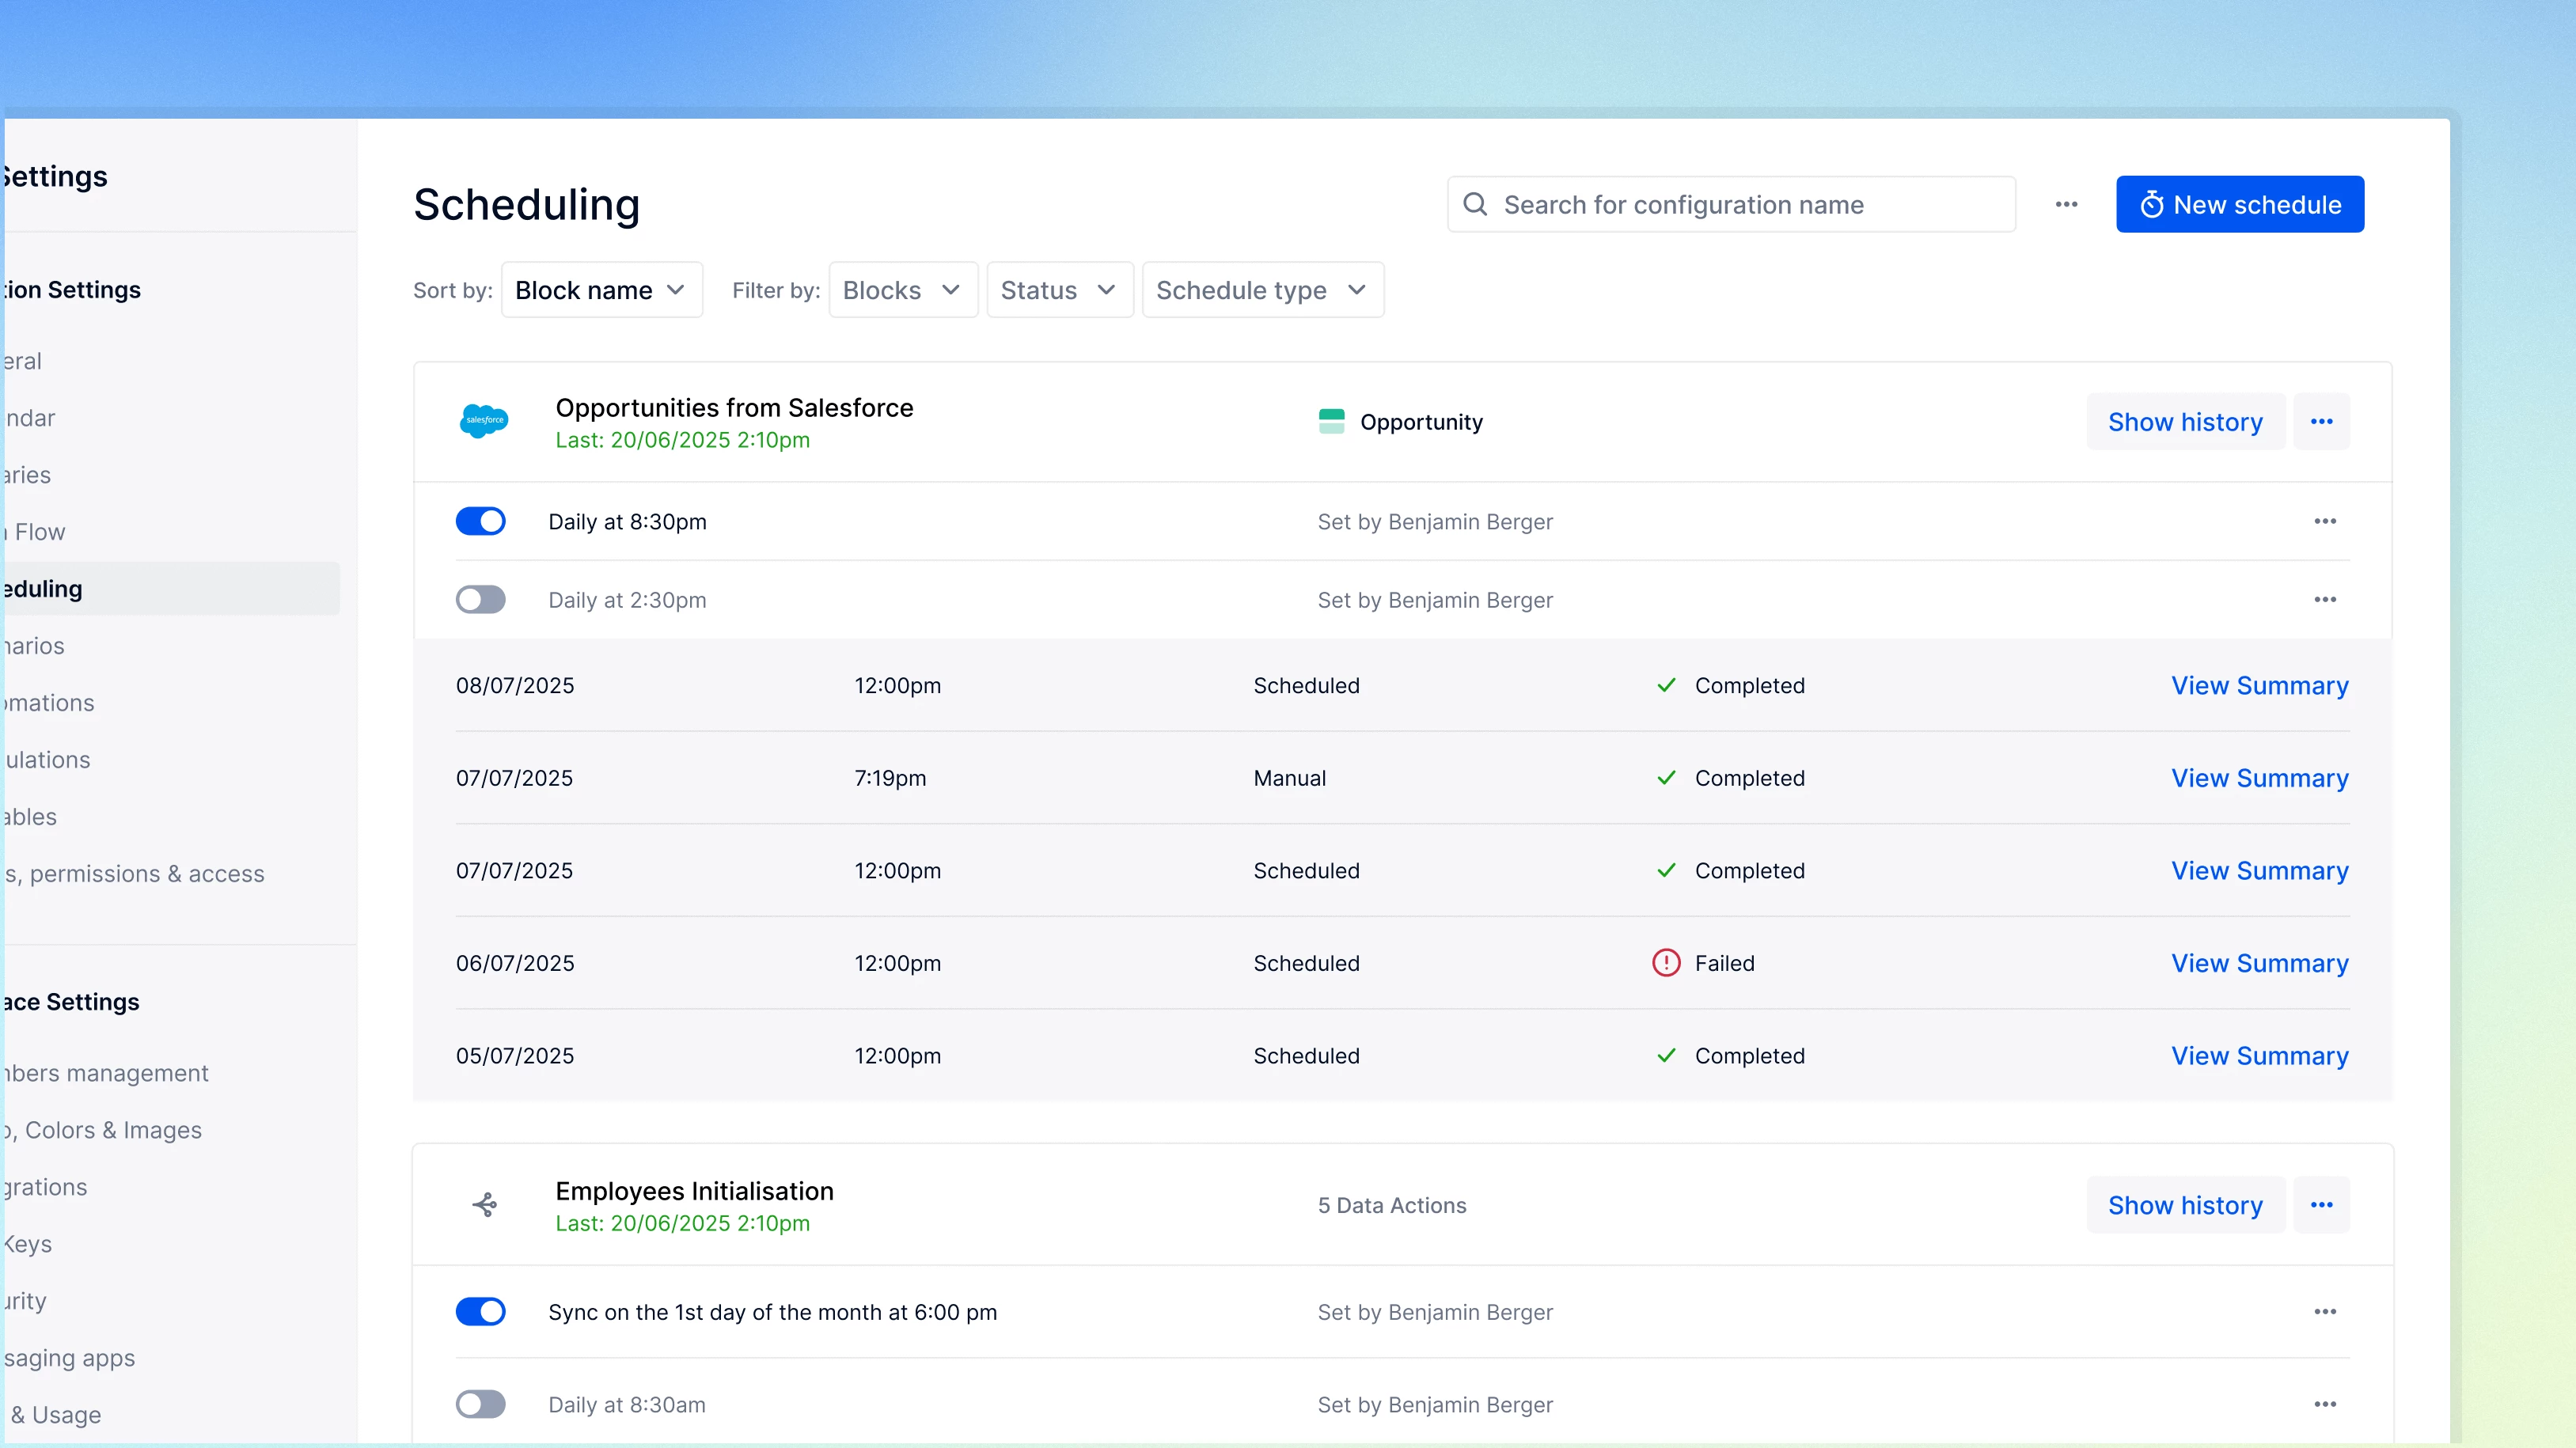
Review and update scheduling configurations
Once you have an import or Data Flow scheduled, you can review and manage all data imports and Data Flows from the Scheduling page.
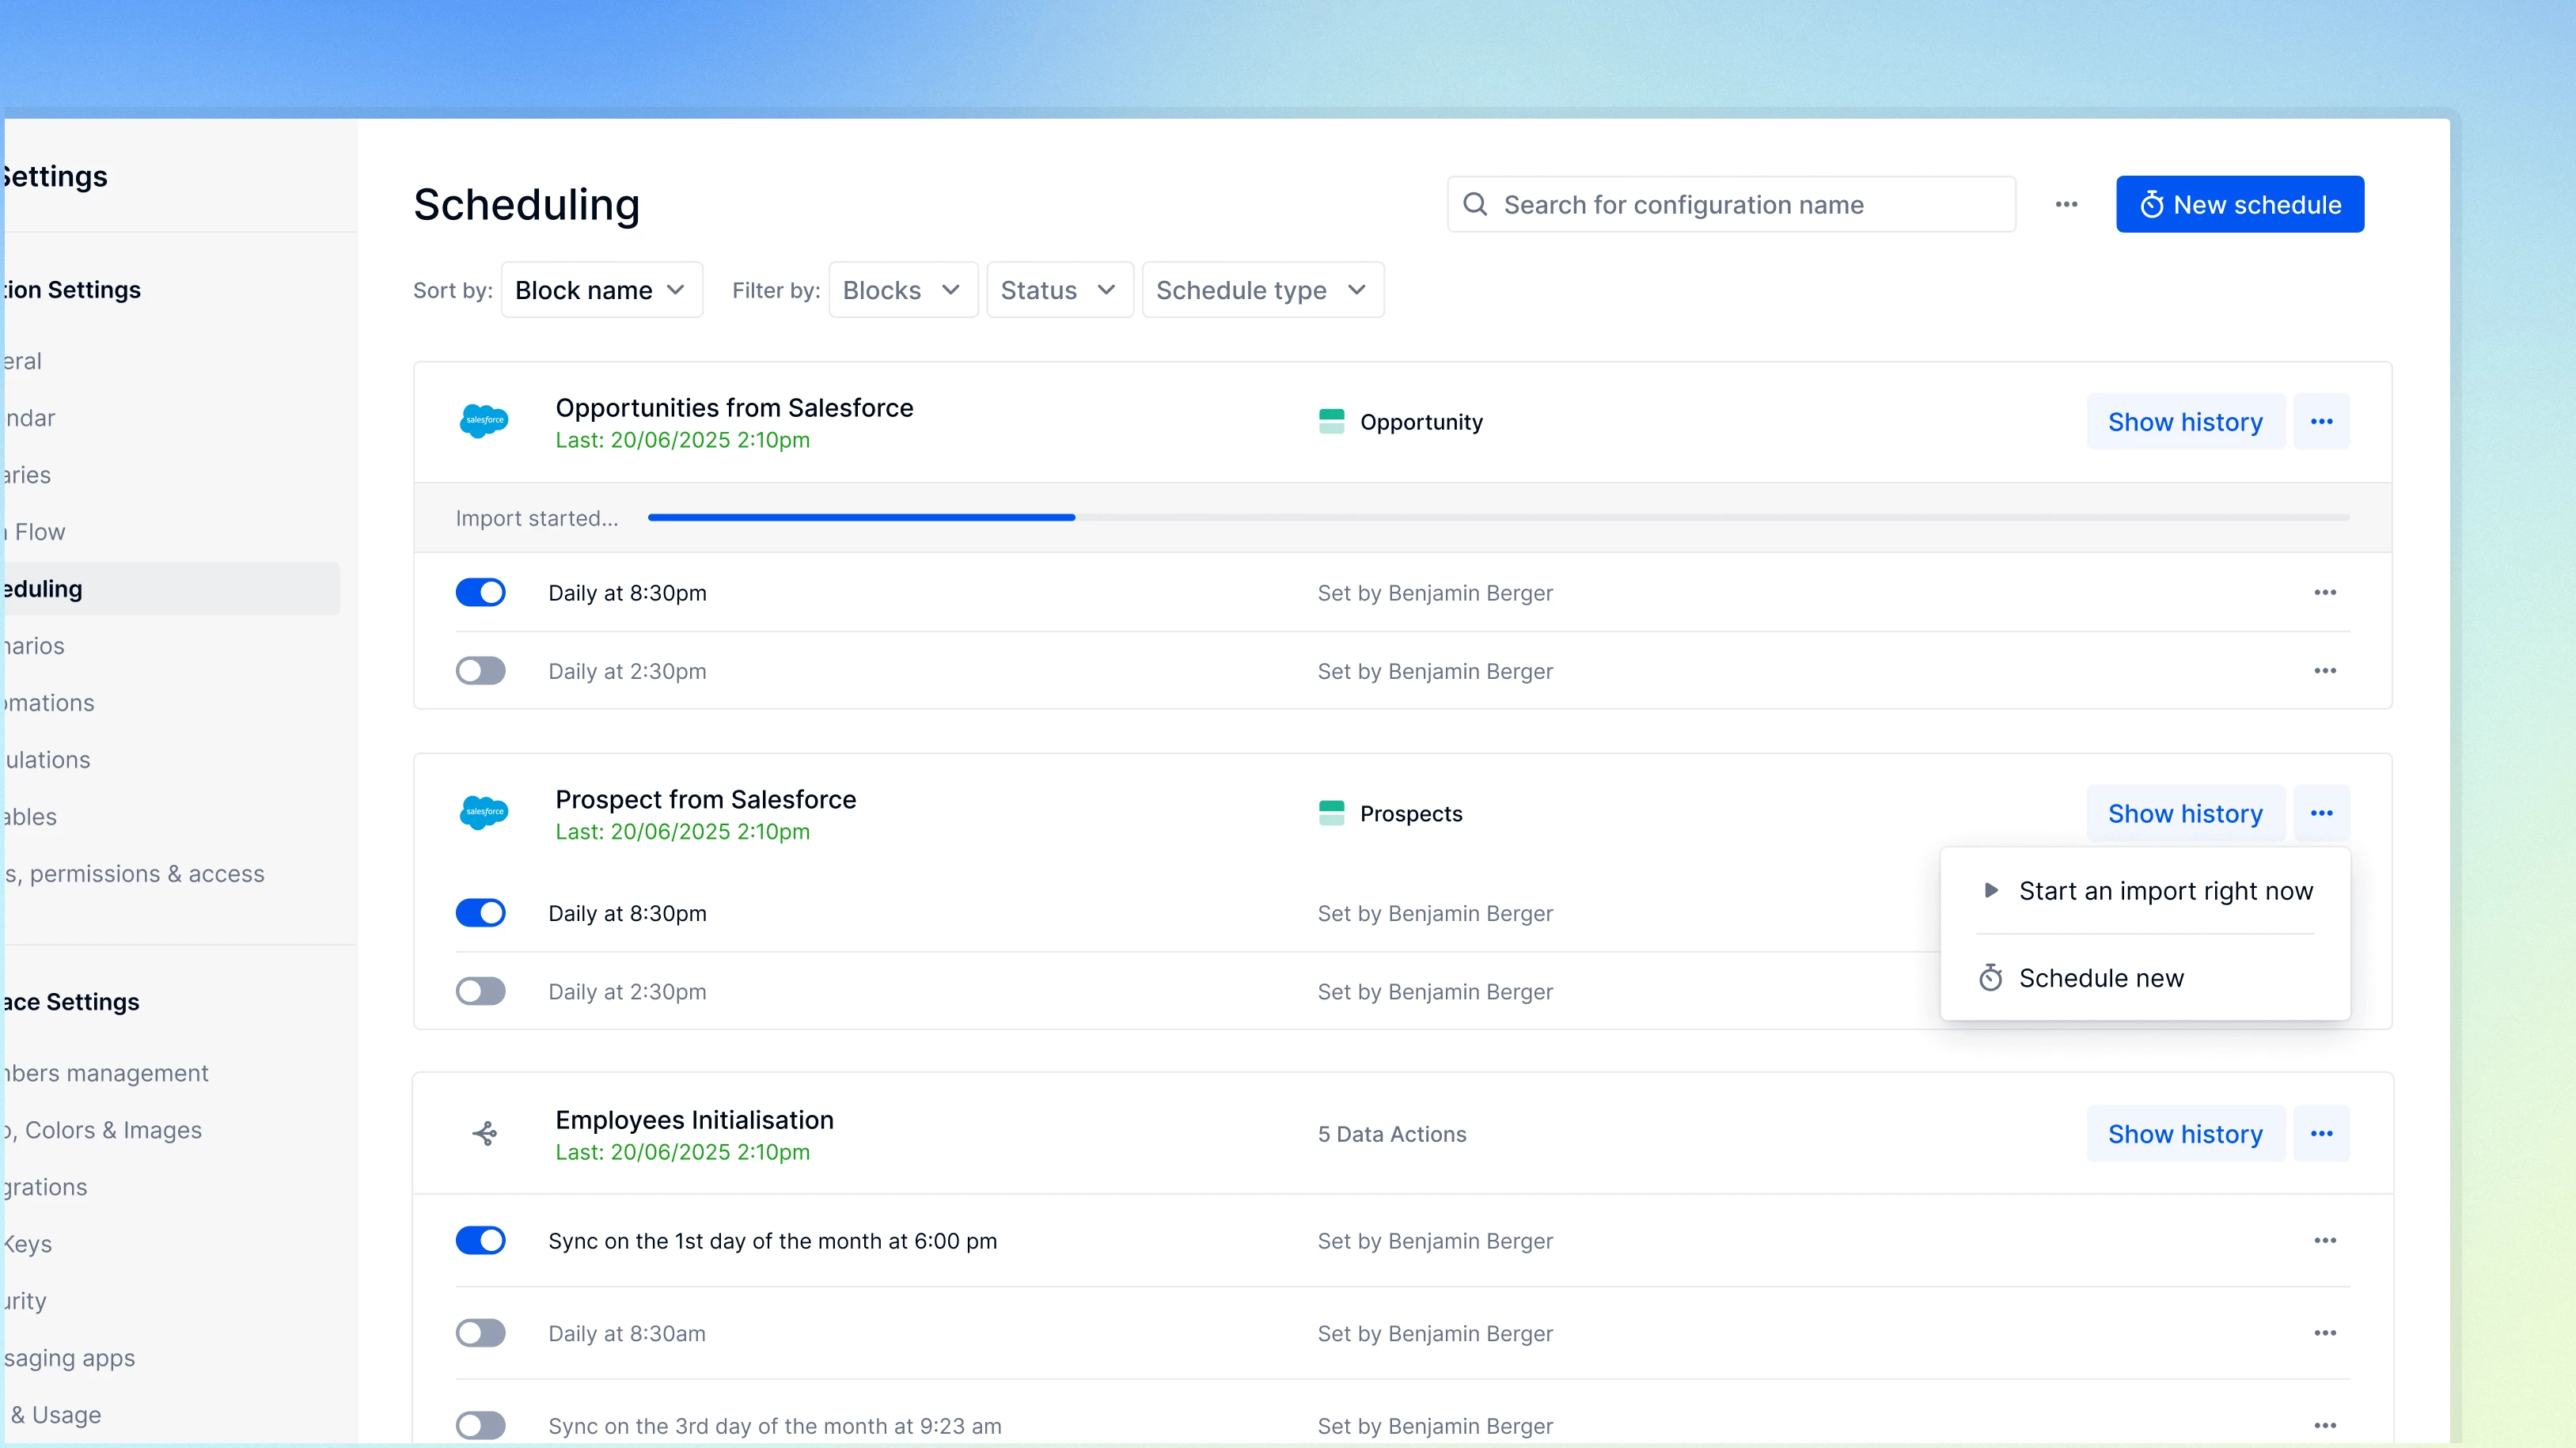
Add a new scheduling option or run import now
Under each import or Data Flow configuration is the scheduling configuration information associated with it.
- Select Start an import right now to trigger the import directly from the Scheduling page.
- Select Schedule new to create a new import schedule.
Manage scheduling configurations
Pause or delete a scheduling configuration
You can use the toggle to turn a scheduling configuration on or off. If you want to delete the import configuration, select the three dots at the end of the configuration and select Delete schedule.
Change ownership of a scheduled import or Data Flow
Important
Scheduling only works with active accounts in a Workspace. If the Member who scheduled an import is deactivated from a Pigment Workspace, you must update the ownership of scheduled imports to prevent import failures.
To change ownership of scheduled imports, open Scheduling. When a Member edits the schedule configuration, they become the owner of the schedule configuration. You must ensure that any recipient of import notifications is updated on the change of ownership.
Show History
The history includes imports triggered either manually or through a scheduling configuration.
- Select Show history to see each instance where a configuration has been triggered.
- Select View Summary to access detailed information about a specific import.
Manage import failure
If an import fails, the import configuration will be flagged with a Failed status and an email notification will be sent if the Failure Alerts option is enabled.
View the history to see details on what caused the import to fail. Once you’ve resolved the issue, select Run Again to confirm the import configuration is working and return a Success status.