

List-to-List import is a type of Block-to-Block import. It allows you to import from one List to another by mapping source and target properties that share the same data type. These imports can be saved and triggered by an Action widget or set up as a scheduled import. This article discusses how to configure and use List-to-List imports.
What is a List-to-List Import?
A List-to-List import allows you to use data from one List Block as the source for importing into another List. This type of Block-to-Block import supports both Transaction Lists and Dimension Lists as either the source or the target.
Imports can be saved and then either scheduled or triggered via an Action Button on a Board. They can also be used to manually transfer data between Lists by mapping properties that share the same data type.
The source List can reside in the same Application as the target List or come from a shared Block. Additionally, you can apply filters to the source using the same filtering options available in View-filtered modes.
⚠️ Important
Members must have the Import Data Permission to trigger a List-to-List import.
- The Read access rights of the Member triggering the List-to-List import will be applied to the source List.
- The Write access rights of the user triggering the List-to-List import will be applied to the target List.
- The Delete Item permission will be required if the Clear Items prior to import option is toggled to On.
Set up a List-to-List Import
When setting up a List-to-List import:
- The target List is the List that will receive the imported data.
- The source List is the List from which the data will be pulled.
⚠️ Important
Members must have the Import Data permission and Read access rights on the source List to import data into the target List.
To set up the List-to-List import:
- Open the target List.
- Select the Import Data button.
- Select Pigment List.
- Select a List from the source List drop-down menu.
- Select Set up import.
Step 1: Filter the Source List
You can configure and preview the data to be imported at this stage of the import. By default, no filters are applied, so the entire source List is included in the import.
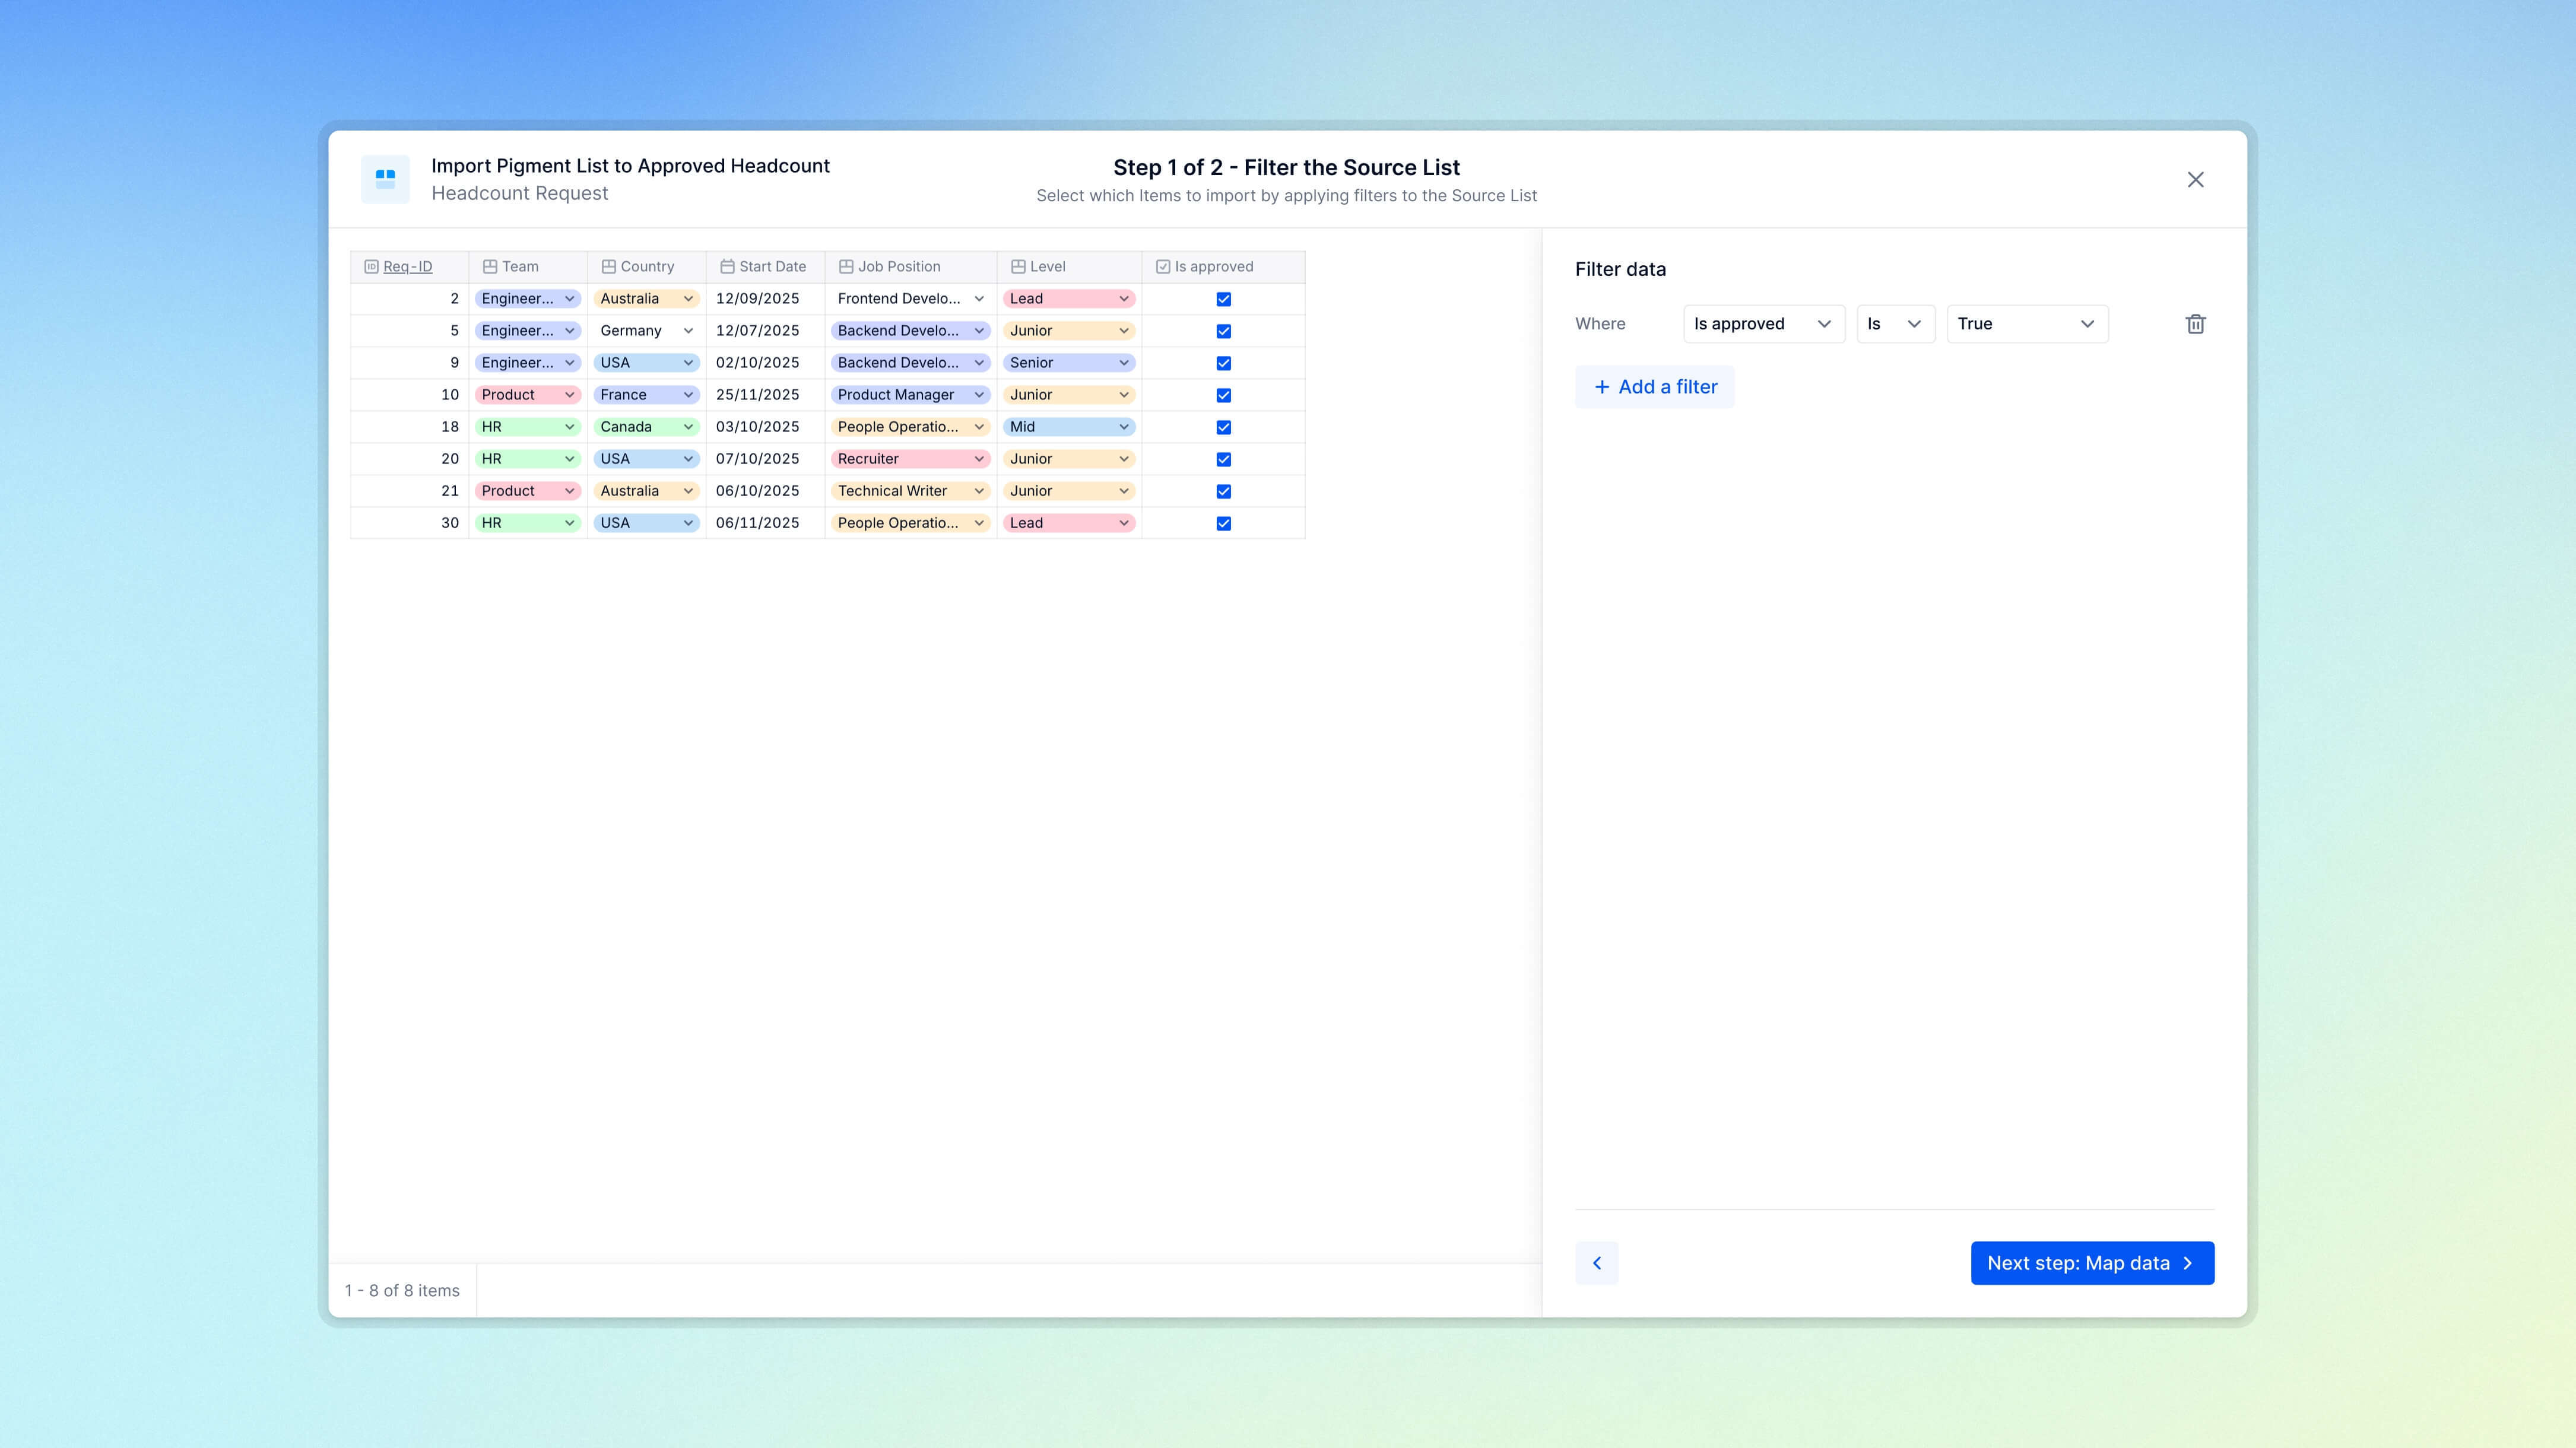
To filter the source data for import:
- Select + Add a filter.
- Select the Property you want to filter on.
- Choose a filter operator. The available operators will vary depending on the Property type.
List of available operators:
| Operator | Data Type |
|---|---|
| Is blank / Is not blank | All |
| Is in / Is not in | Dimension |
| Contains / Does not contain | Text |
| = , ≠ | Text, Boolean, Date, Number and Integer |
| > , < , ≥ , ≤ | Date, Number and Integer |
| Range (Min < N < Max), etc. | Date, Number and Integer |
- Select + Add filter and repeat steps 1 - 3 to add multiple filters. When you apply multiple filters, you can combine them using the AND or OR logical operator. The preview panel on the left updates automatically to show the data that will be imported.
⚠️ Important
The source List is always filtered based on the Read access rights of the Member triggering the import. If the Member configuring the List-to-List import has limited access to the source data, only the records they can access will be included in the import.
- When your data is filtered, select Map Data.
Step 2: Map Data for import
Next, you need to map Properties from the source List to corresponding properties in the target List to define how the data will be imported. Only Properties with compatible data types can be mapped.
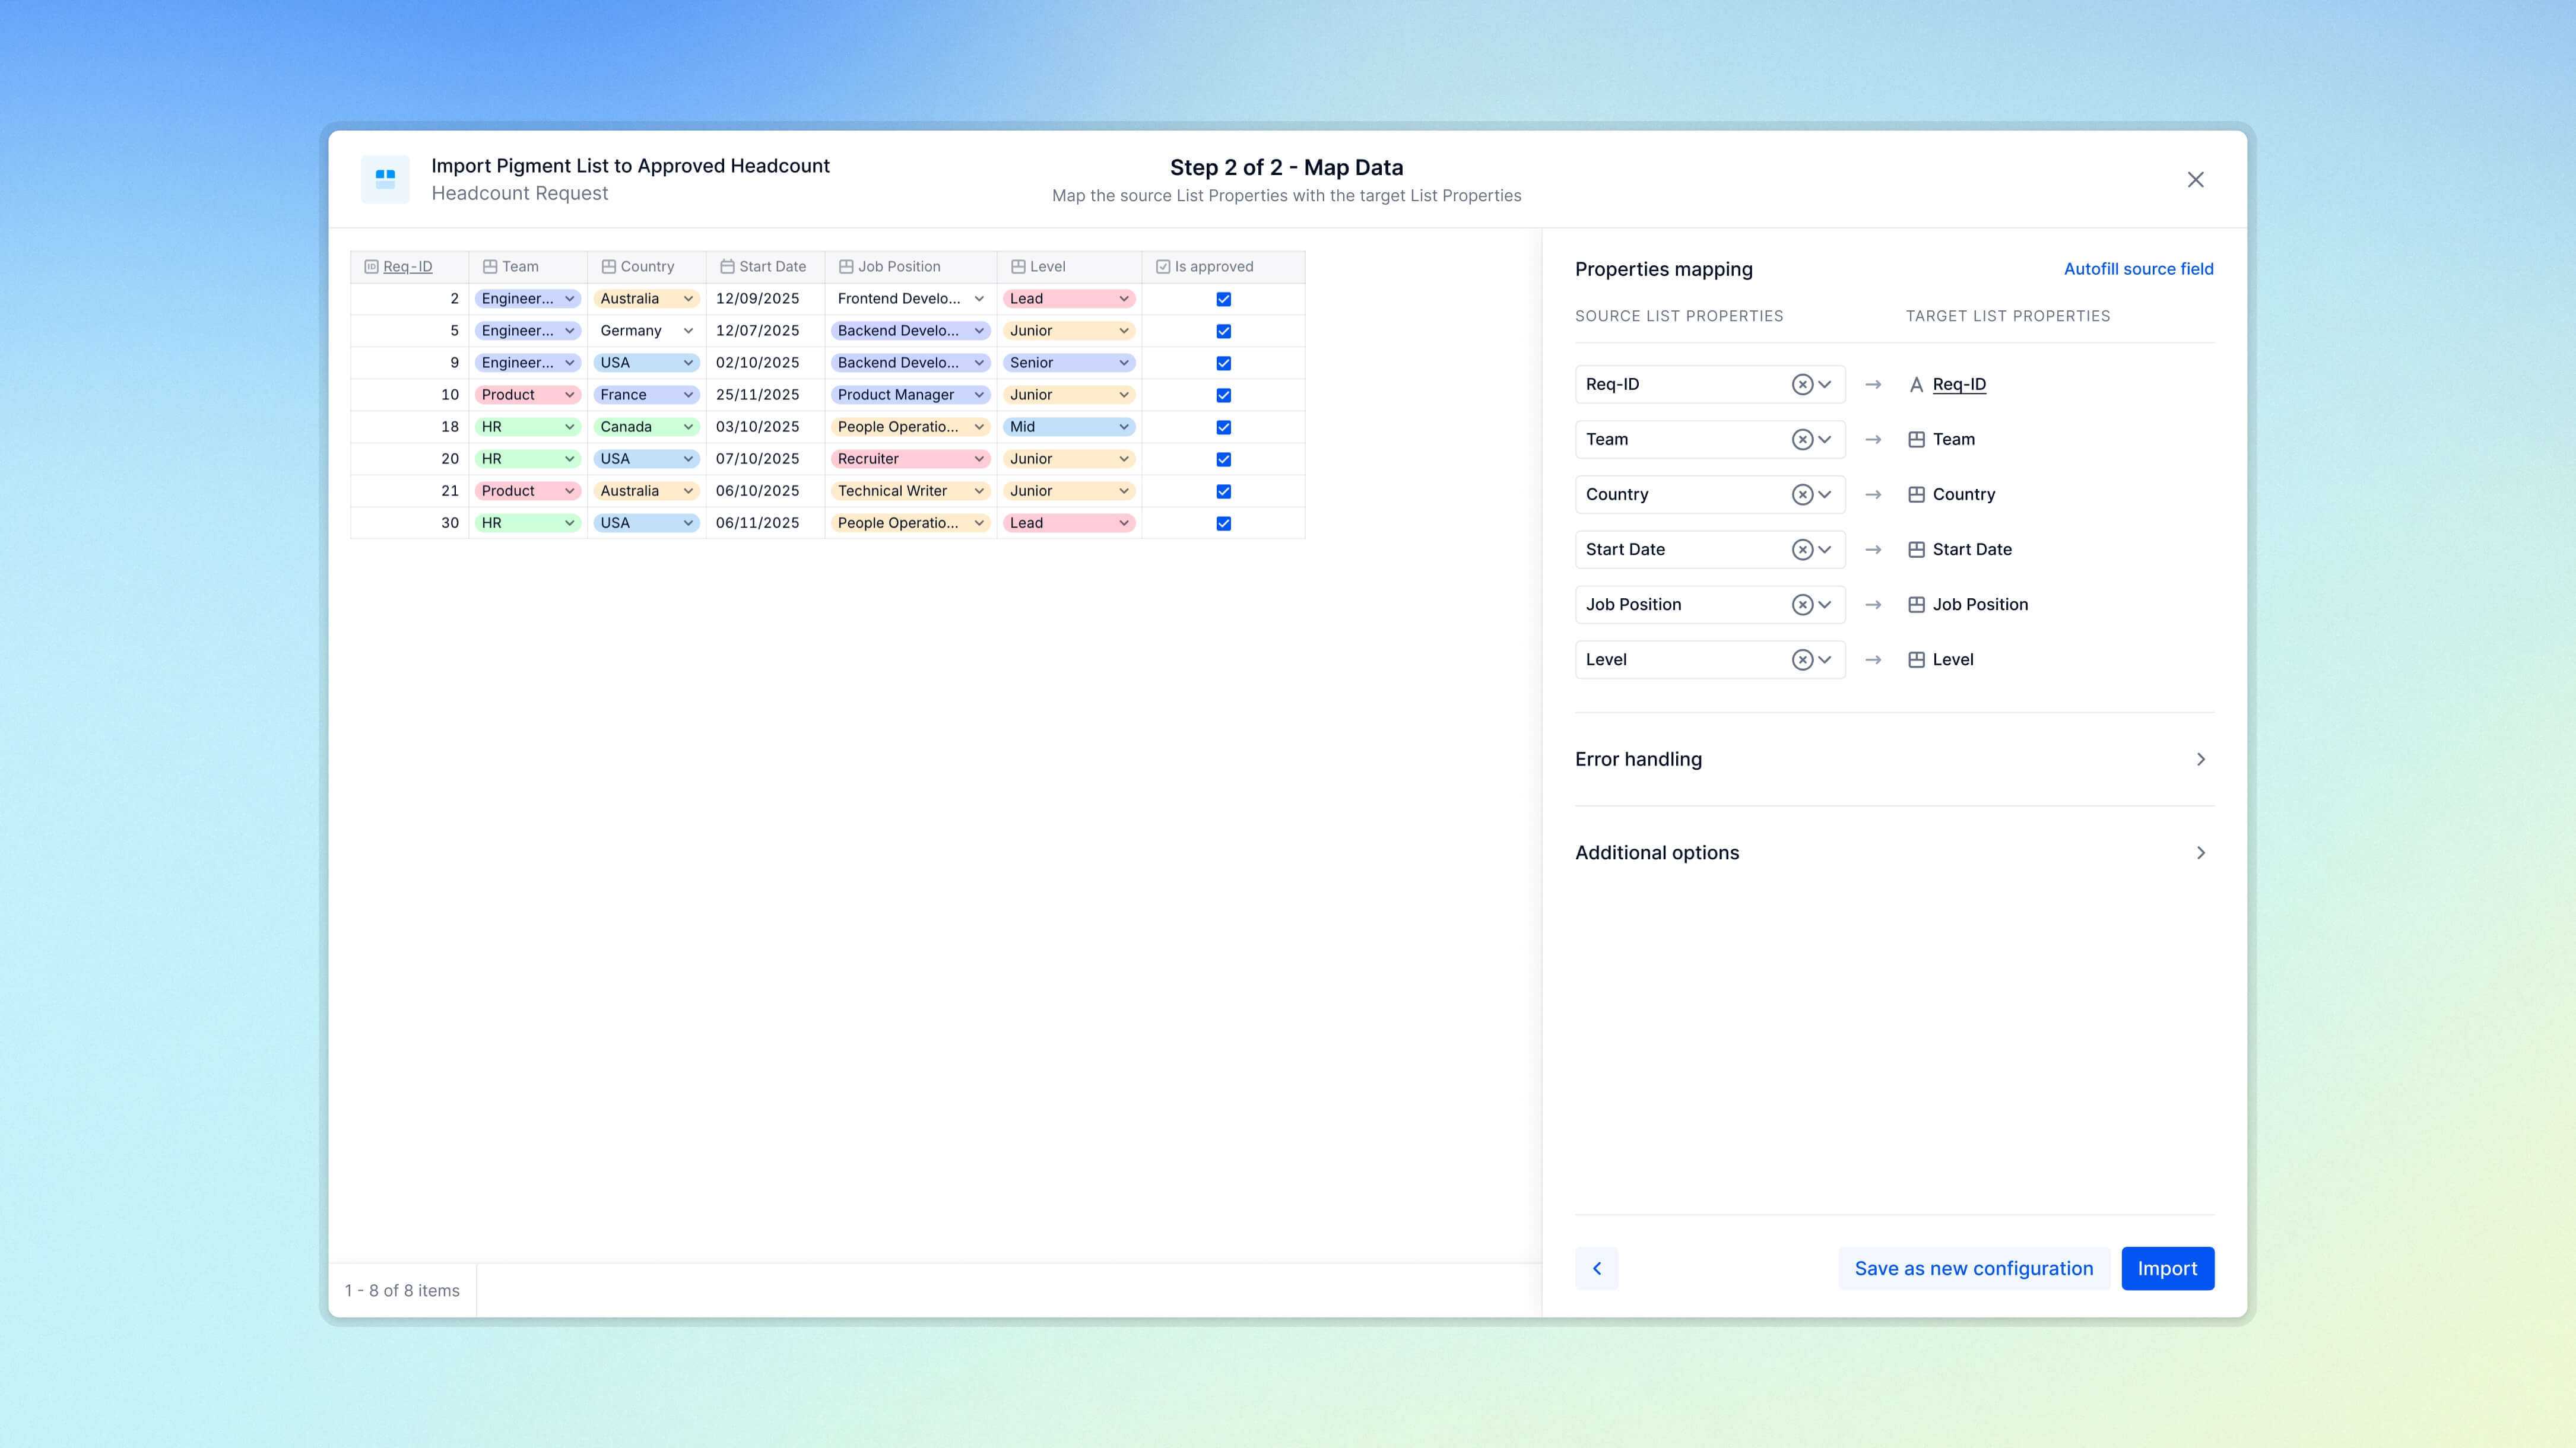
Properties mapping
For each Property in the target List, select the corresponding Property from the source List to import data from.
- Only Properties with the same data type can be mapped (e.g., an Integer Property can only be mapped to another Integer Property).
- Autogenerated or formula-based target Properties cannot be mapped.
- Any target Property left unmapped will not be updated during the import.
- A single source Property can be mapped to multiple target Properties.
ℹ️ Note
To optimize property mapping, select Autofill source fields to automatically link Properties that have identical names and matching data types.
Error handling
For List-to-List imports, you can define what happens if a Member doesn’t have Write access rights or the required permissions to write to the target List.
To import data to a target List, you must have the following access depending on the operation:
- To update existing items. You must have Write access rights on all mapped Properties.
- To create new Items. You must have Write access rights on all mapped Properties and the Add Items permission on the target List.
- To delete items. You must Delete Items permission on the target List. This option is available when Clear items prior to import is toggled to On.
Two options are available if access rights or permissions are missing:
- Fail import. The entire import will be canceled if the user triggering it lacks the required access rights or permissions. This ensures an all-or-nothing import—no items will be partially imported due to insufficient access.
- Reject rows. Only the affected rows will be skipped. The rest of the data will be imported, which may result in a partial import.
Additional options
⚠️ Important
This option is only available when the target List is a Transaction List. For more information, see Clear Items prior to import in Transactions Lists.
In Transaction Lists, use the Clear items prior to import option to remove existing Items before import. This replaces the current Items with those from the imported data.
When this setting is enabled, you can use the following options to define how Items are deleted from the List:
- Delete the entire List
- Define a specific set of Items to be deleted
To use Clear Items prior to import:
- Select Additional options and toggle Clear Items prior to import to On.
- Toggle on All items to delete the entire List or Limited scope to delete a specific set of Items. If using Limited scope, select the source List to define which Items should be deleted and replaced.
- Select Import.
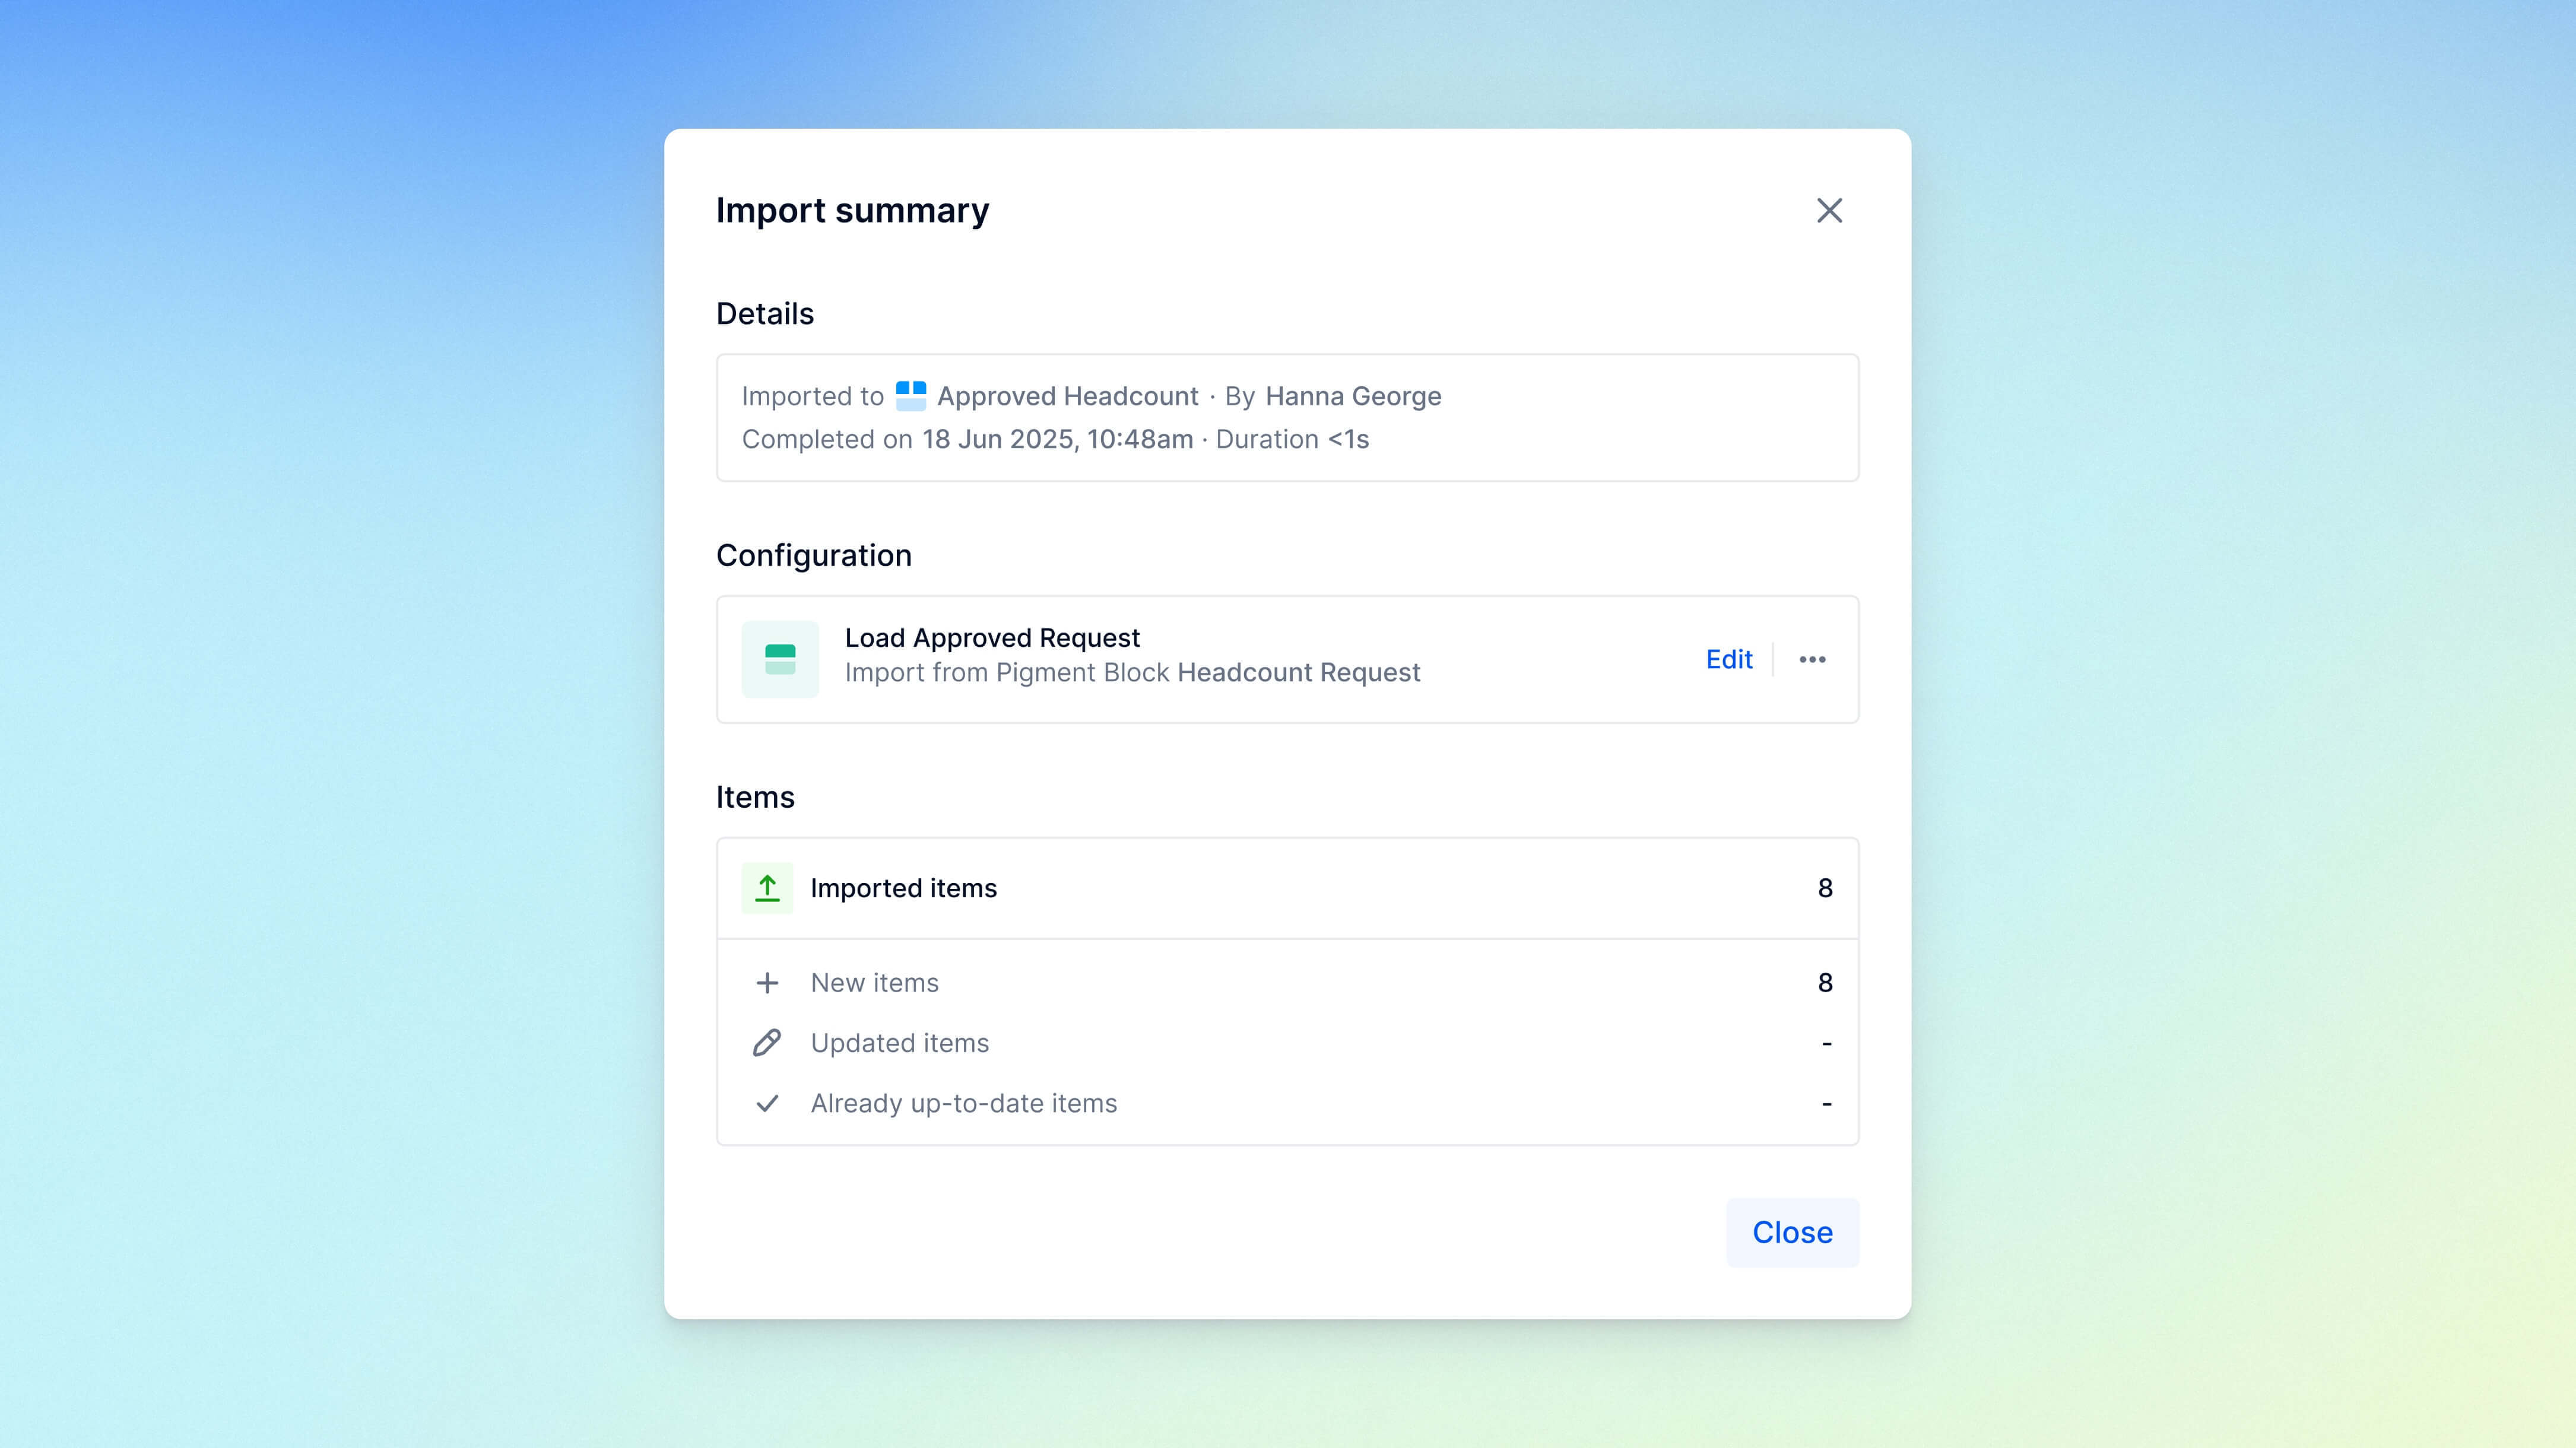
Import summary
When the import is complete, a report will display the number of Items created, updated, or deleted in the target List.
The report also highlights any rows that were skipped, such as those the user didn’t have permission or access rights to modify, or rows that existed in the source data but not in the target List.
Save configuration
If you plan to run this import multiple times, you can save the configuration by selecting Save as new. This option is available before launching the import when mapping data and after the import completes in the import summary.
To reload a saved configuration, select Edit in the first step of the import process. This will restore the settings for both Step 1 and Step 2.
Saving the import configuration is needed in order to be able to:
- Trigger the import from a Board using an Action button.
- Schedule an import in the import scheduling page.