
This article sets out how to clone data in Metrics from one Item in a List to another, providing use cases and examples.
Before you begin
Cloning Metric data can help modelers in the following situations:
-
You want to add a new geography to the model based on existing data.
-
You want to initiate a new Version based on existing data.
-
You are launching a new product line and want to base its sales forecast on your existing product.
-
You want to set up a Board with an action widget for Members to repetitively define and trigger cloning.
 Important
Members must have the following permissions:
-
Clone Data permission to trigger cloning from a Board or elsewhere
-
Configure Block permission to set up a Board to allow Members to trigger a clone through an Action Button
 ️ Warning
Cloning Metric data is irreversible. After data is transferred from the Metrics of one Item to another, it can’t be reversed and any data that was in the target Item is overwritten, even if you are copying blank cells over.
You may need to create a blank target Item beforehand and you must check all the affected Metrics in the Clone data dialog before confirming the cloning of data.
How it works
The Clone data in Metrics feature works with any List Item of your Application and in no more than a few clicks. There are some considerations to know first:
-
Data is cloned from one Item (called the source Item) to another. This means that you need to create an Item before copying data onto it.
-
Data is cloned for each eligible Metric you choose. During the process (see below) you select from all Metrics that:
-
use the Dimension you specify;
-
do not contain a formula, or have formula overrides enabled in the Metric settings.
-
-
Data is cloned inside the Application where the clone is triggered. This means that even if a Dimension is shared, no data is cloned in Metrics outside the Application.
-
Data is cloned based upon the access rights and permissions of the Member initiating it. The data copy is only applied to the cells of the Metrics that you have access rights for. This means data is cloned only where you have:
-
Read access on the cells of all Metrics from which you want to clone data (the source Items)
-
Write access on the cells of all Metrics to which you want to clone data (the target Items)
-
How to access Clone Data in Metrics
You can bring up the Clone Data in Metrics dialog in the following ways:
From the Block Explorer
-
In your Application, select All Blocks or any folder from the sidebar.
-
Select More in the top right of the main pane.
-
Select Clone data in Metrics.
From a Dimension
-
Right-select the Dimension Item you wish to copy.
-
Select Clone data in Metrics.
-
The Clone data in Metrics dialog opens with the Item pre-populated.
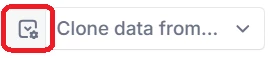
From a Metric or Table
-
Whether in Blocks or on a Board, from the Dimension Items displayed in rows or columns, right-select the one you wish to clone from.
-
Select Clone data from Item.
-
The Clone data in Metrics dialog opens with the Item pre-populated.
From Application Settings
-
In your Application, select Settings, the three-dot menu in the sidebar with the More options tooltip.
-
Select Data Actions & Flows.
-
Select the Clone data in Metrics tab in the main pane.
-
Select Clone data.
The Clone data in Metrics dialog
The Clone data in Metrics dialog steps you through four fields, shown below.
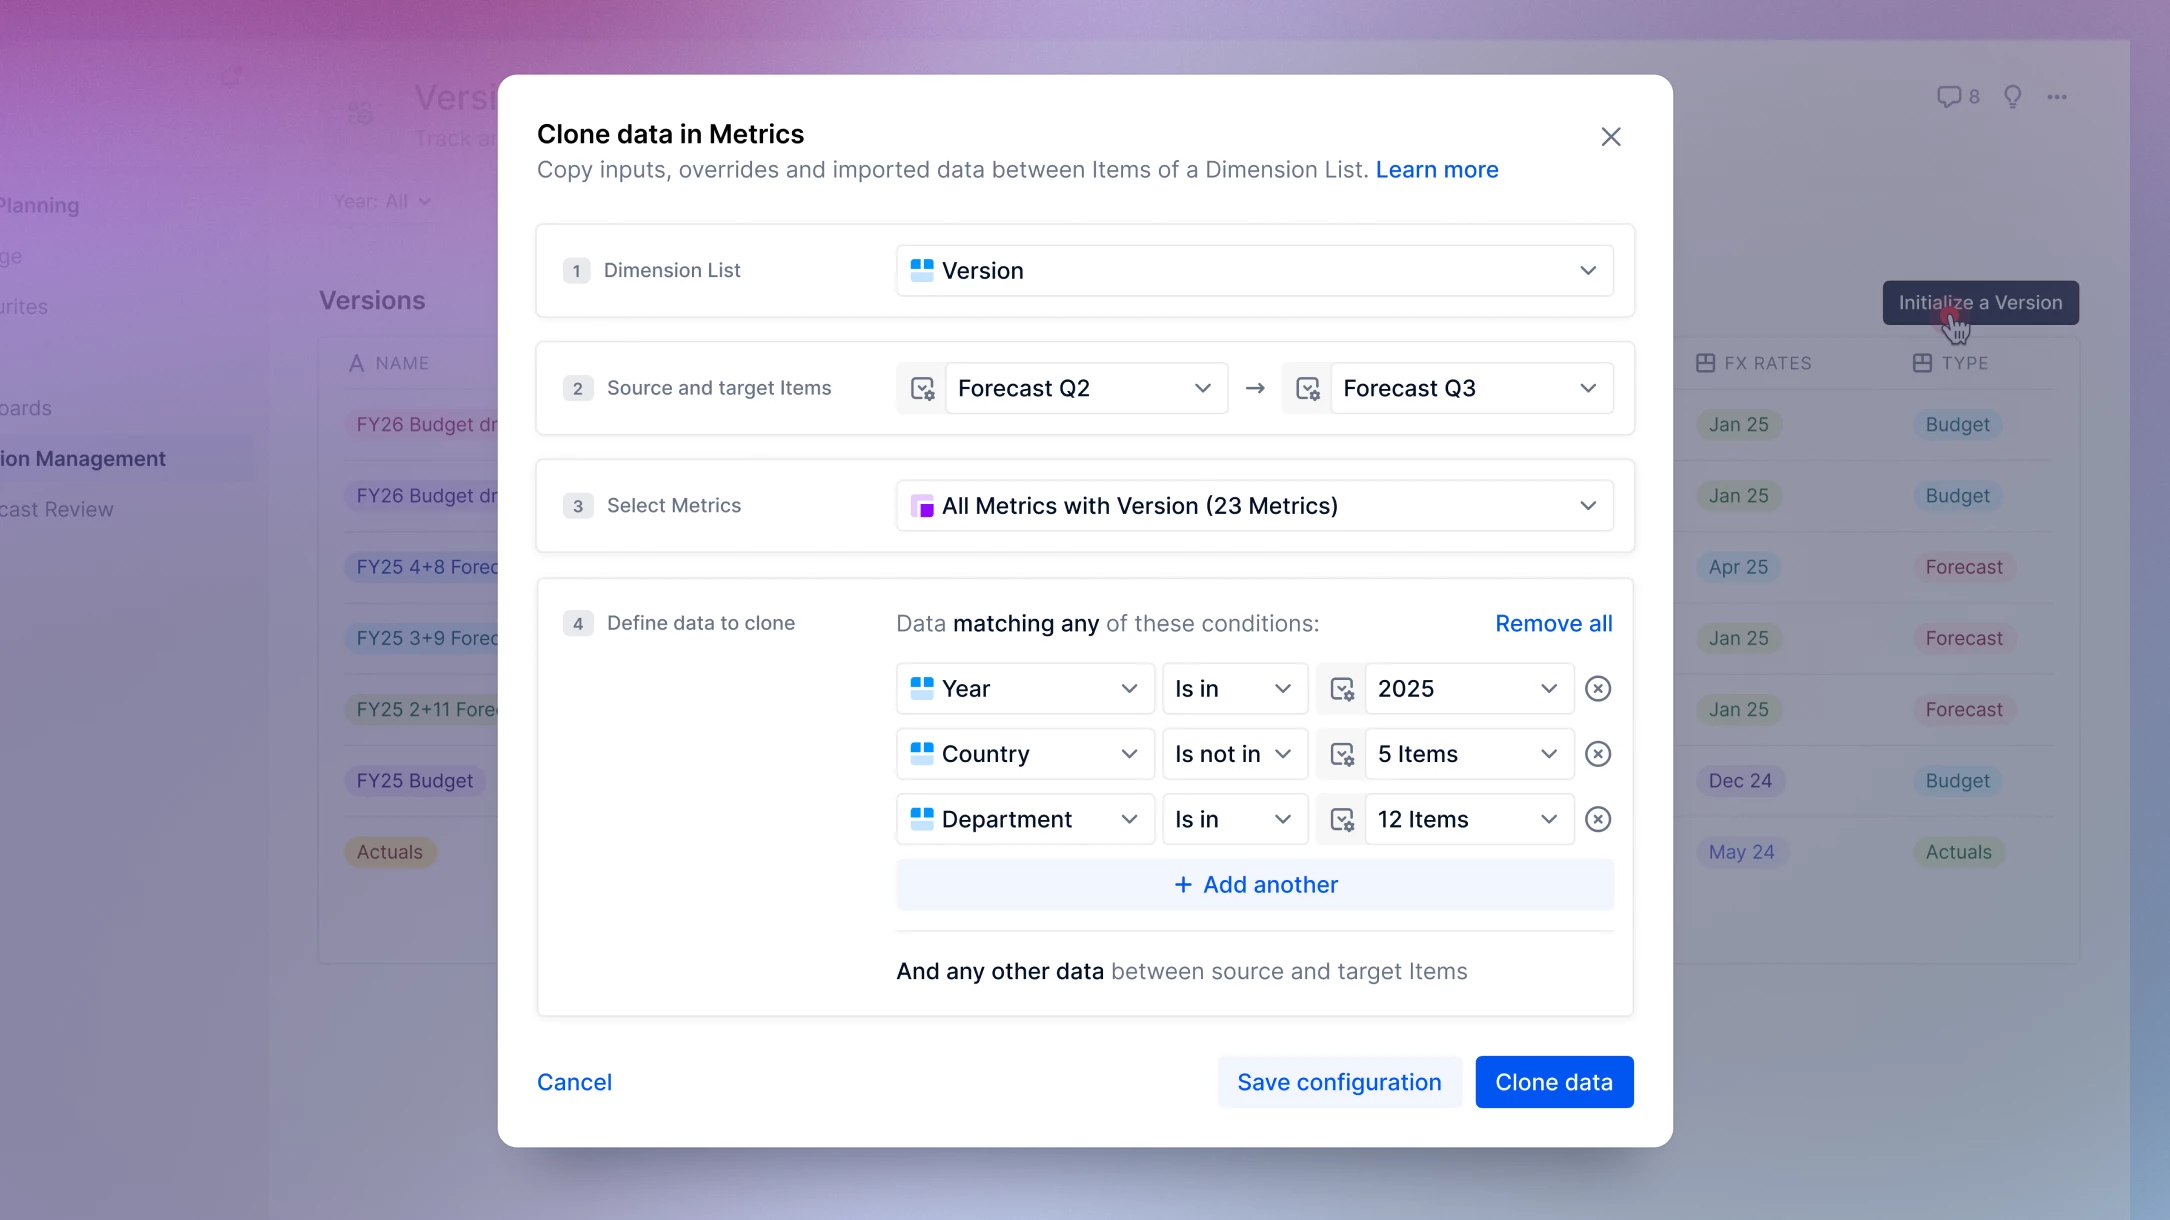
The ‘Dimension List’ field
-
This field provides a dropdown containing every Dimension in your Application.
-
Select the Dimension containing the Metric you wish to clone from.
The ‘Source and Target Items’ field
-
In this field, specify which of the Dimension Items from the Dimension selected above is to be the source, and which to be the target.
The ‘Select Metrics’ field
-
This field allows you to exclude certain Metrics from the clone.
-
If you leave all the checkboxes selected, data in all those Metrics is cloned.
The ‘Define data to clone’ field
-
In this field, add conditions to clone specific ranges of data.
-
Choose ‘Is in’ to only copy the specified range.
-
Choose ‘Is not in’ to copy everything but the specified range.
Important
As specified by the “And any other data between source and target Items” section, for Metrics that are not defined on a Dimension given in the conditions, the data is still cloned from the source to the target Item.
For example, if you have a Metric defined only on Version but not on Department, but you have Department in the conditions, the data is still copied over.
Turn source, target and conditions into parameters
Instead of specifying Dimension Items for source and target as above, you can choose to turn them into parameters. Parameters allow you to leave specification of your source and target Items for a later time, when cloning data from a Board (see below).
Here’s how to use them:
-
Select the parameter icons in the source and/or target fields:
-
The field changes to say From: Single Choice or To: Single Choice, reminding you that cloning is only possible from and to single List Items.
-
If desired, turn the conditions set out in Define data to clone into parameters in the same way. Choose between allowing Members to select just one or multiple options.
Save as new configuration
To reuse this configuration at a later time, select Save configuration.
To access, edit and trigger these saved configurations:
-
In your Application, select Settings.
-
Select Data Actions & Flows.
-
Select the Clone data in Metrics tab in the main pane. Your saved configurations appear listed.
-
Hover on items in the list. Options appear allowing you to:
-
Trigger configurations that do not use parameters.
-
Select the Edit icon to make changes.
-
Open an item’s three-dot menu and select Duplicate to create a copy of the configuration or rename.
-
Important
If the configuration you select is not triggerable, an Error message alerts you. Check whether the configuration was deleted or whether all the Metrics referenced are still present and valid.
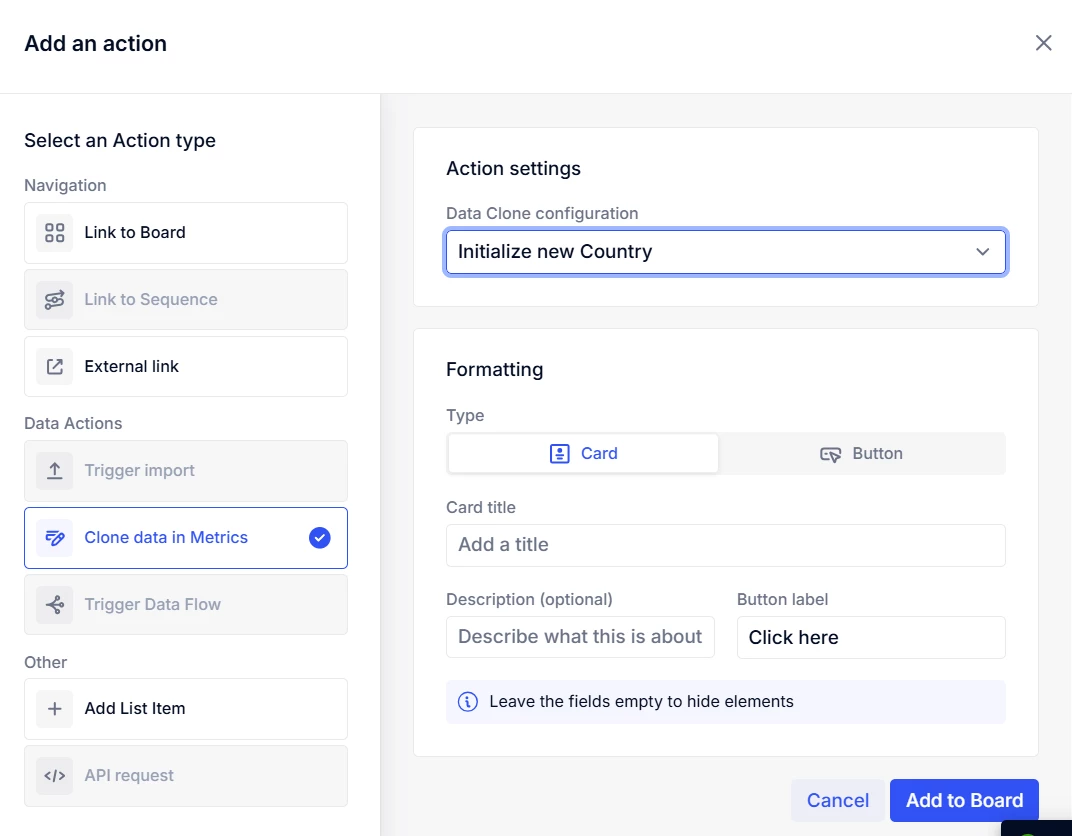
Clone Data in Metrics from a Board
You can set up your Boards to allow Members to trigger a clone through an Action Button:
-
Go to a Board.
-
Select Edit, then + Add a widget.
-
Choose Action.
-
Select Clone Data in Metrics. You must have a saved configuration (see above) for this selection to be available.
-
Select the configuration from the dropdown.
-
Choose Card or Button for the widget format and add a Title, optional Description, or Button label.
-
Select Add to board.
Once added, any Member with the required permissions can clone the data directly from the Board.
.png)
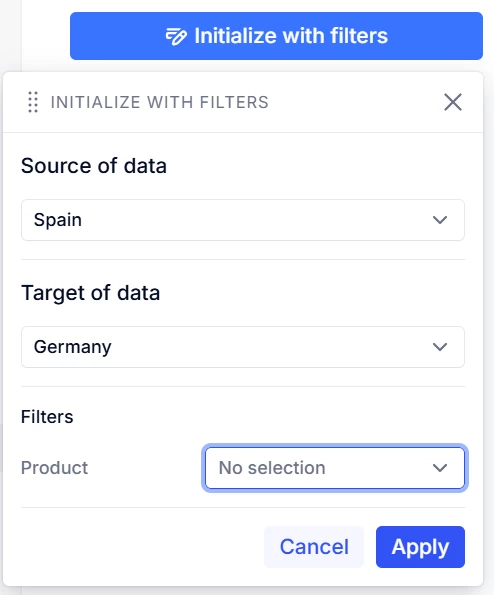
How to clone from a Board action widget as a Member
-
Ensure you have the right permissions (see above) to clone this data.
-
Beneath is an example of a Clone data in Metrics Board action widget. Select the action button (here labelled Initialize with filters), opening a dialog.
-
The dialog allows you to specify Source of data, Target of data and/or Filters, if set as parameters during configuration (see previous section). Choose from the dropdowns and select Apply.
View Clone data in Metrics History
To view a history of executed clone operations:
-
Go to an Application.
-
Select History from the sidebar.
-
Under All Actions, select Clone data from the dropdown to view execution history.