Standard OPEX Planning Article
The purpose of this article is to provide guidance on how you can create a standard OPEX Planning application. Please note, this article is made for advanced modelers. If you need further information on the formulas or concepts mentioned here, please do not hesitate to access our help center. And of course, feel free to adapt your own application to your needs and business processes.
Throughout this article, you will see blue text within brackets. This highlights the Dimensions that should be used in the Metric that is being discussed.
Here you can find some examples of Board restitutions for this typical use case.
OPEX Input Board -
OPEX Restitution Board
Main Dimensions used
- Cost Center
- Account
- Entity
- Versions (by Year)
- Year
- Month
Note
Versions (by Year) will include the version and the year, for example, Budget 2021, Forecast Q1 2022, Budget 2022, etc.
You can create a Year Property in the Versions (by Year) Dimension.
Overview of the Block architecture

Step 1: Build the input Table

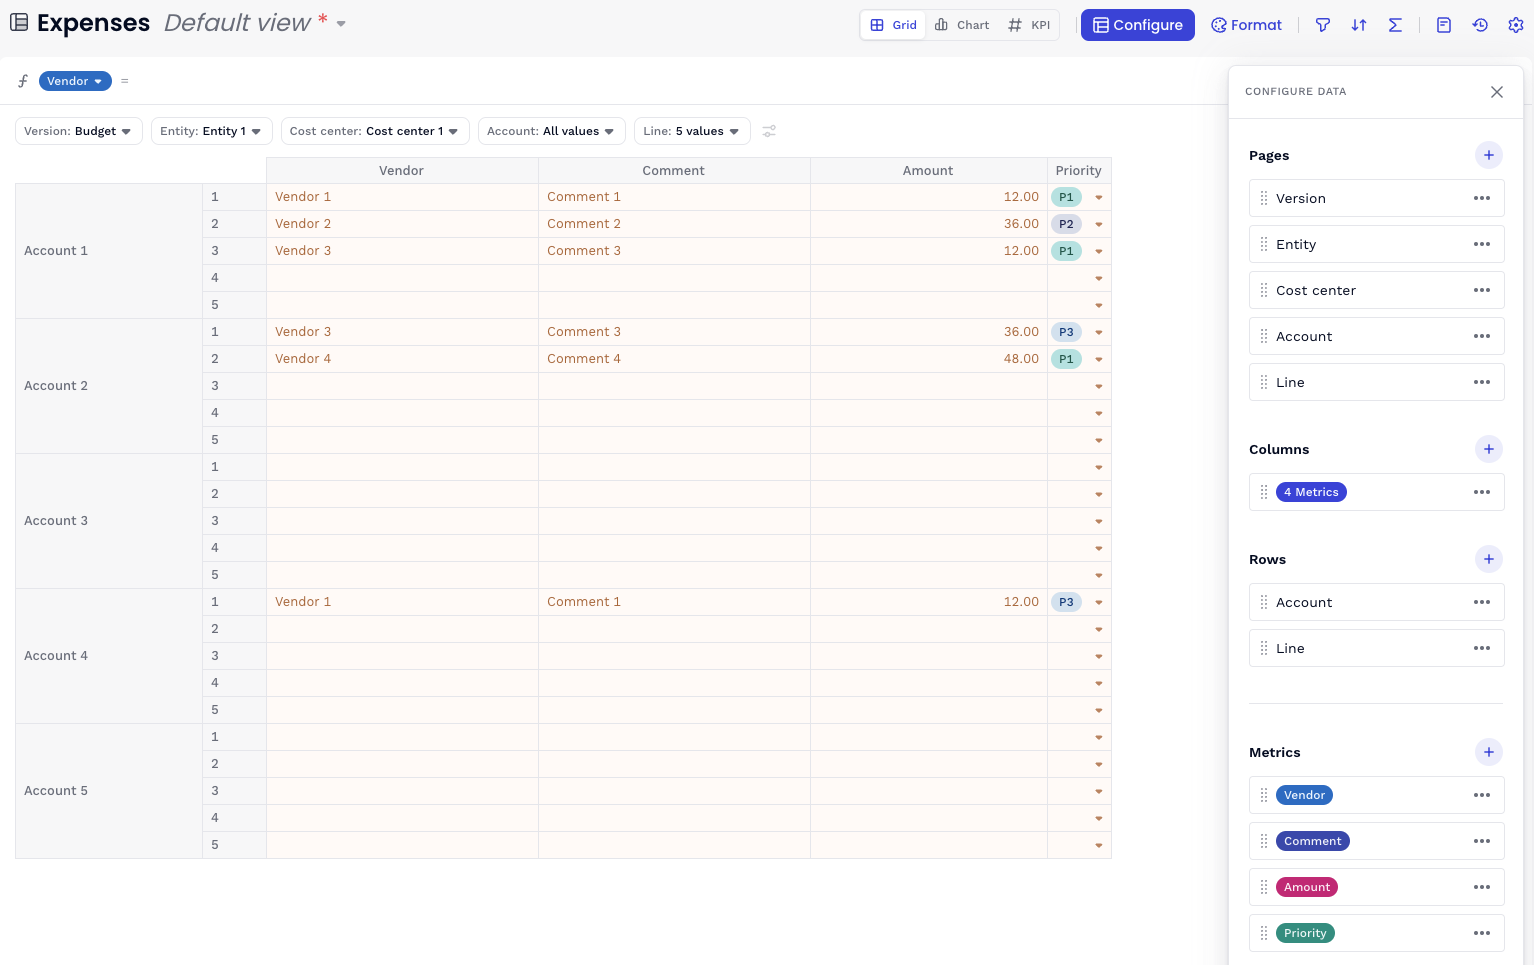
Cost Center, Account, Entity, Versions (by Year), Line
Line is a technical Dimension to input data. We will create 5 items in our example (shown in the screenshots).
Build 4 Metrics without formulas in your ‘Input’ Table:
- ‘Vendor’: Text format
- ‘Comment’: Text format
- ‘Amount’: Numbers
- ‘Priority’: Dimension (P1, P2, P3)

Note
This Table can be secured with AR (Access Rights) on Dimensions Cost Center, Account, Entity, Versions (by Year).
Step 2: Define your seasonality

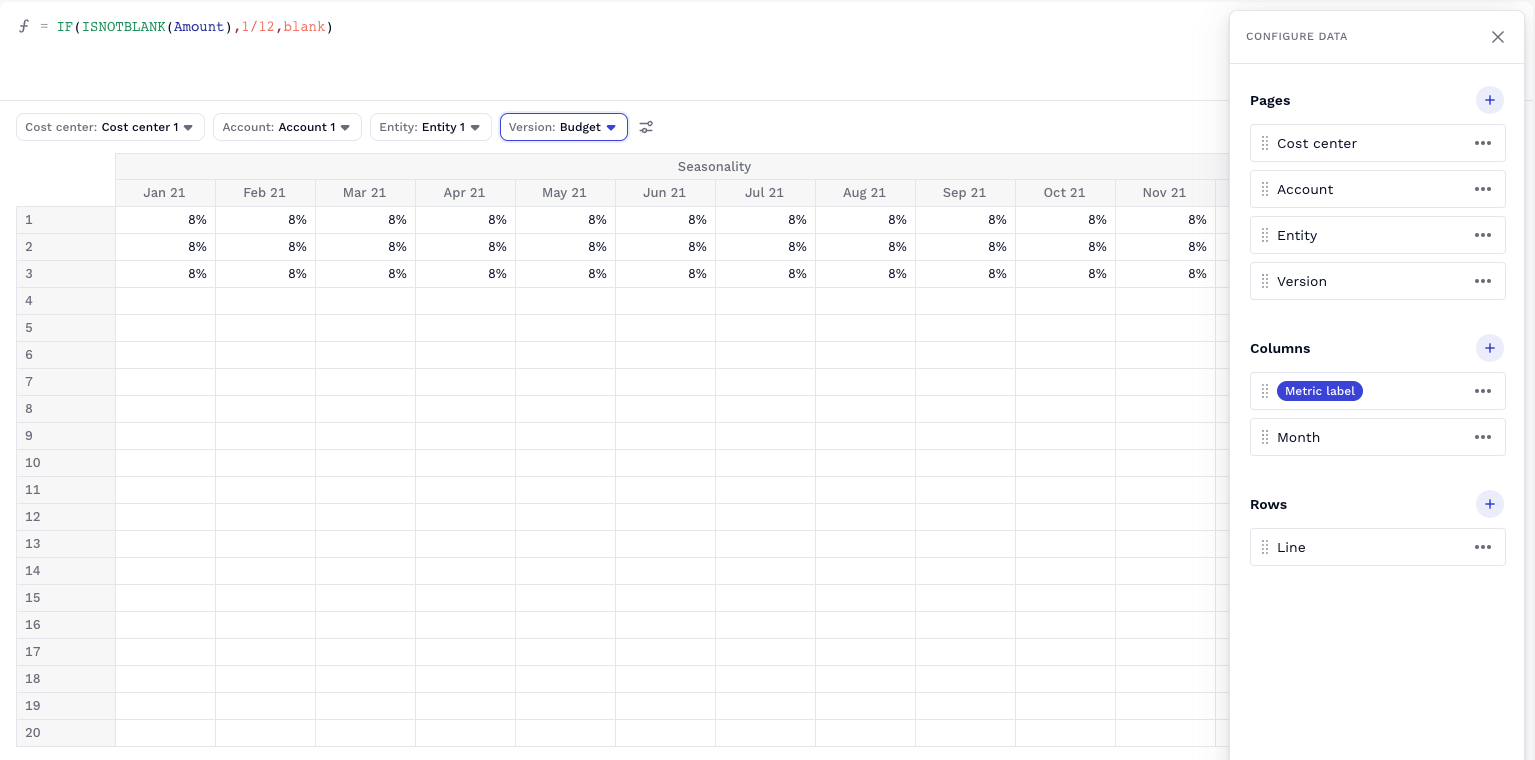
Cost Center, Account, Entity, Versions (by Year), Line, and Month
This Block is the allocation key to split the annual amount input across the months. In our example, we will have a simple allocation ( /12 ), but you can create something more complex, accurate and specific if needed.
Build one Metric and add your allocation formula. If you would like to use a simple allocation you can use the formula below:
IF(ISNOTBLANK(Amount),1/12,blank)
Learn more about IF and ISNOTBLANK functions.

Step 3: Monthly OPEX calculation

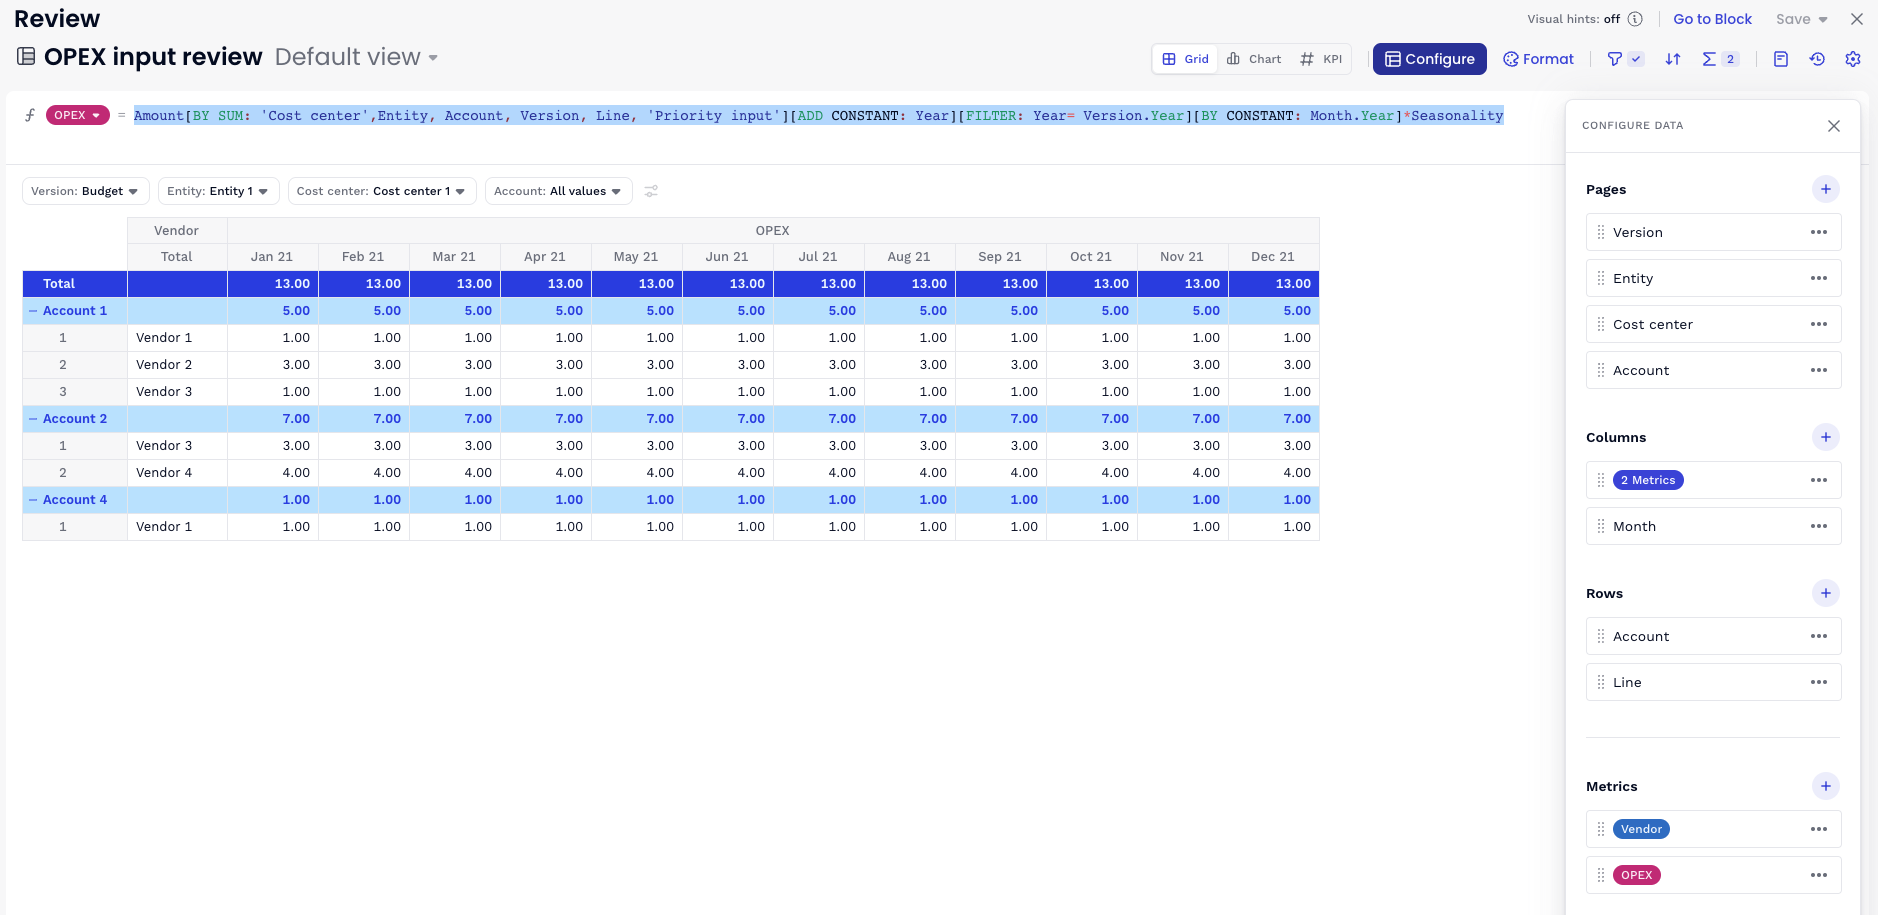
Cost Center, Priority, Account, Entity, Versions (by Year), Line, and Month
This Block is the restitution of the OPEX input based on the seasonality defined.
Build a new Metric called ‘OPEX’ and use the formula below :
Amount9BY SUM: 'Cost center',Entity, Account, Version, Line, 'Priority input']nADD CONSTANT: Year]tFILTER: Year= Version.Year]nBY CONSTANT: Month.Year]*SeasonalityLearn more about BY, FILTER and ADD functions.

Note
In our example, the time is automatically defined by the the Version Dimension (by using a dedicated Property). If you prefer, you can use the time Dimension in your input Metric and delete this part of the formula ADD CONSTANT: Year]iFILTER: Year= Version.Year]
Note
We create a Table to add the Vendor (defined in our Step 1) and the OPEX amount in one single view.
Step 4: Build your boards
Your Blocks are now ready to be published on Boards! You can find examples of OPEX Boards at the beginning of this article, do not hesitate to use them for inspiration.
Of course, you can add some Blocks to handle a validation workflow and/or AR on the main dimensions. This will be explained in their own dedicated articles.
See also
Board Inspiration (including top tips for Board design)
