
Hi Everyone,
I would like to merge two Dimensions into a new Text Dimension in order to get a Unique ID, using a Formula
But the trick is that one of the two Dimension is a Date Data Type :
Dim1 : Item.Code (Text Type)
Dim2 : StartDate (Date Type)
Formula result : Item.code &”_”& StartDate
How to make this formula ?
Thanks in advance
Matthieu

Solved
Merging Text & Date Dimensions
- Apprentice Author
Best answer by Laszlo
Hi
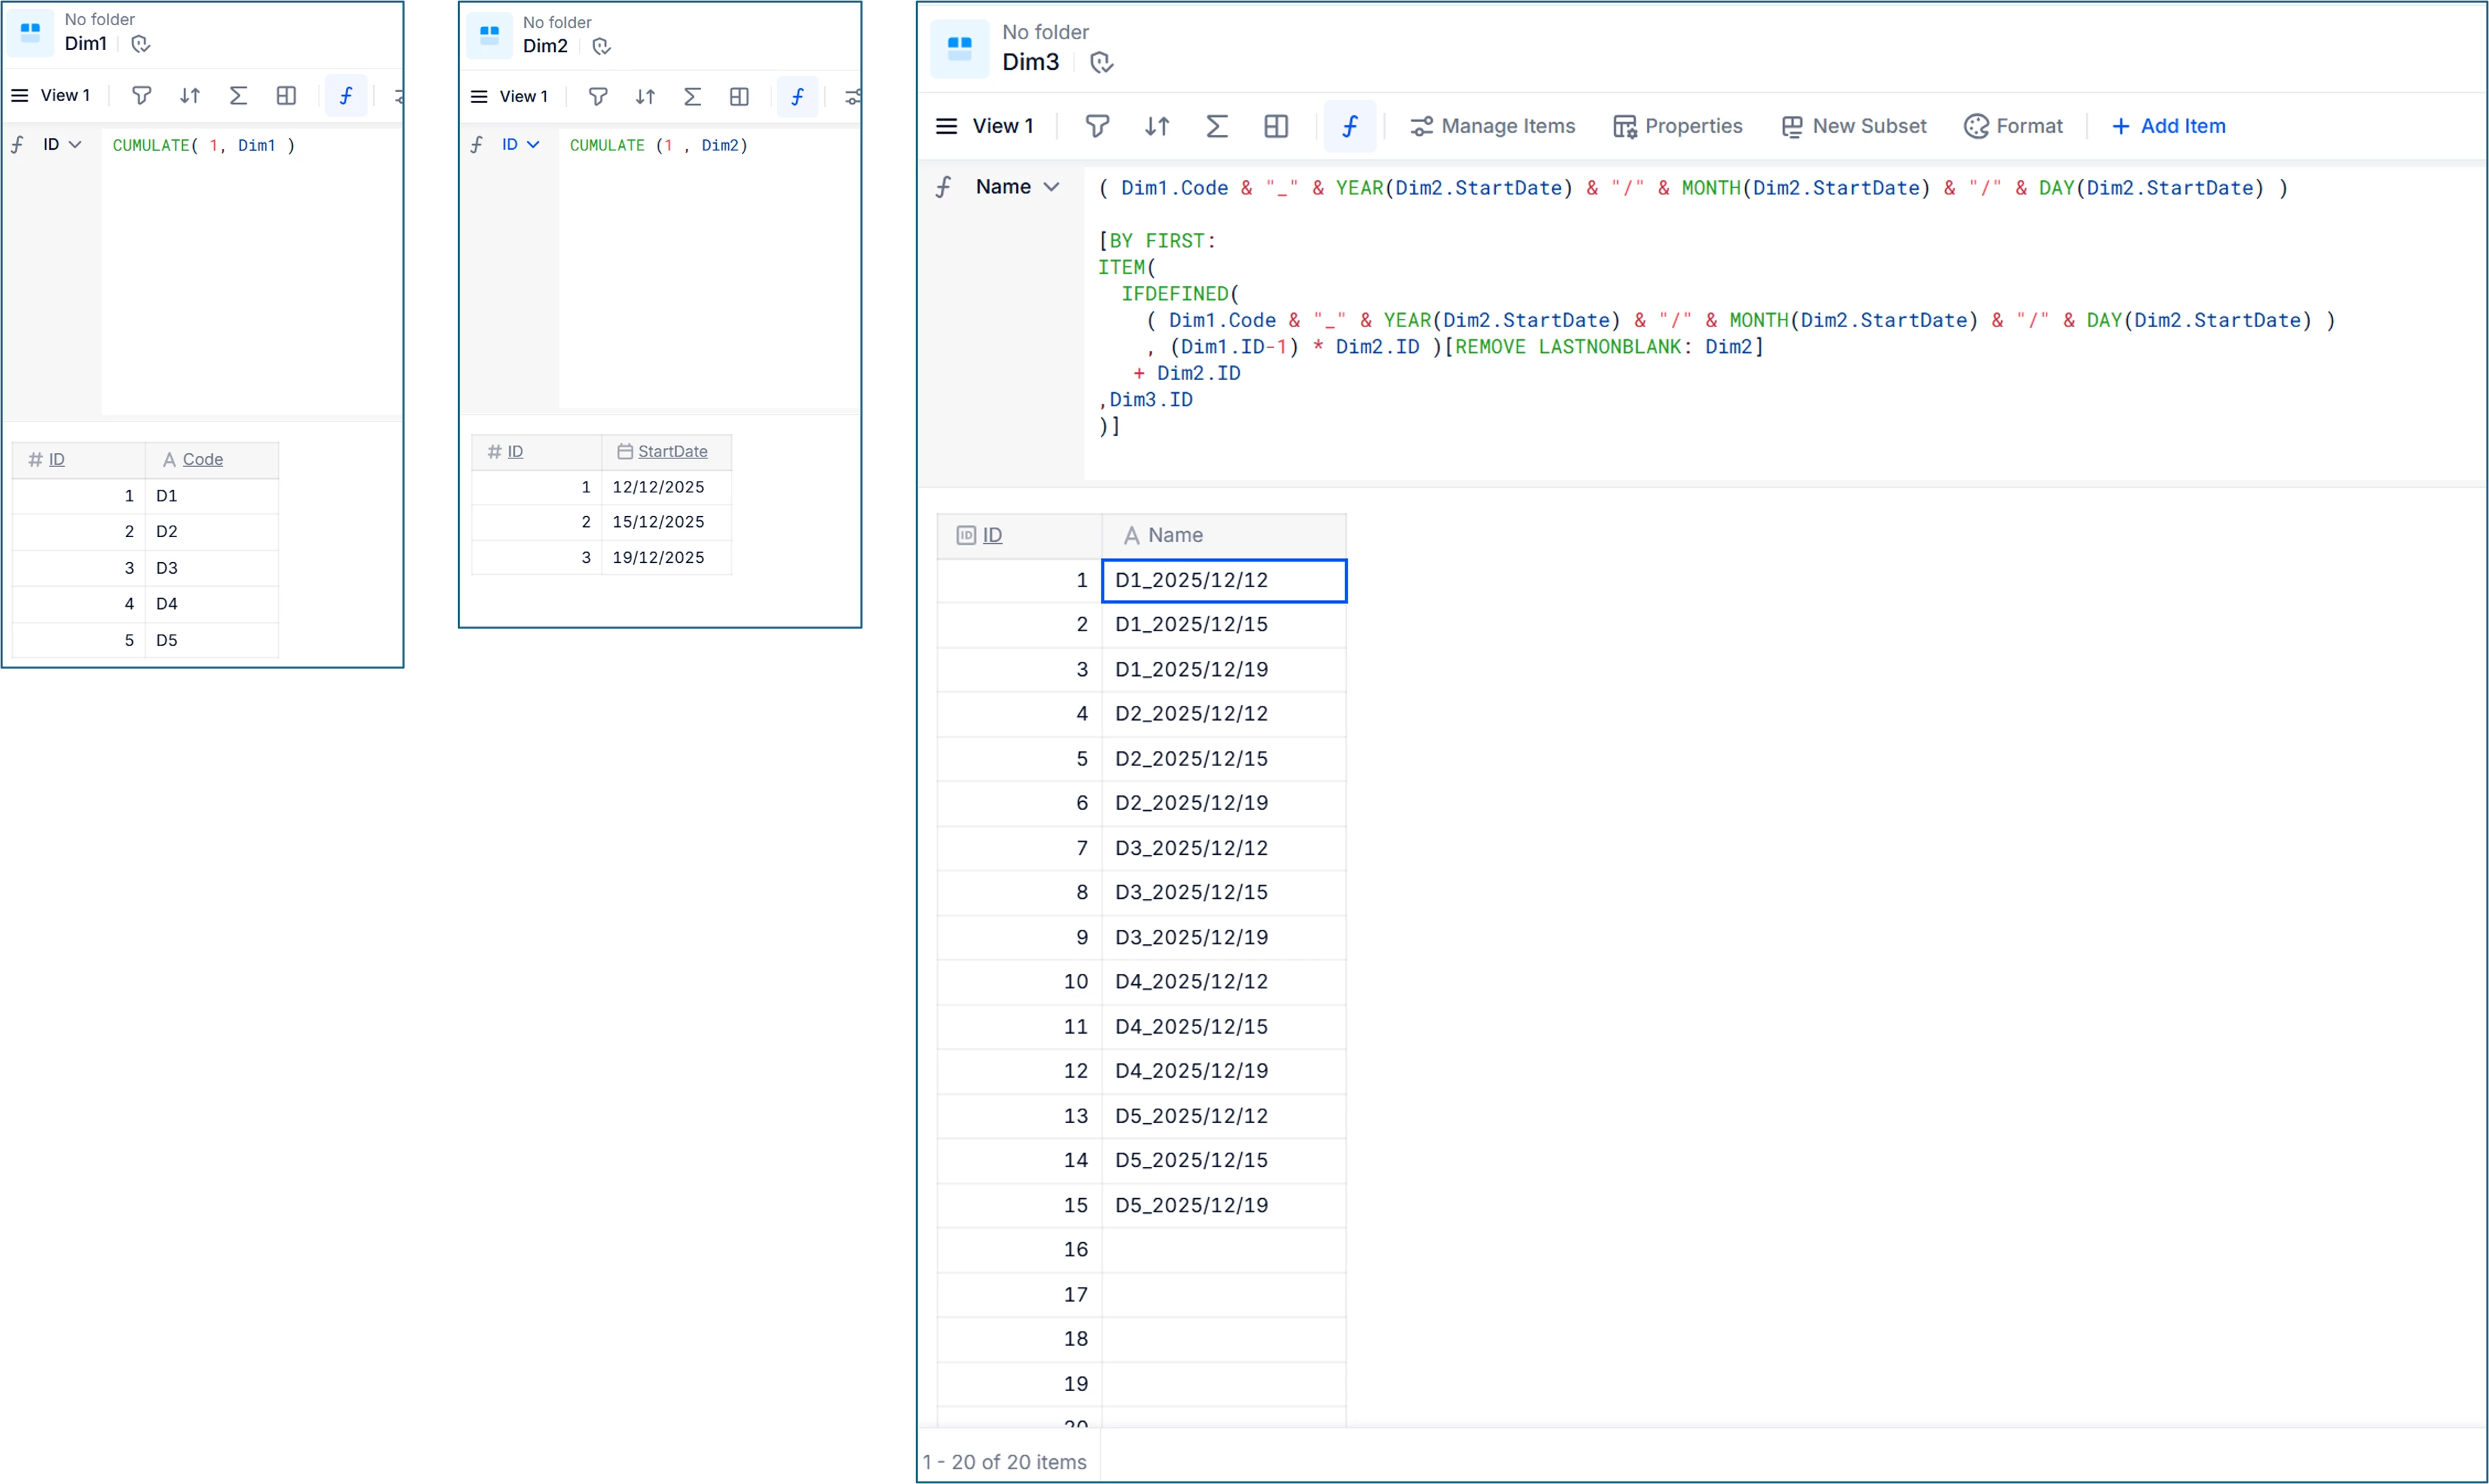
You can accomplish this by adding ID properties into your Dim1, Dim2 and Dim3 lists (Dim3 being the resulting dimension list), and then using those IDs to to map the generated combinations into the Dim3 list.
- First, generate the ID numbers by using these formulas:
-
CUMULATE(1 , Dim1)
CUMULATE(1 , Dim2)
CUMULATE(1 , Dim3)
- Then, prepare the Dim3 placeholder items. You’ll need add at least as many items in Dim3 as the total of the generated combination of Dim1 and Dim2, which is Dim1 items * Dim2 items. These will serve as the placeholders for the generated values.
- Then in the relevant property of Dim3 (in my example it’s the Name), add a formula to generate the Dim1 and Dim2 combinations in the required format.
The Dim1.ID and Dim2.ID are used to calculate the corresponding Dim3.ID and assign the results onto those IDs in the Dim3 list. The final formula looks like this:
( Dim1.Code & "_" & YEAR(Dim2.StartDate) & "/" & MONTH(Dim2.StartDate) & "/" & DAY(Dim2.StartDate) )

[BY FIRST:
ITEM(
  IFDEFINED(
    ( Dim1.Code & "_" & YEAR(Dim2.StartDate) & "/" & MONTH(Dim2.StartDate) & "/" & DAY(Dim2.StartDate) )
    , (Dim1.ID-1) * Dim2.ID )[REMOVE LASTNONBLANK: Dim2]
   + Dim2.ID
,Dim3.ID
)]
-
Dim1.Code & "_" & YEAR(Dim2.StartDate) & "/" & MONTH(Dim2.StartDate) & "/" & DAY(Dim2.StartDate)This part of the formula generates the Dim3 values in the format of D1_2025/12/12 . You can adjust this part as needed to match your formatting requirements.
- The [BY FIRST ...] part calculates the Dim3 IDs of the generated combinations, and assigns the results to the Dim3 list.
This image visualises the dimension lists.
Cheers,
Laszlo


Enter your E-mail address. We'll send you an e-mail with instructions to reset your password.