

Data Flows provide a streamlined way to group Data Actions and trigger them using an Action button on a Board. This article explains how to create and configure Data Flows effectively.
 Important
You must have saved Metric-to-Metric or List-to-List import configurations in an Application before configuring a Data Flow.
Before you begin
Data Flows are sets of Data Actions grouped into a single configuration. Once created, they can be triggered from a Board using an Action button. This allows users to run multiple Data Actions with a single click.
Important
You need the Configure Blocks permission to set up Data Flows.
To run a Data Flow from a Board, you must have permission to perform each individual Data Action in the flow.
Supported Data Actions
At this time, Data Flows supports only Metric to Metric import and List-to-List import from Pigment.
 Note
Note
More Data Action types are in development.
Data Flow execution order
Data Flows supports two types of Execution Mode:
- Parallel: runs all Data Actions at the same time, independently of each other.
- Sequential: runs Data Actions one after another, in a predefined order. If a previous step of the Data Flow impacts the source of a Data Action (for instance through a formula), the Data Action waits for the Data source to be updated before starting.
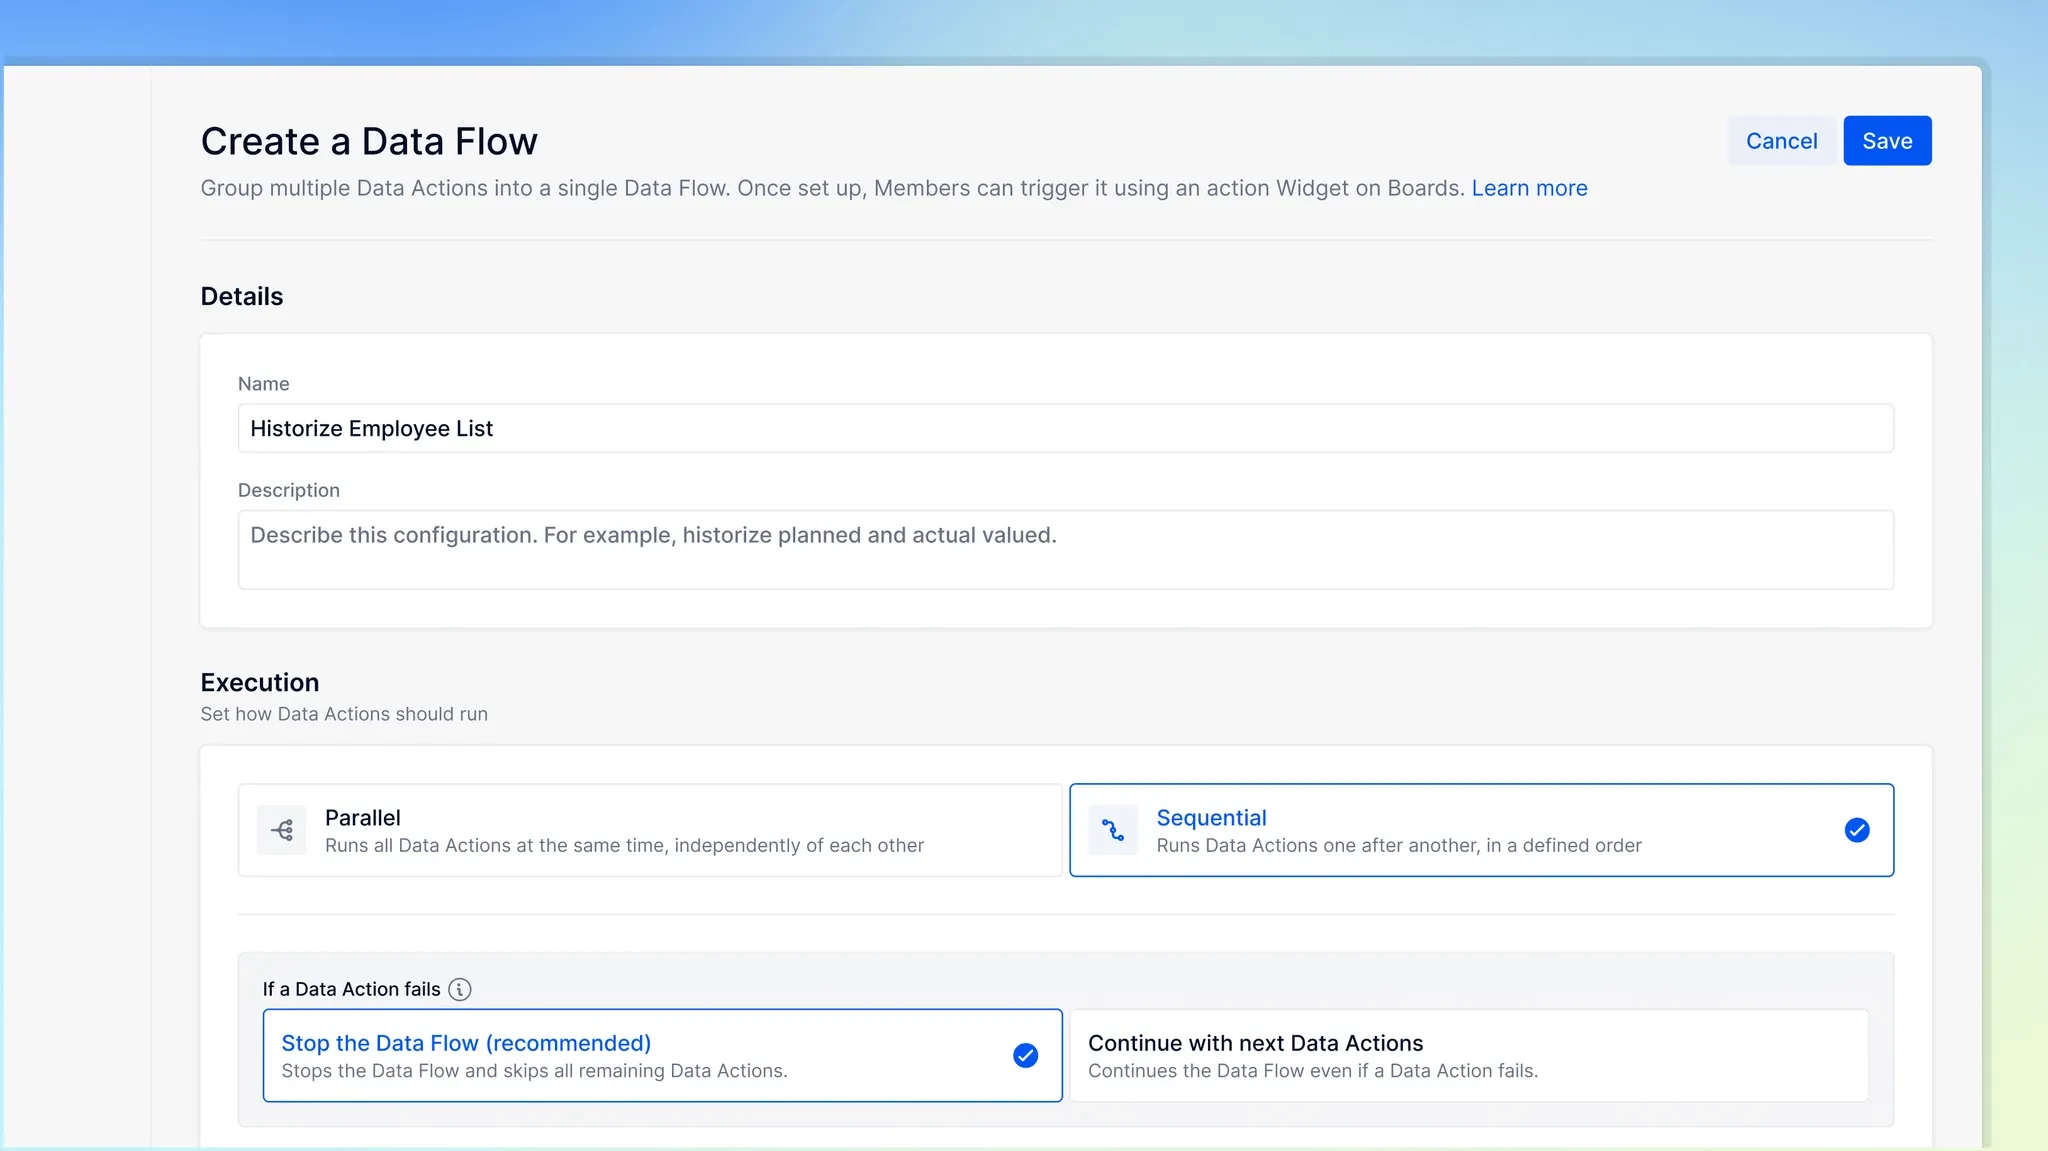
Create a Data Flow
To create a Data Flow:
- Select the three-dot menu and choose Data Flows, or go to All Settings then Data Flows.
- Select Create a Data Flow.
- In the Details section, add a name and description:
- Use the Name field to identify the Data Flow in the list.
- Use the Description field to explain what the Data Flow does and the business logic it follows.
- In the Execution section, select between Parallel and Sequential. If you select Sequential, you can specify the behavior in case of failure:
- Stop the Data Flow: if a Data Action fails, the remaining Actions are not executed. They are marked as Skipped in the Data Flow report.
- Continue with next Data Actions: if a Data Action fails, the remaining Data Actions are still executed.
- In the Data Actions section, define the actions the Data Flow should run:
- Select Add action to add one or more Data Actions.
- Choose the Target Block and Configuration from the dropdown menus.
- Select Save.
Note
If you are using Sequential Execution, you can reorder the steps of the Data Flow using drag and drop.
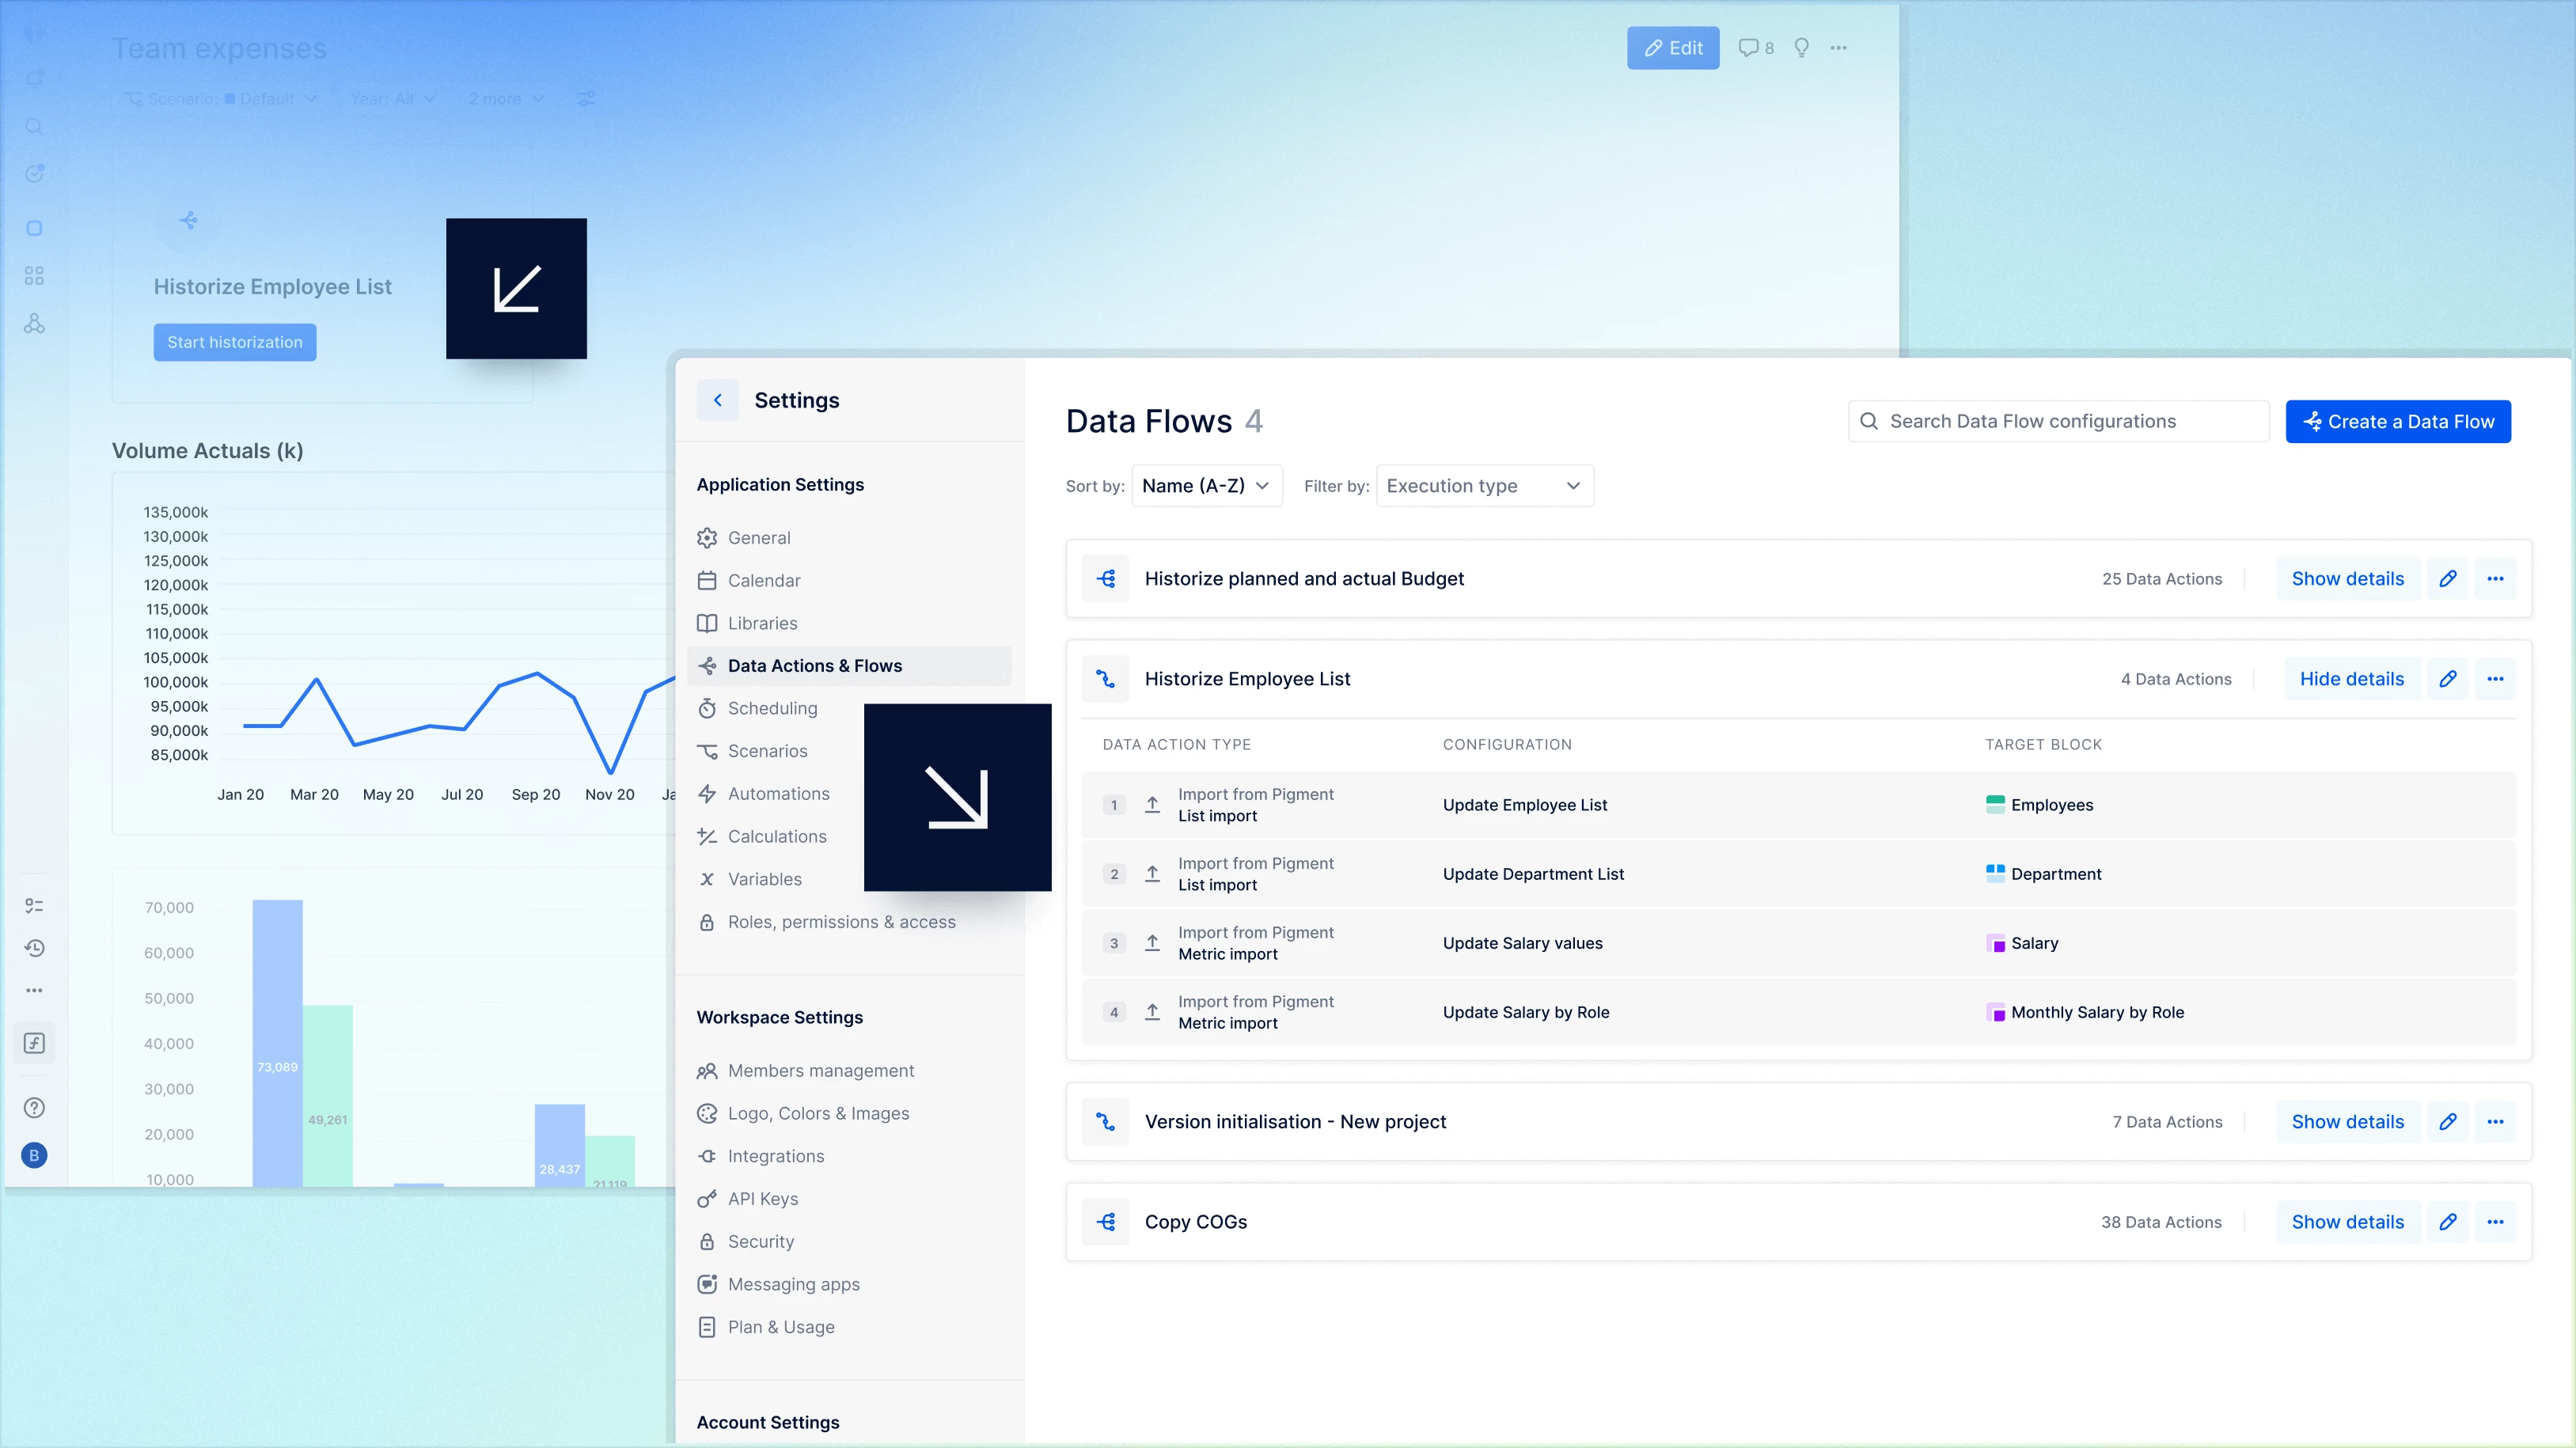
View or edit a Data Flow
All configurations are stored in the Data Flows overview, and each one is specific to an Application.
To view or edit a Data Flow:
- In your Application, open the three-dot menu and select Data Flows & Actions, or go to All Settings then Data Flows.
- From the list, you can:
- Select Show details to review a configuration.
- Select the Edit icon to make changes.
- Use the list item’s three-dot menu, then select Duplicate to create a copy of the configuration.

Note
Sequential and Parallel Data Flows are represented with a different icon.
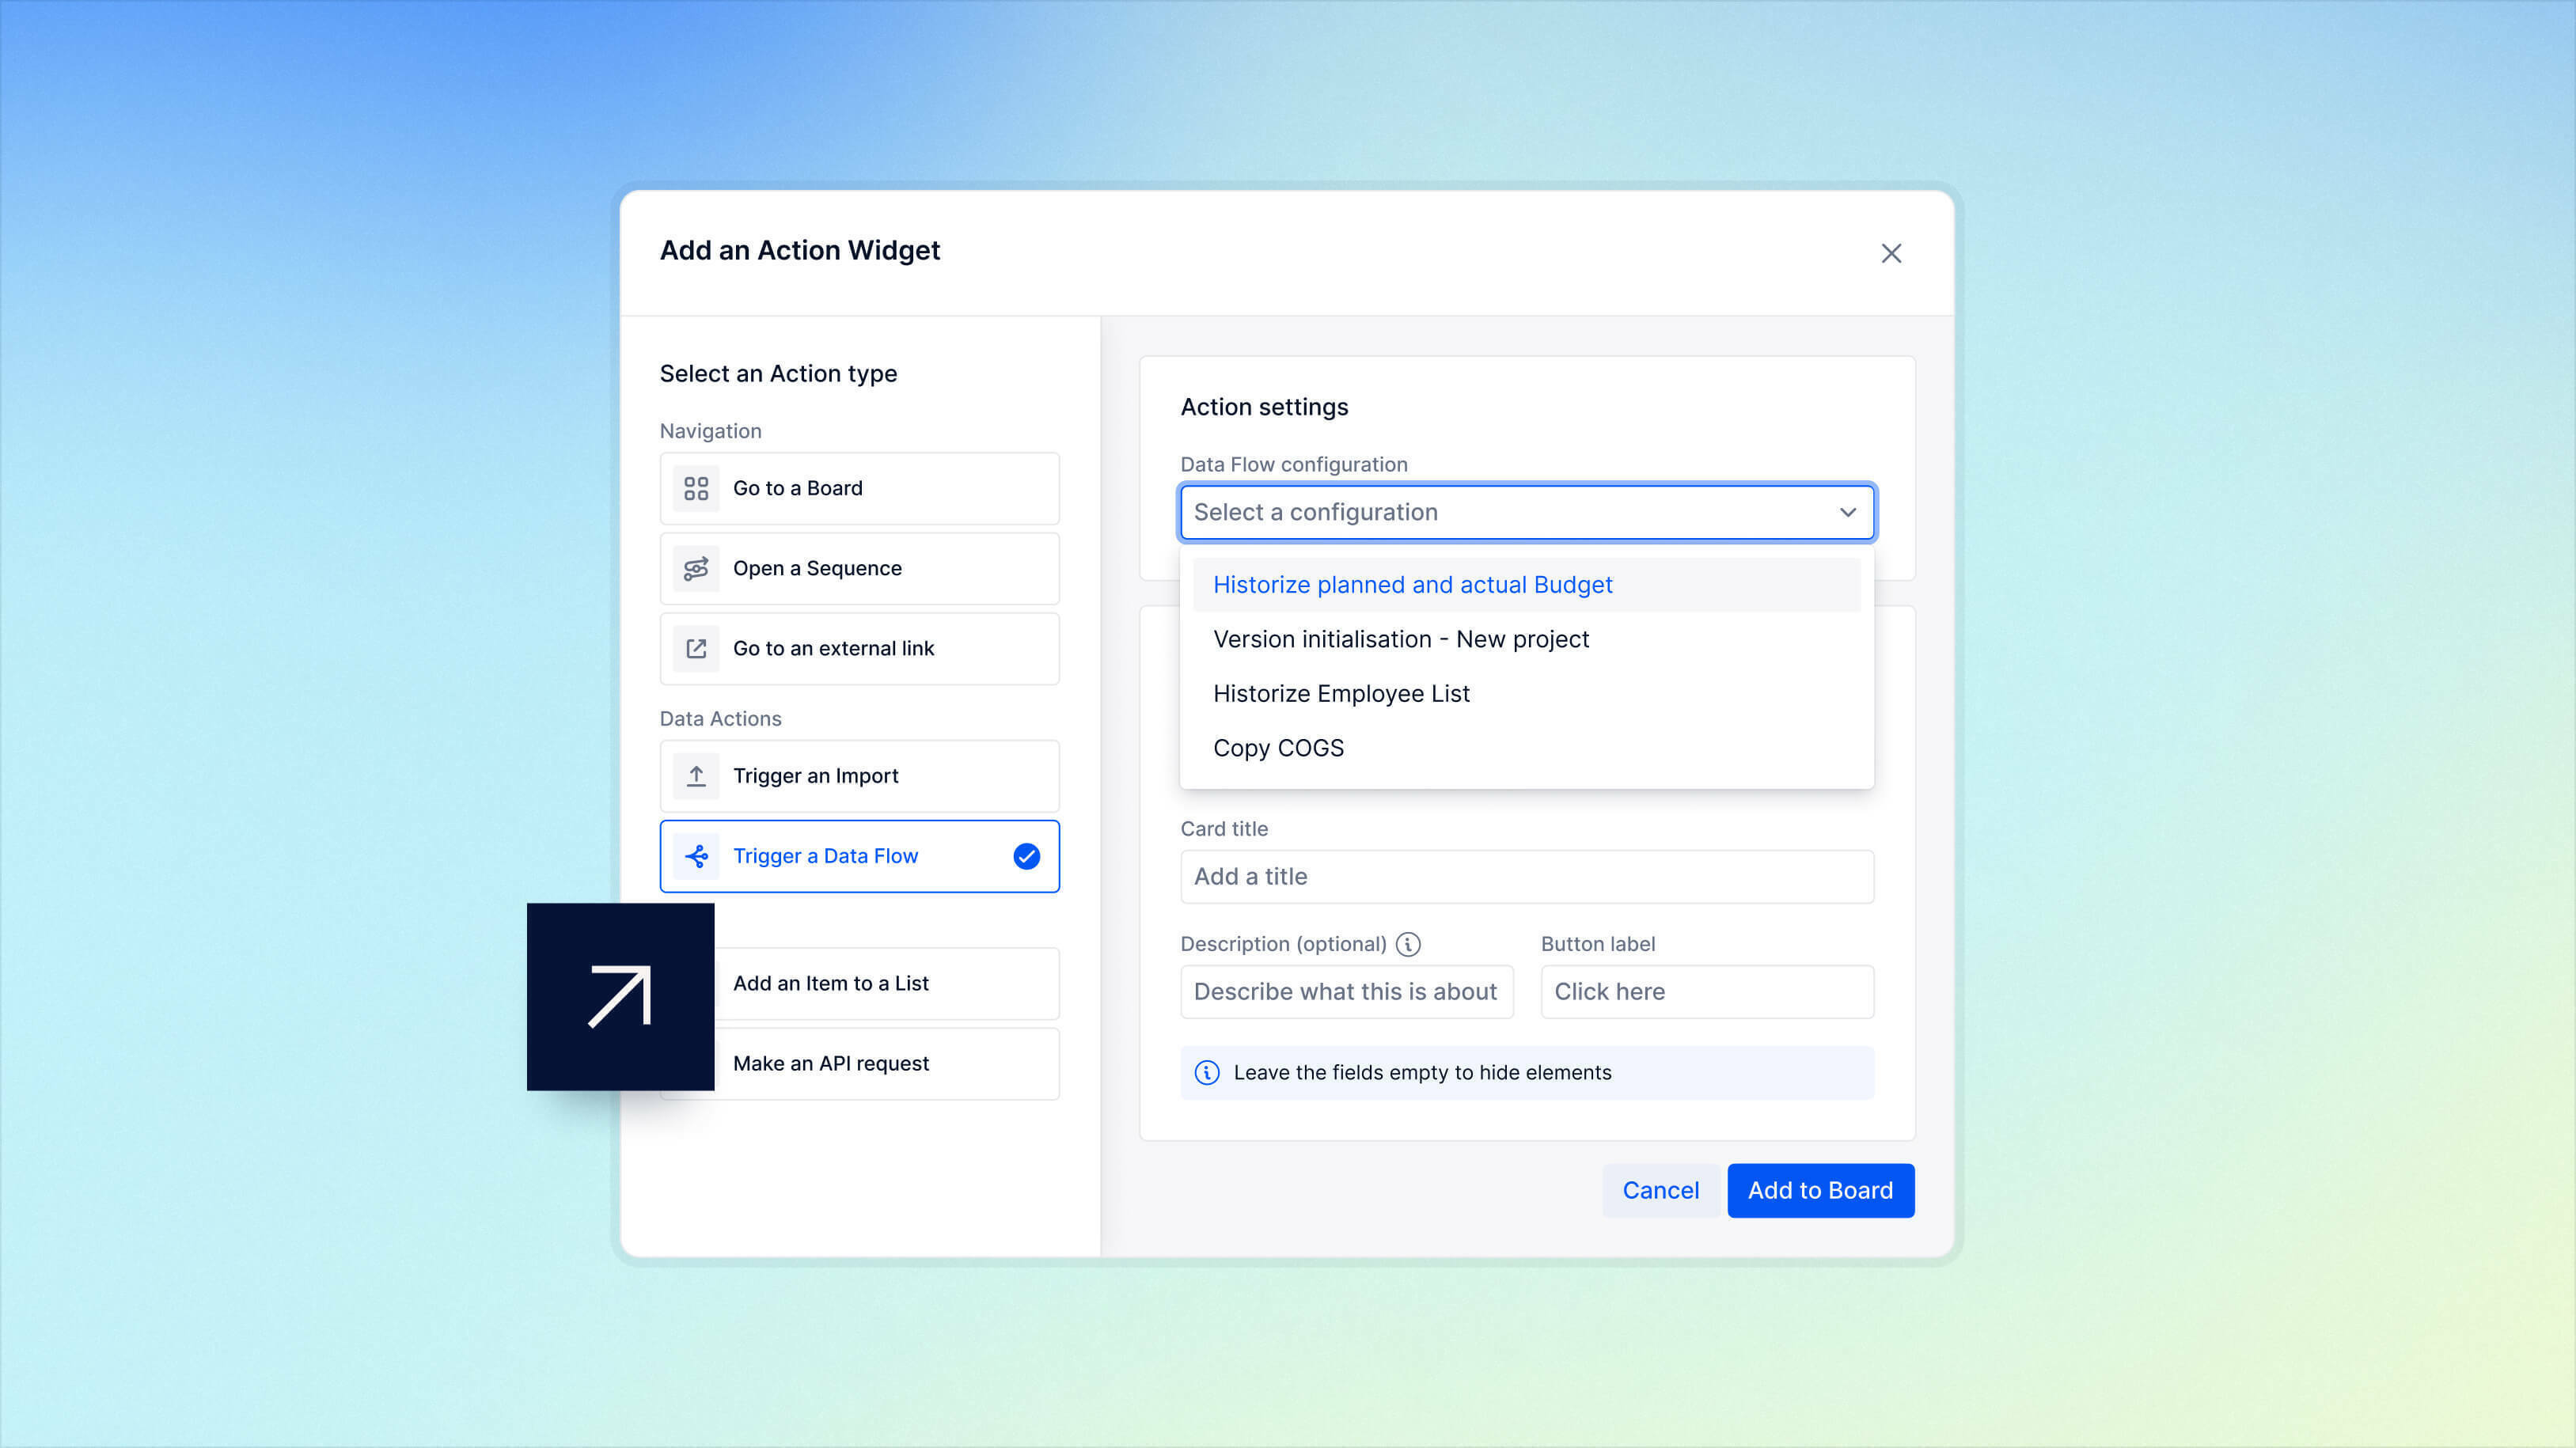
Trigger a Data Flow from a Board
You can run a Data Flow from a Board using an Action button:
- Go to a Board.
- Select Edit, then + Add a widget.
- Choose Action.
- Select Trigger Data Flow, then select the configuration from the dropdown.
- Choose Card or Button for the widget format and add a Title, optional Description, or Button label.
- Select Add to board.
Once added, any Member with the required permissions can trigger the Data Flow directly from the Board.
Schedule a Data Flow
You can create and edit all scheduled Data Flows from the Scheduling page. For more information on how to create and manage a scheduled Data Flow, see Schedule imports in Pigment.
View Data Flow History
To view a history of executed Data Flows:
- Go to an Application.
- Select History from the sidebar.
- Under All Actions, select Data Flows from the dropdown to view execution history.