
Mapping Metrics are used when two or more Dimensions in your model have a relationship but the relationship is liable to change. For example, a use case might be employees working in teams, but as months go by, they are reassigned to new teams.
Before you begin
What is a mapping Metric?
While a mapping Property defines a static relationship between a Dimension List Item and a second Dimension, mapping Metrics define a dynamic relationship, involving multiple Dimensions. One of them is often time.
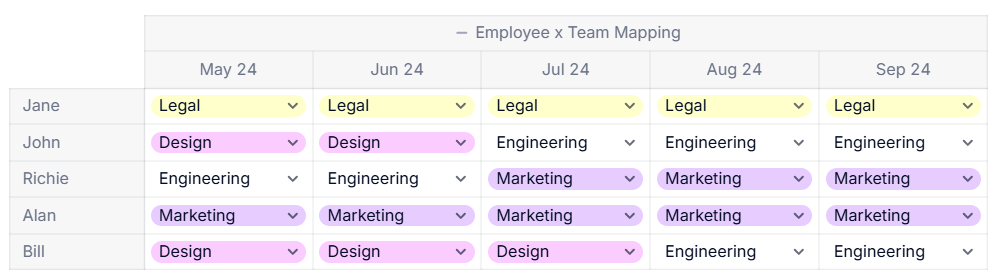
A mapping Metric tracking employees in teams over time might look like this:
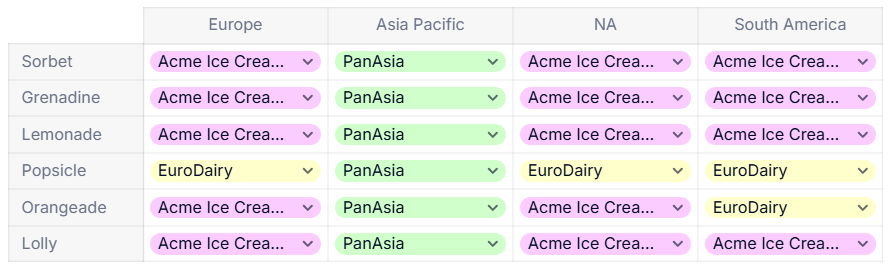
.png) Mapping Metrics are not limited to time-based relationships. Below is an example of key ingredients for your product lines that come from different suppliers by region. A mapping Metric tracks suppliers by Product by Region:
Mapping Metrics are not limited to time-based relationships. Below is an example of key ingredients for your product lines that come from different suppliers by region. A mapping Metric tracks suppliers by Product by Region:
 Important
To set up a mapping Metric, you need the Configure Blocks permission.
.png)
Set up a mapping Metric
-
In your Application’s sidebar, hover over Blocks and select the + symbol.
-
Select New Metric.
-
Select Dimension data type.
-
In the Pick a Dimension field, select the Dimension you want to aggregate or allocate data across. As an example, for data at Employee level that you want to aggregate to Team level, the Dimension would be Team. In the example above of Suppliers by Product, the Dimension would be Supplier.
-
For the field labelled Dimensions within this Metric, select the Dimensions that break out your granular data. In the examples above, these would be:
-
Employee and Month
-
Product and Region
-
Contexts for using mapping Metrics
Mapping Metrics are often used with tools that group or aggregate data, such as: